Page | 8
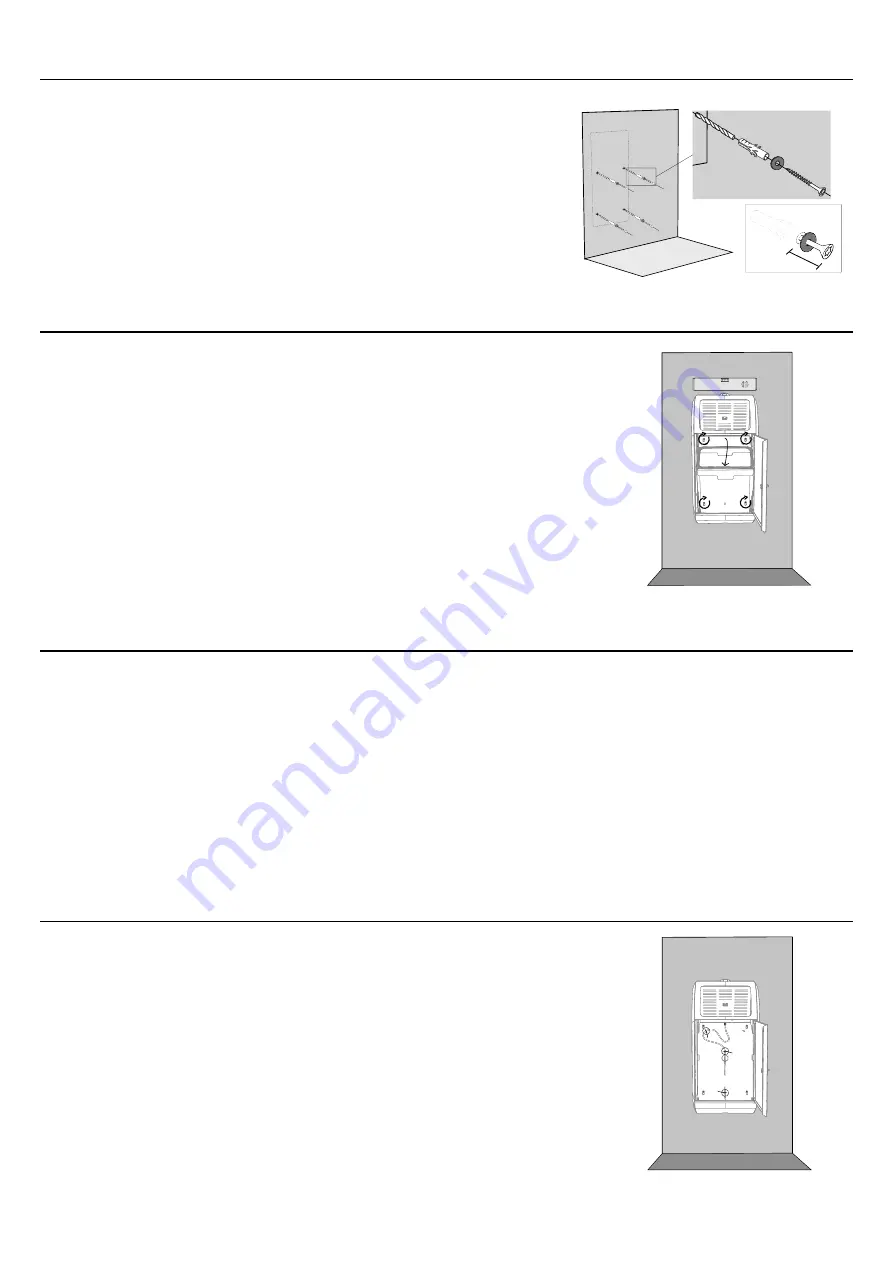
INSERTING PLUGS AND SCREWS
When the four holes are fully drilled, the corresponding plastic plugs can be gently
punched into the holes using a hammer or mallet.
Ensure that the plastic plugs are flush with the wall before screwing the screws into
their respective plastic plug.
REMEMBER:
Place a rubber washer onto each screw before screwing it in.
Do not screw the screws all the way in, as they are supposed to go through the key
holes in the back wall of the Compax One
™
, and properly suspend it. Leave
approximately 10 mm of the screw to be tightened after the Compax One
™
is in
place.
SUSPENDING AND SECURING THE COMPAX ONE
™
Rotate open the Compax One
™
door and pull out the bag holder device in order to see all four
key holes on the back wall of the appliance frame.
Lift the Compax One
™
up against the wall at the installation location. Ensure that the screws
enter each of the four keyholes, and carefully let the appliance frame rest on the screws by
gradually letting go of it.
Ensure that the rubber strip at the back wall of the Compax One
™
is correctly arranged against
the washroom wall, i.e., straight and without wrinkles or folds.
Once suspended onto the four screws, the screws should be tightened sufficiently, securing
the Compax One
™
to the wall. Use a level while tightening the screws to keep the Compax
One
™
levelled.
Verify that the clearance between the floor and the lowermost part of the Compax One
™ is
approximately 20 cm.
ELECTRICAL CONNECTION OF THE COMPAX ONE
™
As soon as the Compax One
™
is securely installed to the wall, the power supply cable can be inserted through the hole in the
bottom of the appliance frame and connected to the corresponding socket on the appliance end. Depending on the room for
which the Compax One
™
is to be installed, the power supply cable may be connected to the mains power network through plug
and socket, or directly onto a grounded branch circuit.
In the former case, the plug should be pulled out of the socket in advance to prevent possible live current at the connector end,
which ultimately may cause electrical shock. In the latter case, a local fuse or a circuit breaker should remove the live current
from the circuit while plugging the power supply cable into the appliance.
IMPORTANT:
A qualified electrician is required in order to perform connection directly onto a branch circuit.
Make sure that the mechanical connection between the power supply cable and the Compax One
™
is properly secured before
letting live current through the closed circuit.
FINALISE THE INSTALLATION
As soon as the Compax One
™
is securely installed to the wall, the power cable should be let
through the appropriate hole in the Compax One
™
frame before the power plug can be
inserted into its corresponding socket.
DO NOT
connect the power plug to the Compax One
™
before it is securely mounted to the wall.
Remember to
close the circuit with the local fuse or
circuit breaker if it was priorly opened.
When the Compax One
™
is connected to power, secure the power cable with the attached
cable ties at the inner back wall of the appliance frame using the integrated cable tie holders.
Make sure that there is a small loop of excess cable for the purpose of stress relief before
tightening the cable ties.
Rotate the bag holder device properly back in place, and make sure to close the door.
Congratulations, your Compax One
™
is now fully installed!


