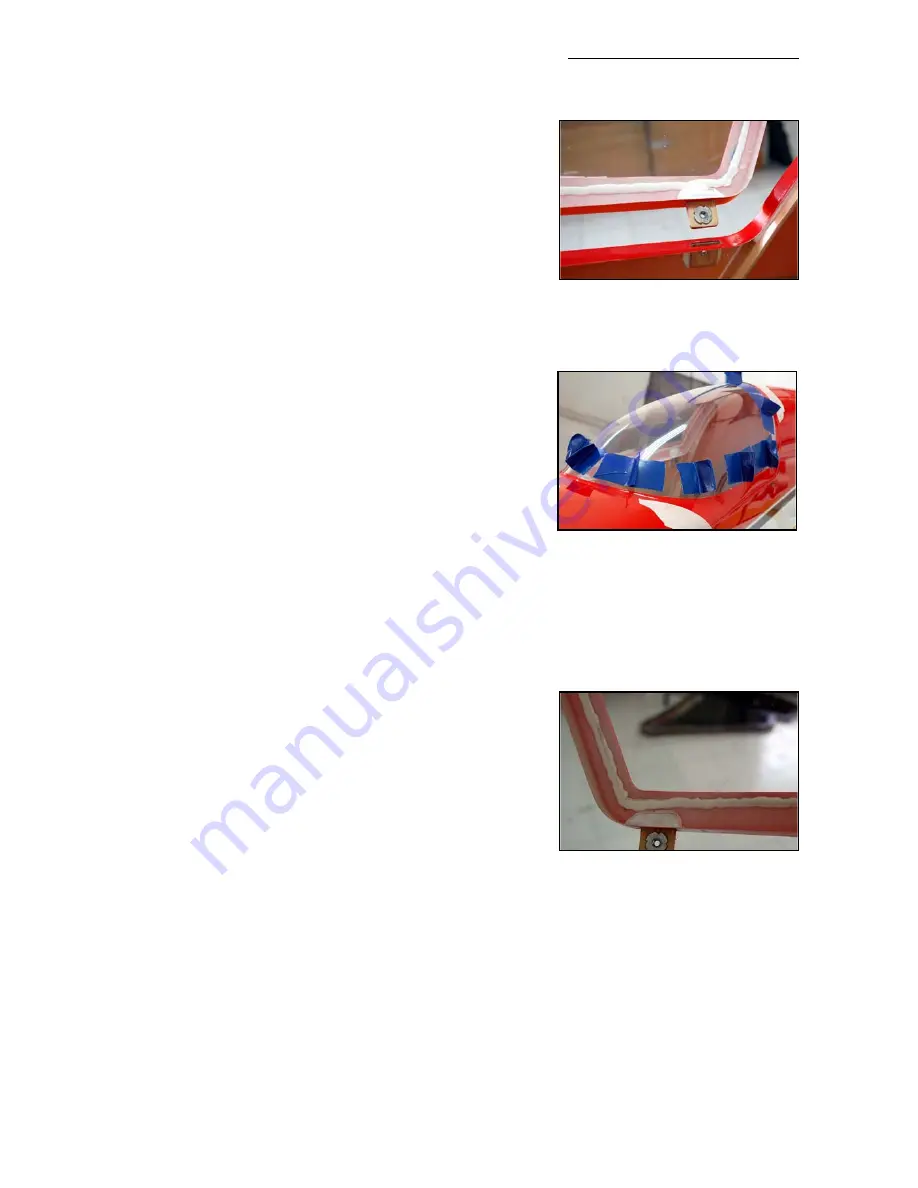
Canopy Frame
The fibreglass canopy frame mountings are already com-
pleted for you at the factory. It is secured to the fuselage
with four M4 x 12mm allen bolts, fitted from the outside of
the fuselage, through the plywood tabs that are glued to the
canopy frame, into M4 T-nuts. This system has been very
well proven on all of our aerobatic planes, and is a strong
rattle-free solution.
Fitting the clear canopy into the frame can be a little bit
tricky, but this is a step by step guide of how we do it:
Sand the inside edges of the canopy frame carefully with
120 grit sandpaper, especially the fibreglass joining tapes,
to ensure a perfect fit of the canopy. Fit the canopy frame
on the fuselage and secure with all 4 bolts. Lay the canopy
on top of the frame, view from the front to check that it is
centred and symettrically positioned, and then mark the
approx. shape with a felt pen or wax crayon. Cut the outer
border of the clear canopy with sharp scissors, about
12mm (1/2”) too big all around. Unless you are in a very
warm room, we recommend that the canopy is slightly
warmed up with a hair dryer to prevent cracking - but be
careful not to melt or deform it! When the canopy fits inside
the frame, tape it into position temporarily, and accurately
mark the edge of the frame on the canopy with a wax cray-
on. Remove the canopy and trim exactly to shape, leaving
about 6mm overlap outside the line all around.
Refit the canopy into the frame, and tape into position from
the inside. Push the canopy up tightly inside the back of the
frame and fix the bottom 2 back corners with one small drop
of odorless CA each (ZAP-O recommended).
Note:
Do NOT use any CA accelerator/kicker - you will
immediately ‘fog’ the clear canopy!
Make visual check from the front and back to make sure
sure that the canopy is straight. Make several hand-holds
with strong tape (see photo) to make holding and positioning the canopy easy. Remount the
canopy frame to the fuselage (use all 4 bolts), and tape the canopy frame tightly to the fuselage
all around. Using the tape handles to pull the canopy outwards firmly against the frame, working
from the back towards the front, glue the edges of the canopy in place in 2 more places each
side, with just a single small drop of CA at each position, all the time checking that the edge of
the canopy is tight up against the frame at the front.
Now that the canopy is fixed in position and cannot twist or warp anymore, you can carefully
remove the canopy frame from the fuselage, and use a 30 minute or 24hr epoxy and micro-bal-
loon mixture for gluing all the edges to the frame on the inside surface (see photo above). It is
most important that the canopy cannot come off in flight, so make sure that the bead of glue traps
the clear canopy firmly in place. Re-secure the canopy frame onto the fuselage with all 4 bolts
Composite-ARF Extra 300SX
(2.6m span)
techsupport@composite-arf.com
14
(above) Use duct-tape handles to
pull the clear canopy tightly against
the canopy frame while gluing it in
position with a few very small
drops of odorless-CA.
(below) When fixed, remove frame
& secure edges of canopy firmly
with epoxy/micro-balloon mixture
(above) The canopy frame is
secured to the fuselage with 4
tabs, M4 bolts and T-nuts, all fin-
ished at the factory for you.


