Remote Playback on WebVUer
Remote Monitoring on WebVUer
Compro RS-3232 - User's Manual
11-6
Icon
Name
Description
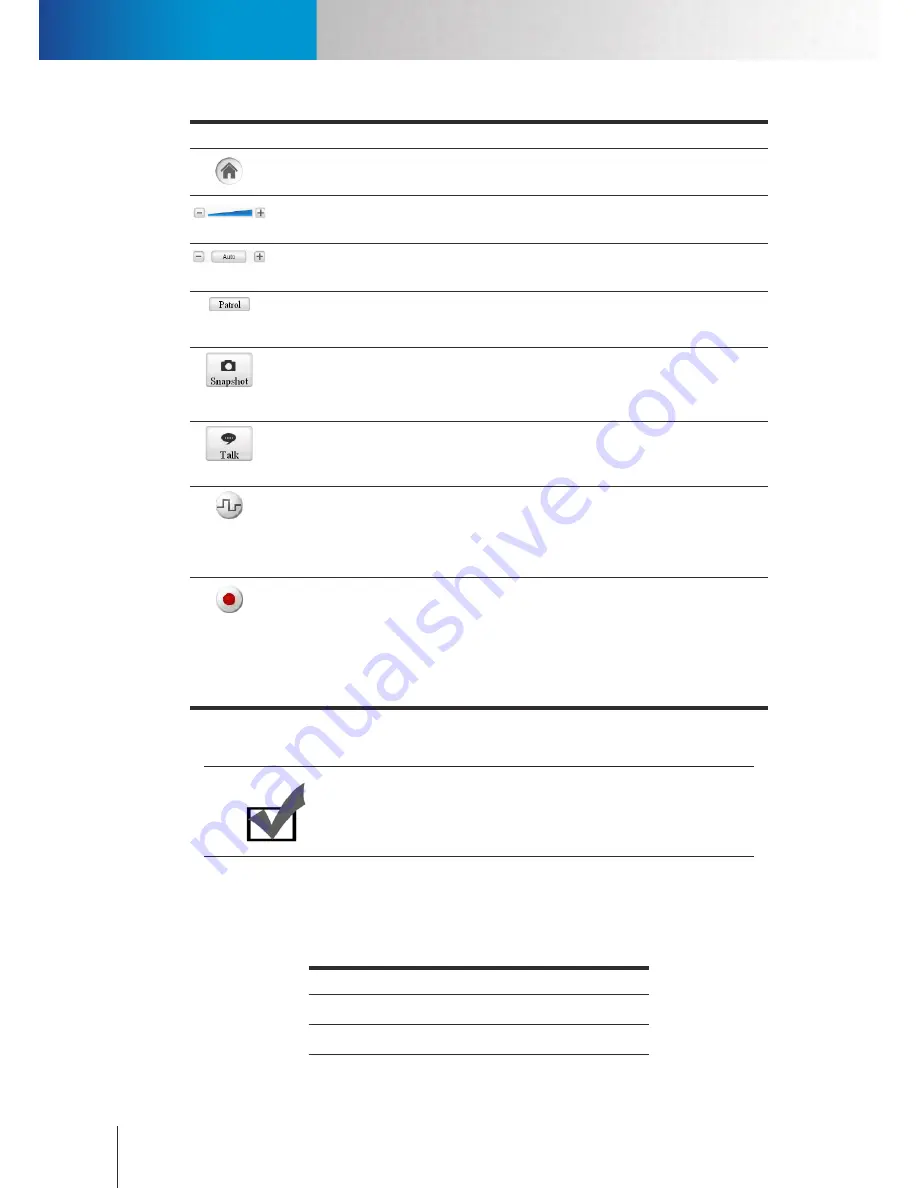
Home
The
Home Button
is used for returning to the preset home position for PTZ
cameras.
Zoom Con-
trol
For PTZ cameras, click on the
Zoom Control
slider or hit the "plus" and "mi-
nus" button to zoom in / out on the image.
Focus con-
trol
For PTZ cameras, hit the "plus" and "minus" button to adjust the focal point.
Or press the "Auto" button to auto-focus.
Patrol
Mode
Push the
Patrol Mode
button to make the selected PTZ camera rotate through
different predefined camera positions. The positions are defined and stored
on the camera side.
Snapshot
Select a connected camera channel and press the
Snapshot
button to take
a snapshot. The snapshot will be saved under "My Documents" by default.
However, you can change the storage path by going to [Setup] > [Option] and
enter a different path into the "Default Snapshot Path" field.
Talk
This
Talk
(2-way communication) button allows you to speak into your PC
microphone and broadcast through camera's speaker (per camera support).
Press and hold the Talk button to talk through microphone.
I/O Control
If the selected camera supports digital inputs/outputs and is connected with
IO device(s), you can push the
I / O Control
button to show the IO control
panel in which you can manually trigger the alarm or siren connected to the I/
O port of the selected camera. When an ONVIF camera or a generic camera is
selected, the IO control button is disabled.
Record
The
Record
button is used to start / stop video recording on the selected
channel. To start recording video, select a connected video channel and hit
the Record button. The recording will be saved under "My Documents" by
default. However, you can change the storage path by going to [Setup] >
[Option] and enter a different path into the "Default Recording Path" field. (If
your computer can not play .mkv file format, please download and install VLC
media player or KMPlayer from the Internet.)
Table 11-2. WebVUer icons 2
Note:
When using the "Talk" feature, you may experience various degrees of
delay between transmission from the computer and playback at the
camera depending on the condition of your network environment.
Right-Click Menu on LiveView Page
The right-click menu lets you carry out additional actions on the selected channel. Simply right-click on
any video pane on the live view screen, and the right-click menu for the selected channel will appear. The
menu contains the following items.
Item
Description
Connect
Connect to the selected channel.
Disconnect
Disconnect the selected channel.
Summary of Contents for RS-3232
Page 1: ...Network Video Recorder RS 3232 Model No V2 120510 ...
Page 34: ... Compro RS 3232 User s Manual 4 12 ...
Page 58: ...Talk and Broadcast Voice Compro RS 3232 User s Manual 6 8 ...
Page 64: ...Manual Recording Compro RS 3232 User s Manual 7 6 ...
Page 74: ...Add and Manage Bookmarks Compro RS 3232 User s Manual 8 10 ...
Page 78: ...Schedule a Backup Operation Compro RS 3232 User s Manual 9 4 ...
Page 82: ...Add an E Map Compro RS 3232 User s Manual 10 4 Figure 10 3 Emap example ...
Page 92: ...Remote Playback on WebVUer Compro RS 3232 User s Manual 11 10 ...
Page 112: ... Compro RS 3232 User s Manual 12 20 ...
Page 120: ...Contacting Compro Technical Support Compro RS 3232 User s Manual 14 4 ...


