QAM Marker
Signal Source
rev1.0.5 August 15, 2017
13
Configuration Manager Introduction (web based)
To configure the QAM Marker by direct connection, use a cross-over type Cat 5 Ethernet cable between
the computer and the LAN port on the back panel of the unit. Make sure the computer’s Ethernet
configuration has DHCP turned OFF. Also ensure the subnet mask is set to: 255.255.255.0.
Use a straight-through Cat 5 Ethernet cable when the QAM Marker is installed and connected to your
system network. Make sure the unit’s preset address does not conflict in the existing network. If so, use
the direct connection method to change the unit’s address under Network Settings and then use Apply
Settings. Then press the Reset button on the unit’s front panel. Note: If the default IP Address is
changed, there is not a way to reset it or recall it if forgotten. Please be sure to record the new IP
address for future reference.
Steps to Program the QAM Marker box:
Open a web browser. Enter 192.168.0.50 (or the changed address) in the URL address bar.
(Recommended browsers are IE, Firefox, and Chrome.)
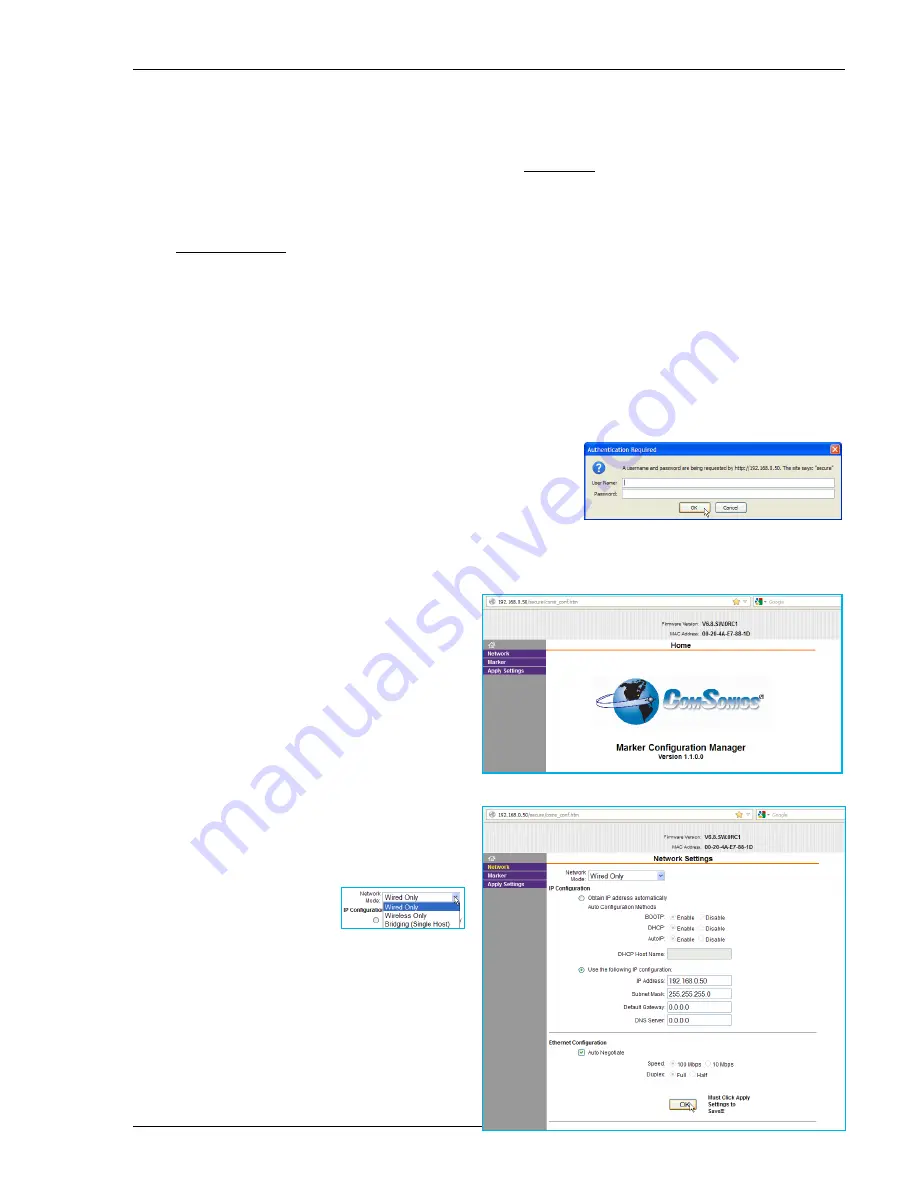
Click OK once the Authentication window appears. The User
Name and Password can remain blank.
The Authentication window varies per OS and browser.
(Leave the fields blank, as this step is a placeholder for development. The Authentication window shows
the first time the unit is addressed as long as the browser remains open.)
The Home page shows the QAM Marker’s
Firmware Version, MAC Address, and the Marker
Configuration Manager Version.
Network
Use this function if you want to have the marker
unit networked. Set the
desired selections and click
on the OK button.
(Clicking the OK button remembers the settings
but does not send the settings to the QAM
Marker unit.)
Use Apply Settings to send the settings to the
QAM Marker unit. REMEMBER the new IP
address and settings for future reference!


