119
IIa. PUSH-BUTTON CONFIGURATION
The WPS push-button configuration provides a semi-automated configuration
method. The WPS button on the front panel of the router can be used for this
purpose.
The WPS push-button configuration is described in the procedure below. It is
assumed that the Wireless function is Enabled and that the router is configured as
the Wireless Access Point (AP) of your WLAN. In addition, the wireless client must
also be configured correctly and turned on, with WPS function enabled.
NOTE:
The wireless AP on the router searches for 2 minutes. If the router stops
searching before you complete Step 4, return to Step 3.
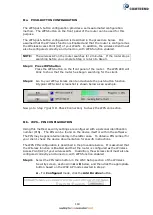
Step 3: Press WPS button
Press the WPS button on the front panel of the router. The WPS LED will
blink to show that the router has begun searching for the client.
Step 4:
Go to your WPS wireless client and activate the push-button function.
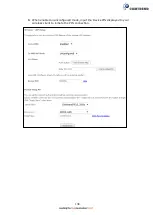
A typical WPS client screenshot is shown below as an example.
Now go to Step 7 (part III. Check Connection) to check the WPS connection.
IIb. WPS
–
PIN CONFIGURATION
Using this method, security settings are configured with a personal identification
number (PIN). The PIN can be found on the device itself or within the software.
The PIN may be generated randomly in the latter case. To obtain a PIN number for
your client, check the device documentation for specific instructions.
The WPS PIN configuration is described in the procedure below. It is assumed that
the Wireless function is Enabled and that the router is configured as the Wireless
Access Point (AP) of your wireless LAN. In addition, the wireless client must also be
configured correctly and turned on, with WPS function enabled.
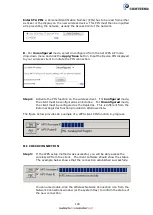
Step 3:
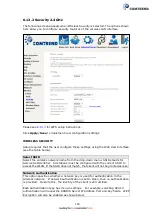
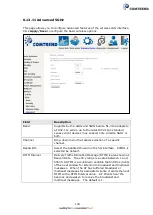
Select the PIN radio button in the WSC Setup section of the Wireless
Security screen, as shown in
A
or
B
below, and then click the appropriate
button based on the WSC AP mode selected in step 2.
A -
For
Configured
mode, click the
Add Enrollee
button.
Summary of Contents for NexusLink 3120
Page 41: ...40 5GHz ...
Page 60: ...59 5 3 4 UPnP Select the checkbox provided and click Apply Save to enable UPnP protocol ...
Page 70: ...69 A maximum of 100 entries can be added to the URL Filter list ...
Page 87: ...86 ...
Page 123: ...122 Enter the MAC address in the box provided and click Apply Save ...
Page 167: ...166 STEP 2 Click the Windows start button Then select Control Panel ...
Page 168: ...167 STEP 3 Select Devices and Printers STEP 4 Select Add a printer ...
Page 196: ...195 F2 4 PPP over ATM PPPoA IPv4 STEP 1 Click Next to continue ...
Page 216: ...215 Click Next to continue or click Back to return to the previous step ...

