108
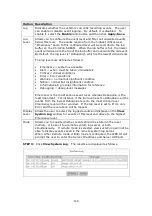
Line 1 & 2
Ports FXS1 & FXS2
Call waiting
Tick the checkbox
to enable this option
Call forwarding number
Enter the forwarding phone number
Forward unconditionally
Tick the checkbox
to enable this option
Forward on “busy”
Tick the checkbox
to enable this option
Forward on “no answer”
Tick the checkbox
to enable this option
MWI
Enable or disable Message-Waiting Indicator
(MWI) for FXS Phones with this checkbox
.
Anonymous call blocking
Tick the checkbox
to enable this option
Anonymous calling
Tick the checkbox
to enable this option
DND (Do Not Disturb)
Tick the checkbox
to enable this option
Enable T.38 support
Enable or disable T.38 Fax mode support with this checkbox
.
You can plug a fax machine into either phone port to send or
receive faxes. Functionality depends upon FAX support by
your VoIP service provider.
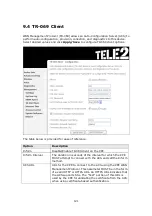
Registration Expire
Timeout
The time period the user would like the registration to be valid
for the Registrar/ Proxy Server. The default is 3600 seconds.
Registration Retry
Interval
The time interval between re-registration attempts.
Max Digit Length
Sets the maximum number of digits for a phone number.
DSCP for SIP
Diff Serv Code Point (DSCP) for SIP
DSCP for RTP
Diff Serv Code Point (DSCP) for RTP
Dtmf Relay setting
Set the special use of RTP packets to transmit digit events.
Hook Flash Relay
setting
Set flash hook event will be sent via which signal.
SIP Transport
protocol
SIP control message will be sent via which protocol.
Enable SIP tag
matching (Uncheck
for Vonage Interop).
Since CPE rely on the
tags
for
matching
purposes,
implementations which support Replacements MUST support
the
SIP
specification, which requires
tags.
Summary of Contents for VI-3223u
Page 1: ...VI 3223u Multi DSL WLAN IAD User Manual Version B1 0 July 19 2013 261099 020...
Page 7: ...6 1 2 Application The following diagram depicts a typical application of the VI 3223u...
Page 16: ...15 STEP 3 After successfully logging in for the first time you will reach this screen...
Page 26: ...25...
Page 32: ...31 Chapter 5 Advanced Setup The following screen shows the advanced menu options...
Page 67: ...66 5 11 UPnP Select the checkbox provided and click Apply Save to enable UPnP protocol...
Page 72: ...71 5 15 1 Storage Device Info Display after storage device attached for your reference...
Page 74: ...73 Automatically Add Clients With Following DHCP Vendor IDs...
Page 98: ...97 Click Apply Save to set new advanced wireless options...
Page 103: ...102 7 1 SIP Basic Setting 7 1 1 Global Parameters A common parameter setting...
Page 104: ...103 7 1 2 Service Provider This screen contains basic SIP configuration settings...
Page 106: ...105 7 2 SIP Advanced This screen contains the advanced SIP configuration settings...
Page 107: ...106 7 2 1 Global Parameters A common parameter setting...
Page 172: ...171 Click Next to continue or click Back to return to the previous step...


