154
STEP 3:
Choose a layer 2 interface from the drop-down box and click
Next
.
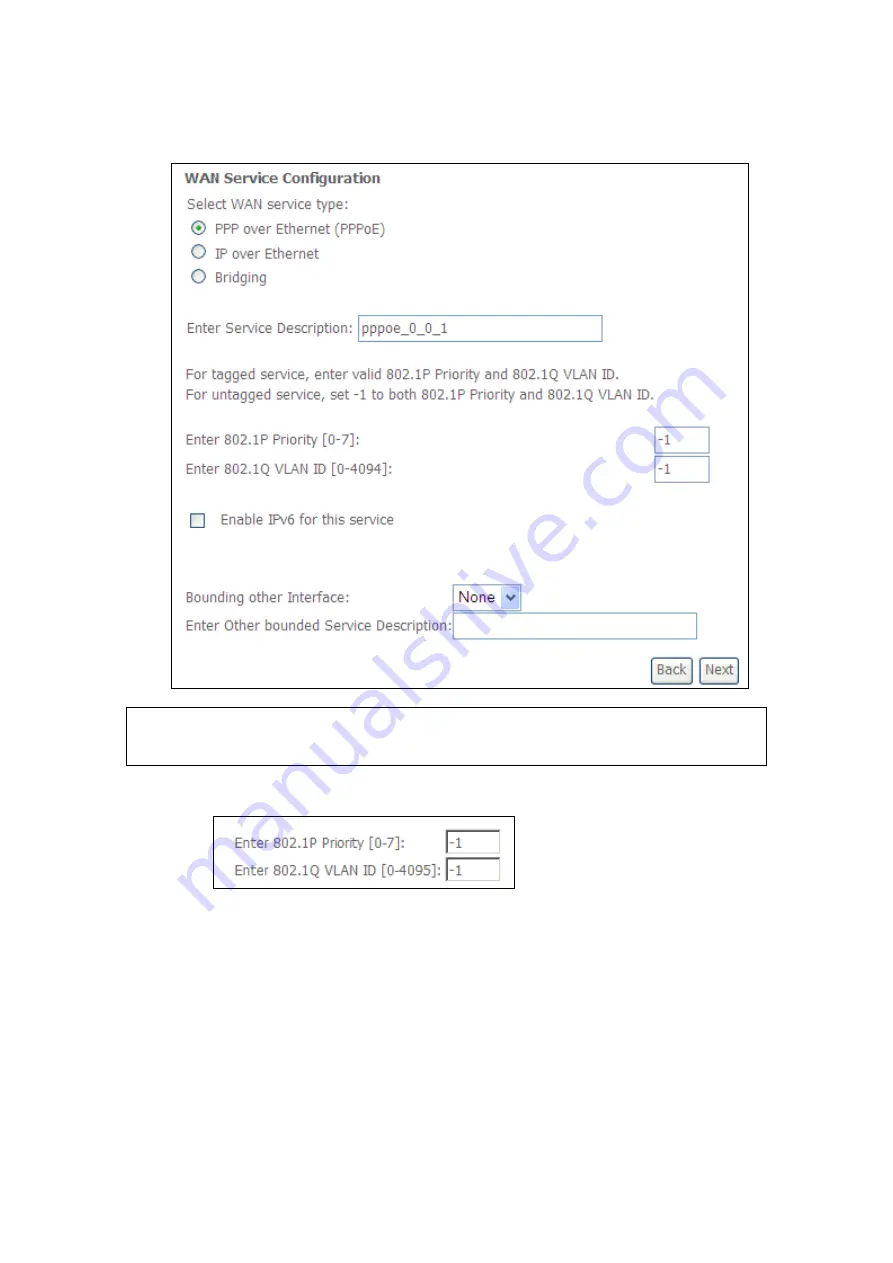
The WAN Service Configuration screen will display as shown below.
NOTE
:
The WAN services shown here are those supported by the layer 2
interface you selected in the previous step. If you wish to change your
selection click the
Back
button and select a different layer 2 interface.
STEP 4:
For VLAN Mux Connections only, you must enter Priority & VLAN ID tags.
STEP 5:
You will now follow the instructions specific to the WAN service type you
wish to establish. This list should help you locate the correct procedure:
(1) For
F2.1 PPP over ETHERNET (
PPPoE), go to page 154.
(2) For
G2.2 IP over ETHERNET (
IPoE), go to page 159.
(3) For
G2.3
Bridging, go to page 164.
(4) For
Summary of Contents for VI-3223u
Page 1: ...VI 3223u Multi DSL WLAN IAD User Manual Version B1 0 July 19 2013 261099 020...
Page 7: ...6 1 2 Application The following diagram depicts a typical application of the VI 3223u...
Page 16: ...15 STEP 3 After successfully logging in for the first time you will reach this screen...
Page 26: ...25...
Page 32: ...31 Chapter 5 Advanced Setup The following screen shows the advanced menu options...
Page 67: ...66 5 11 UPnP Select the checkbox provided and click Apply Save to enable UPnP protocol...
Page 72: ...71 5 15 1 Storage Device Info Display after storage device attached for your reference...
Page 74: ...73 Automatically Add Clients With Following DHCP Vendor IDs...
Page 98: ...97 Click Apply Save to set new advanced wireless options...
Page 103: ...102 7 1 SIP Basic Setting 7 1 1 Global Parameters A common parameter setting...
Page 104: ...103 7 1 2 Service Provider This screen contains basic SIP configuration settings...
Page 106: ...105 7 2 SIP Advanced This screen contains the advanced SIP configuration settings...
Page 107: ...106 7 2 1 Global Parameters A common parameter setting...
Page 172: ...171 Click Next to continue or click Back to return to the previous step...


