14
Installing the VS1000 Hardware
Installing the Hardware
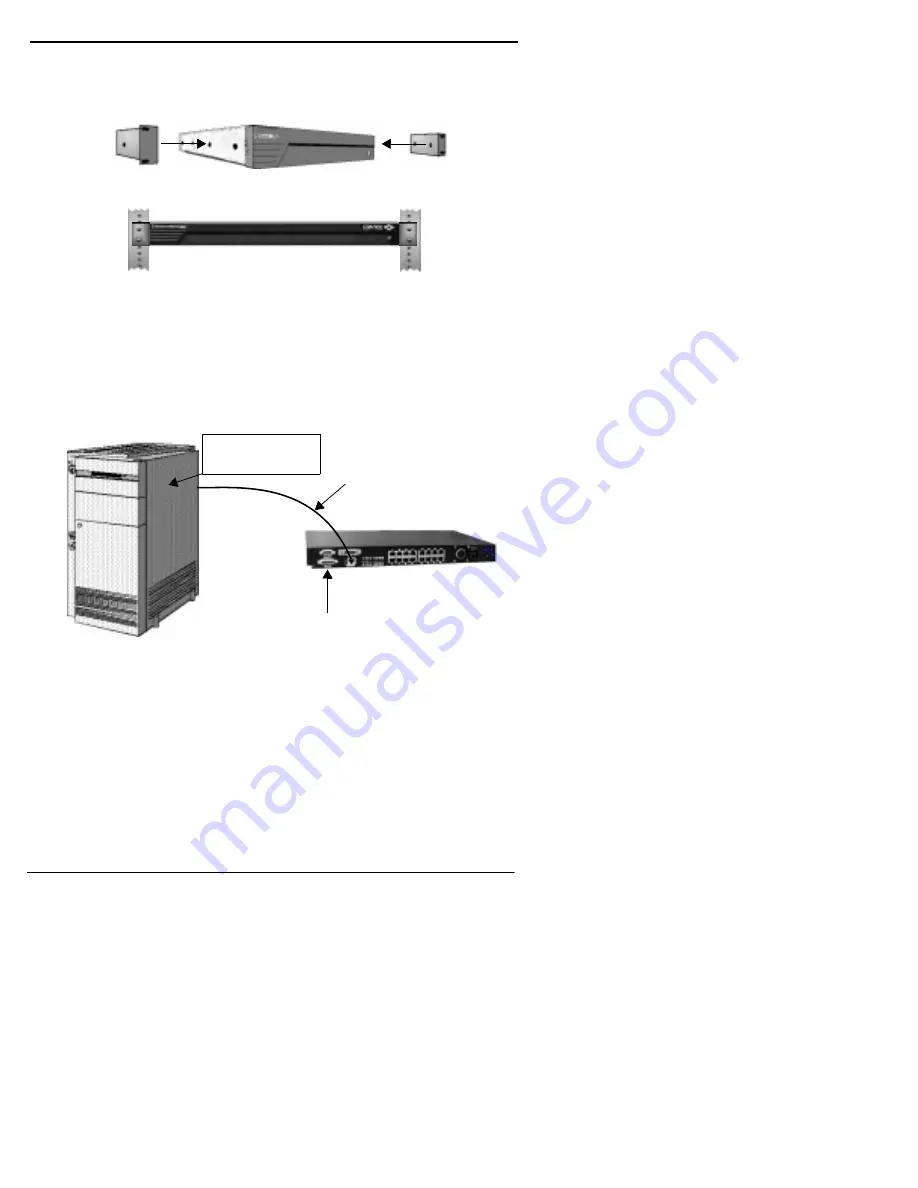
a.
Attach the L brackets to the VS1000 using the screws supplied
with the unit.
b.
Attach the L brackets into your rack.
OR
•
Attach the adhesive feet to the depressions in the bottom of the
VS1000 and place the unit on a stable surface.
Note: You can mount the VS1000 facing either forward or to the
rear. Make sure the cooling fan is unobstructed.
3.
Connect an Ethernet cable from the appropriate Ethernet
connection (10Base-T or AUI) on the VS1000 to your server or
Ethernet hub.
Notes:
•
Do not connect two VS1000 base units directly to each other.
•
If connecting the VS1000 directly to the server, an Ethernet
adapter (NIC card) is required. This is not supplied by Comtrol.
•
If connecting the VS1000 directly to the server, an
Ethernet
crossover cable
is required. See Building Cables for
specifications.
4.
If not connecting VS1100 expansion units, put the
terminator plug
in the VS1100 connector on the VS1000 base unit.
Server Running
VS-Link
Ethernet Connection
to Server or
Ethernet Hub
Terminator Plug
Summary of Contents for InterChangeVS1000
Page 1: ...InterChangeVS 1000 Series VS1000 and VS1100 Hardware Installation and Configuration Guide ...
Page 6: ...6 List of Tables ...
Page 26: ...26 Building Loopback Plugs Building Cables ...
Page 30: ...30 Power Supply Requirements InterChangeVS Specifications ...
Page 36: ...36 Index ...
Page 37: ......


