ITALIANO ITALIANO
Grazie per aver scelto un prodotto
COMUNELLO AUTOMATION.
Questo manuale fornisce tutte le informazioni
specifiche necessarie alla conoscenza e al
corretto utilizzo dell’apparecchiatura; deve
essere letto attentamente e compreso all’atto
dell’acquisto e consultato qualora vi siano
dubbi sull’utilizzo o si debbano fare interventi
di manutenzione.
Il produttore si riserva il diritto di apportare
eventuali modifiche al prodotto e al presente
documento senza preavviso.
AVVERTENZE
Leggere attentamente il presente manuale
prima di iniziare l’installazione ed eseguire gli
interventi come specificato dal costruttore.
Il presente manuale di installazione
è rivolto esclusivamente a personale
professionalmente competente.
Tutto quello non espressamente previsto in
queste istruzioni non è permesso.
DESCRIZIONE DEL PRODOTTO E
DESTINAZIONE D’USO
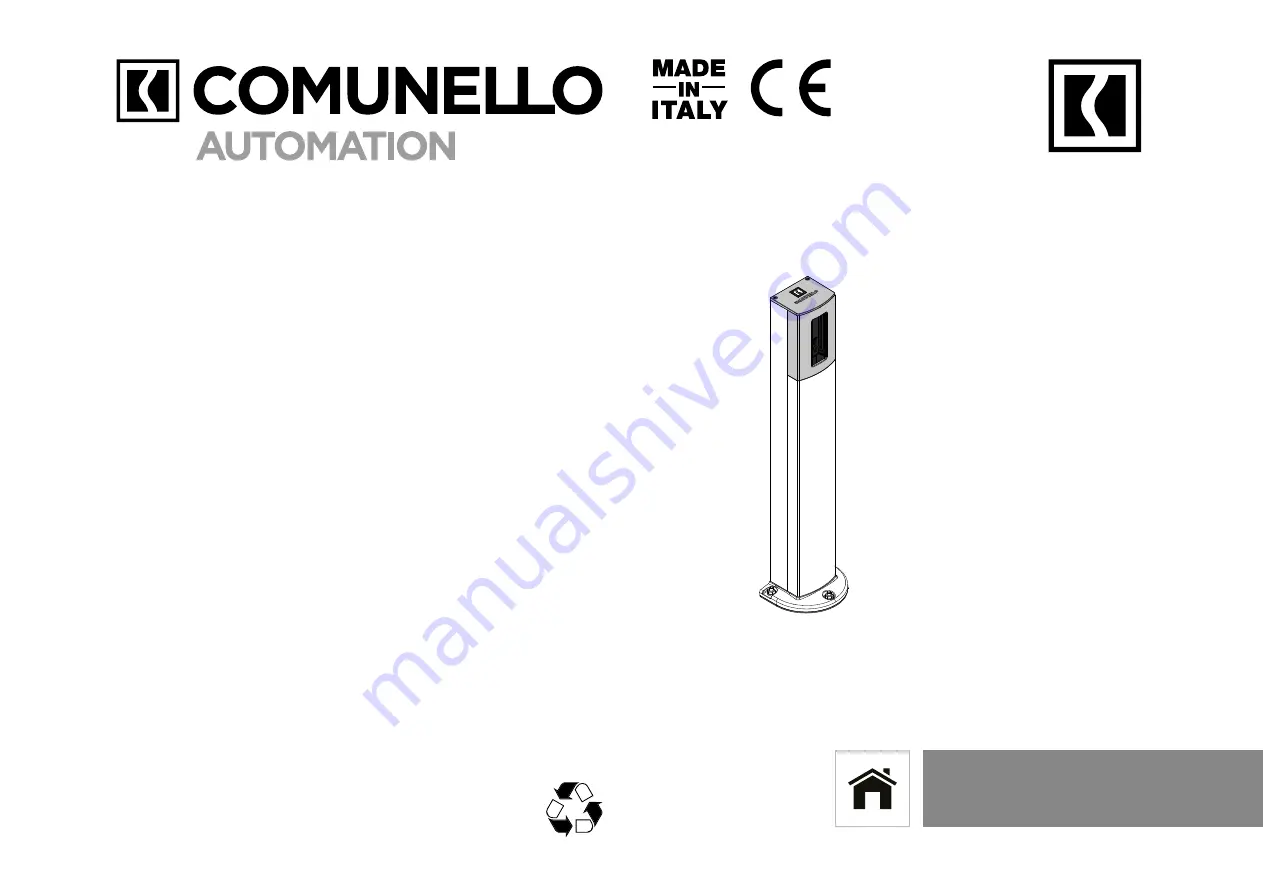
Colonnine in alluminio estruso e basamento
robusto adatte all’alloggiamento di fotocellule
o altri accessori, nelle situazioni in cui non si
abbia a disposizione una struttura muraria.
VERIFICHE PRELIMINARI
• Verificare che il prodotto all’interno dell’imballo
sia integro ed in buone condizioni.
• Verificare che la colonnina venga fissata ad una
superficie solida che consenta un fissaggio
adeguato in un punto facilmente raggiungibile.
• Verificare che l’installazione sia fuori dall’area
di manovra del cancello come previsto dalle
normative vigenti.
• Verificare di posizionare le colonnine su
superfici parallele e alla stessa altezza tra di
loro per consentire il corretto allineamento
delle fotocellule.
INSTALLAZIONE
• Fissare le colonnine al pavimento con
dei tasselli adatti o, nel caso di cemento
fresco, immergere la piastra con tirafondi
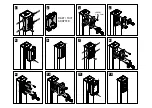
(fi g. A-B).
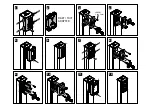
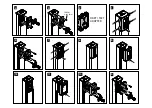
• Per togliere la cover di protezione, premere
ai lati ed estrarla come indicato nella figura
1.
• Nella parte superiore è possibile installare:
la fotocellula DART, la tastiera TACT, oppure
il selettore a chiave INDEX (vedi figure da 1
a 12). Utilizzare l’adattatore (fig. 2) solo nel
caso in cui si usi la fotocellula DART o la
tastiera TACT, facendo attenzione di avvita
re i prodotti sui relativi fori indicati.
• Le viti di fissaggio dei relativi accessori sono
incluse.
COLLEGAMENTI
I cablaggi vanno fatti passare internamente
lungo la colonnina per arrivare alle fotocellule
o altri accessori, passando all’interno dei
supporti.
SMALTIMENTO
Alcuni componenti del prodotto
possono essere riciclati mentre altri
come ad esempio i componenti
elettronici devono essere smaltiti secondo le
normative vigenti nell’area di installazione.
Alcuni componenti potrebbero contenere
sostanze inquinanti e non devono essere
dispersi nell’ambiente.
66.5 mm
95 mm
50 - 100 mm
76 mm
63 mm
120 mm
IXI
DART
MAST
INDEX
DART / TACT
ADAPTER
SCREW
2.9x9.5mm
10
11
12
1
4
7
2
3
8
5
6
9
GMAST005N0G00A - GMAST010N0G00A
Safety accessories
MAST
INSTALLATION AND
USER’S MANUAL
FRATELLI COMUNELLO S.P.A.
AUTOMATION GATE DIVISION
Via Cassola, 64 - C.P. 79
36027 Rosà, Vicenza, Italy
Tel. +39 0424 585111
Fax +39 0424 533417
info@comunello.it |
comunello.com
Fratelli Comunello S.p.A. dichiara che i prodotti MAST 50 - 100 sono
conformi ai requisiti delle Direttive RoHS 2011/65/UE e EMCD 2014/30/
UE. Dichiarazione al link:
https://bit.ly/comunello-mast-50-ce
https://bit.ly/comunello-mast-100-ce
Fratelli Comunello S.p.A. declares that MAST 50 - 100 products conform
to the requirements of the Directives RoHS 2011/65/EU and EMCD
2014/30/EU. Declaration available from the link:
https://bit.ly/comunello-mast-50-ce
https://bit.ly/comunello-mast-100-ce
91300399 - Rev. 01 - 08.10.20
24H
B-1
B-4
AC - 850 (OPTIONAL KIT)
B-2
B-5
B-6
B-3
ENGLISH
Thank you for choosing a COMUNELLO
AUTOMATION product.
This manual provides all the detailed
information required for the understanding
and correct use of the equipment. It must
be read carefully at the time of purchase and
consulted if there are any doubts regarding its
use or when maintenance is required.
The manufacturer reserves the right to make
any modifications to the item and to this
document without prior notice.
WARNINGS
Please read this manual carefully before
beginning installation and carry out the
procedures as specified by the manufacturer.
This installation manual is only intended for
professional personnel.
Anything not expressly included in these
instructions is prohibited.
PRODUCT DESCRIPTION AND
INTENDED USE
Extruded aluminium masts and sturdy base
suitable for housing photocells or other
accessories, in situations where walls are not
available.
PRELIMINARY CHECKS
• Check that the item inside the packaging is
intact and in good condition.
• Ensure that the mast is secured to a solid
foundation and is positioned in a location
that is easily accessible.
•
Ensure that installation is outside the
operating zone of the gate as required by
current regulations.
• Ensure the masts are positioned on parallel
surfaces and at the same height to allow for
correct alignment of the photocells.
INSTALLATION
• Secure the masts to the floor with suitable
anchoring systems or, in the case of fresh
concrete, submerge the plate using anchor
bolts (Figs. A-B).
•
To remove the protective cover, apply
pressure to the sides and remove it as
shown in Figure 1.
• The DART photocell, the TACT keypad, or the
INDEX key selector switch (see Figures 1 to
12) can be installed on the upper part. Use
the adapter (Fig. 2) only when using the DART
photocell or the TACT keypad, taking care to
screw the items into the indicated holes.
• Securing screws for the accessories are
included.
CONNECTIONS
Wiring must be routed internally along
the mast to reach the photocells or other
accessories, transiting inside the supports.
DISPOSAL
A number of components of the item
can be recycled while others, such
as electronic components must be
disposed of in accordance with the regulations
in force in the country of installation.
A number of components may contain
pollutants that must not be released into the
environment.
FRANÇAIS
Merci d’avoir choisi un produit
COMUNELLO AUTOMATION.
Ce manuel fournit toutes les informations
spécifiques nécessaires à la connaissance
et à l’utilisation correcte de l’appareil ; il doit
être lu attentivement et compris au moment
de l’achat et consulté en cas de doute sur
son utilisation ou si une maintenance est
nécessaire.
Le fabricant se réserve le droit d’apporter
toute modification au produit et au présent
document sans préavis.
AVERTISSEMENTS
Lire attentivement ce manuel avant de
commencer l’installation et effectuer les
travaux comme indiqué par le fabricant.
Ce manuel d’installation est uniquement
destiné à être utilisé par un personnel
professionnellement qualifi é.
Tout ce qui n’est pas expressément prévu
dans ces instructions est interdit.
DESCRIPTION DU PRODUIT ET USAGE
PRÉVU
Colonnes en aluminium extrudé et base robuste
indiquées pour le logement de photocellules ou
autres accessoires, dans les situations où on ne
dispose pas d’une structure en maçonnerie.
CONTRÔLES PRÉLIMINAIRES
•
Vérifier que le produit à l’intérieur de
l’emballage soit intègre et en bonnes
conditions.
• Vérifier que la colonne soit fixée sur une
surface solide qui permette une fixation
adéquate sur un point facilement accessible.
• Vérifier que l’installation soit au-dehors de
la zone de manœuvre de la grille, comme
prévu par les règlementations en vigueur.
• S’assurer d’avoir positionné les colonnes sur
des surfaces parallèles et à la même hauteur
entre elles pour permettre l’alignement
correct des photocellules.
INSTALLATION
• Fixer les colonnes au plancher avec des
chevilles adéquates ou, en cas de ciment
frais, submerger la plaque avec des boulons
d’ancrage (Fig. A-B).
• Pour retirer le couvercle de protection,
appuyer sur les côtés et l’extraire comme
indiqué en figure 1.
• Sur la partie supérieure, il est possible
d’installer : la photocellule DART, le clavier
TACT, ou le sélecteur à clé INDEX (voir
figures de 1 à 12). utiliser l’adaptateur (fig. 2)
seulement si on utilise la photocellule DART
ou le clavier TACT, en faisant attention de
visser les produits sur les trous indiqués.
• Les vis de fixation des accessoires sont fournies.
BRANCHEMENTS
Les câblages doivent passer à l’intérieur le long
de la colonne pour arriver aux photocellules
ou autres accessoires, en passant à l’intérieur
des supports.
ÉLIMINATION
Certains composants du produit peuvent
être recyclés tandis que d’autres, tels
que les composants électroniques,
doivent être éliminé selon les règlementations
en vigueur dans la zone d’installation.
Certains composants peuvent contenir des
substances polluantes et ne doivent pas être
rejetés dans l’environnement.
ESPAÑOL
Gracias por haber elegido un producto
COMUNELLO AUTOMATION.
Este manual proporciona toda la información
específica necesaria para el conocimiento y
el uso correcto del aparato; debe ser leído
atentamente y comprendido en el acto de
compra y consultado siempre que se tengan
dudas sobre el uso o se deban realizar
operaciones de mantenimiento.
El fabricante se reserva el derecho de aportar
eventuales modificaciones al producto y al
presente documento sin preaviso.
ADVERTENCIAS
Lea atentamente el presente manual antes
de comenzar la instalación y realice las
operaciones como especifica el fabricante.
El presente manual de instalación está dirigido
exclusivamente a personal profesionalmente
competente.
Todo lo que no está específicamente previsto
en estas instrucciones no está permitido.
DESCRIPCIÓN DEL PRODUCTO Y USO
PREVISTO
Columnas de aluminio extruido y base robusta
adecuadas para la colocación de fotocélulas
u otros accesorios, cuando no se tenga a
disposición una estructura de mampostería.
VERIFICACIONES PRELIMINARES
• Compruebe que el producto en el interior
del embalaje esté intacto y en buenas
condiciones.
• Compruebe que la columna esté fijada
en una superficie sólida que permita una
fijación adecuada en un punto fácilmente
alcanzable.
• Compruebe que la instalación sea fuera del
área de maniobra de la barrera como está
previsto por la normativa vigente.
• Compruebe la posición de las columnas en
superficies paralelas a la misma altura entre
ellas para permitir la alineación correcta de
las fotocélulas.
INSTALACIÓN
• Compruebe las columnas al pavimento con
tacos adecuados o, en el caso de cemento
fresco, sumergir la placa con tirafondos (fig.
A-B).
• Para quitar la funda de protección, presione
los lados y extráigala como se indica en la
fi gura 1.
• En la parte superior es posible instalar:
la fotocélula DART, el teclado TACT, o el
selector de llave INDEX (véase figuras de
1 a 12). Utilice el adaptador (fig. 2) solo en
el caso en que se use la fotocélula DART
o el teclado TACT, prestando atención
a atornillar los productos en los orificios
indicados.
• Los tornillos de fijación de cada accesorio
están incluidos.
CONEXIONES
Los cableados deben hacerse pasar
totalmente a lo largo de la columna para llegar
a las fotocélulas o a los otros accesorios,
pasando en el interior de los soportes.
ELIMINACIÓN
Algunos componentes del producto
pueden reciclarse mientras otros,
como por ejemplo los componentes
electrónicos, deben eliminarse según las
normativas vigentes en el área de instalación.
Algunos componentes podrían contener
sustancias contaminantes y no deben ser
liberados en el medio ambiente.
PORTOGUESE
Obrigado por ter escolhido um produto
COMUNELLO AUTOMATION.
Este manual fornece todas as informações
específicas necessárias para o conhecimento
e uso correto do equipamento; deve ser
lido com atenção e entendido no momento
da compra, e consultado quando houver
dúvidas sobre o seu uso ou quando se deva
fazer intervenções de manutenção.
O fabricante reserva-se o direito de fazer
eventuais alterações ao produto e a este
documento sem aviso prévio.
AVISOS
Leia este manual com atenção antes de
iniciar a instalação e execute as operações
conforme especificado pelo fabricante.
Este manual de instalação é destinado apenas
a pessoal profissionalmente competente.
Tudo o que não esteja expressamente
previsto nestas instruções não é permitido.
DESCRIÇÃO DO PRODUTO E
FINALIDADE DE USO
Colunas em alumínio extrudido e base
resistente adequada para o alojamento
de fotocélulas ou outros acessórios, em
situações em que não exista à disposição
uma estrutura de parede.
VERIFICAÇÕES PRELIMINARES
• Verifique se o produto no interior da emba-
lagem está intacto e em boas condições.
• Certifique-se que a coluna seja fixada a uma
superfície sólida que permita uma fixação
adequada num ponto facilmente acessível.
• Certifique-se que a instalação esteja fora
da área de manobra do portão, conforme
exigido pelos regulamentos atuais.
• Certifique-se de posicionar as colunas em
superfícies paralelas e na mesma altura
entre elas para permitir o alinhamento
correto das fotocélulas.
INSTALAÇÃO
• Fixe as colunas no chão com buchas
adequadas ou, no caso de betão armado
fresco, mergulhe a placa com tira-fundos
(chumbadores) (fig. A-B).
• Para retirar a tampa de proteção, pressione
nos lados e remova-a conforme mostrado
na figura 1.
• Na parte superior, é possível instalar: a
fotocélula DART, o teclado TACT ou o seletor
de chave INDEX (veja as figuras de 1 a 12).
Use o adaptador (fig. 2) apenas se estiver a
usar a fotocélula DART ou o teclado TACT,
certificando-se de aparafusar os produtos
nos respetivos orifícios indicados.
• Os parafusos de fixação dos respetivos
acessórios estão incluídos.
LIGAÇÔES
As cablagens deve ser passadas
internamente ao longo da coluna para
chegar às fotocélulas ou a outros
acessórios, passando dentro dos suportes.
ELIMINAÇÃO
Alguns componentes do produto podem
ser reciclados, enquanto outros, como
por ex. os componentes eletrónicos,
devem ser eliminados de acordo com as
normas em vigor no local de instalação.
Alguns componentes podem conter
substâncias poluentes que não devem ser
dispersas no ambiente.
РУССКИЙ
Благодарим за выбор изделия
COMUNELLO AUTOMATION.
В настоящем руководстве приводятся
все сведения, необходимые для знания и
правильной эксплуатации оборудования.
Следует внимательно прочесть и понять
руководство после приобретения и
обращаться к нему всякий раз при
возникновении сомнений относительно
эксплуатации или при проведении работ
по техобслуживанию.
Производитель оставляет за собой
право вносить необходимые изменения
в изделие и в настоящий документ без
предварительного уведомления.
МЕРЫ БЕЗОПАСНОСТИ
Внимательно
прочитать
настоящее
руководство перед началом установки и
выполнить действия согласно указаниям
производителя.
Настоящее руководство по установке
предназначено исключительно для людей
с профессиональными навыками.
Все, что не разрешено согласно
настоящим инструкциям, запрещается.
ОПИСАНИЕ ИЗДЕЛИЯ И ЕГО
ПРЕДНАЗНАЧЕНИЕ
Колонки из экструдированного алюминия
и прочное основание подходят для
размещения фотоэлементов или других
комплектующих в тех случаях, когда
отсутствует строительная конструкция.
ПРЕДВАРИТЕЛЬНЫЕ ПРОВЕРКИ
• Убедиться, что изделие внутри упаковки
не повреждено и в хорошем состоянии.
• Убедиться, что колонка крепится к проч-
ной поверхности, которая гарантирует
подходящее крепление в легко доступ-
ной точке.
• Убедиться, что установка находится
за пределами зоны маневров ворот,
как предусмотрено действующими
нормами.
• Проверить размещение колонок на
параллельных поверхностях и на
одной высоте между собой, чтобы
обеспечить правильное выравнивание
фотоэлементов.
УСТАНОВКА
• Закрепить колонки к полу с помощью
двух подходящих анкерных болтов или,
в случае свежего цемента, установить
плиту с анкерными болтами (рис. A-B).
• Для снятия защитной крышки нажать
по бокам и извлечь ее, как показано на
рисунке 1.
• В верхней части можно установить: фо-
тоэлемент DART, клавиатуру TACT или
селектор с ключом INDEX (см. рисунки
от 1 до 12). Использовать адаптер (рис.
2) только в том случае, если использует-
ся фотоэлемент DART или клавиатура
TACT, закручивать изделия в соответ-
ствующие указанные отверстия.
• Крепежные винты соответствующих
комплектующих входят в комплект
поставки.
ПОДКЛЮЧЕНИЯ
Провода
полностью
укладываются
внутри колонки через опоры для
подвода к фотоэлементам или другим
комплектующим.
УТИЛИЗАЦИЯ
Некоторые компоненты изделия
могут подвергаться вторичной
переработке, другие, например,
электронные
компоненты
следует
утилизировать согласно действующим на
месте установки нормам.
Некоторые компоненты могут содержать
загрязняющие вещества и не должны
выбрасываться в окружающую среду.
NEDERLANDS
Dank u voor het kiezen van een product
COMUNELLO AUTOMATION.
Deze handleiding bevat alle specifieke
informatie die noodzakelijk is voor de
goede kennis en het correcte gebruik
van de apparatuur; de handleiding moet
na de aankoop zorgvuldig gelezen en
begrepen worden en in geval van twijfel
over het gebruik en bij het uitvoeren van
onderhoudswerkzaamheden geraadpleegd
worden.
De fabrikant behoudt zich het recht voor
om, zonder voorafgaande kennisgeving,
wijzigingen aan te brengen aan het product
en dit document.
WAARSCHUWINGEN
Lees deze handleiding zorgvuldig alvorens de
installatie te starten en verricht de ingrepen
zoals aangegeven door de fabrikant.
Deze installatiehandleiding is uitsluitend
bestemd voor professioneel bekwaam
personeel.
Alles wat niet uitdrukkelijk staat aangegeven
in deze aanwijzingen is niet toegestaan.
BESCHRIJVING VAN HET PRODUCT
EN BEOOGD GEBRUIK
Paaltjes van geëxtrudeerd aluminium en sterk
voetstuk, geschikt voor de montage van
fotocellen of andere accessoires in situaties
waarin er geen structuren van metselwerk
beschikbaar is.
VOORAFGAANDE CONTROLES
• Controleer of het product in de verpakking
intact is en in goede staat verkeert.
• Controleer of het paaltje op een stevig
oppervlak wordt bevestigd, waarop een
geschikte bevestiging mogelijk is op een
eenvoudig bereikbaar punt.
• Controleer of de installatie zich buiten het
actiebereik van de poort bevindt, zoals
voorzien door de geldende regelgeving.
• Controleer of de paaltjes geplaatst worden
op parallelle oppervlakken en onderling
op dezelfde hoogte, opdat de fotocellen
correct kunnen worden uitgelijnd.
INSTALLATIE
• Bevestig de paaltjes met geschikte pluggen
op de vloer, of, in geval van vers gegoten
beton, dompel de plaat met ankerbouten
onder (afb. A-B).
• Druk, om de beschermkap te verwijderen,
op de zijkanten en neem de beschermkap
weg zoals op afbeelding 1.
• Bovenaan is de installatie mogelijk van: de
fotocel DART, het toetsenbord TACT, of de
sleutelschakelaar INDEX (zie afbeeldingen
Italiano - English - Français - Español - Portoguese
Русский
- Nederlands - Polski - Magyar
Per la versione digitale con altre lingue
disponibili usare il QR code
For the digital version with other
available languages use the QR code
van 1 tot 12). Gebruik de adapter (afb.
2) alleen in geval de fotocel DART of het
toetsenblok TACT wordt gebruikt, en let op
de producten op de betreffende aangegeven
gaten vast te schroeven.
• De bevestigingsschroeven van de betreffen-
de accessoires worden bijgeleverd.
AANSLUITINGEN
De kabels moeten aan de binnenkant van
het paaltje naar de fotocellen of andere
accessoires worden geleid, geplaatst in
voorziene zittingen.
VERWIJDERING
Enkele onderdelen van het product
kunnen gerecycled worden, terwijl
anderen, zoals bijvoorbeeld de
elektronische onderdelen, verwijderd
moeten worden in overeenstemming met de
regelgeving van kracht in het land van installatie.
Enkele onderdelen kunnen mogelijk
vervuilende stoffen bevatten die niet in het
milieu verspreid mogen worden.
POLSKI
Dziękujemy za wybranie produktu
COMUNELLO AUTOMATION.
Niniejsza instrukcja zawiera wszystkie infor-
macje niezbędne dla zapoznania się z cha-
rakterystyką techniczną urządzenia i z jego
prawidłowym użytkowaniem; po zakupieniu
urządzenia należy ją uważnie przeczytać i
zrozumieć jej treść, a następnie odnieść się
do niej w przypadku jakichkolwiek wątpliwo-
ści związanych z obsługą i konserwacją.
Producent zastrzega sobie prawo do
wprowadzenia modyfikacji w produkcie i w
niniejszym dokumencie, bez uprzedzenia.
OSTRZEŻENIA
Należy uważnie przeczytać niniejszą in-
strukcję przed przystąpieniem do instalacji i
wykonaniem interwencji, zgodnie z informa-
cjami przekazanymi przez producenta.
Niniejsza instrukcja instalacji jest przezna-
czona wyłącznie dla wykwalifikowanego
personelu.
Zabrania się użytkowania i wykorzystywania
w sposób inny niż ten wskazany w niniejszej
instrukcji.
OPIS PRODUKTU I
PRZEZNACZENIE
Słupki z wytłaczanego aluminium i stabilna
podstawa są elementami, na których
montuje się fotokomórki lub inne akcesoria,
w przypadku gdy nie ma możliwości
skorzystania z konstrukcji murowanych.
KONTROLE WSTĘPNE
• Sprawdzić, czy produkt znajdujący się
w opakowaniu jest w nienaruszonym i
dobrym stanie.
• Sprawdzić,
czy
słupek
zostanie
zamocowany na odpowiedniej i solidnej
powierzchni, w łatwo dostępnym punkcie.
• Upewnić się, że zostanie zainstalowany
poza zasięgiem manewru bramy, zgodnie
z obowiązującymi normami.
• Słupki należy umiejscowić na równoległych
powierzchniach, na takiej samej wysokości,
tak aby umożliwić prawidłowe wyrównanie
fotokomórek.
A-2
A-1
A-3
A-4
ىبرع
Summary of Contents for MAST GMAST005N0G00A
Page 3: ...DART TACT ADAPTER SCREW 2 9x9 5mm 1 4 2 3 5 6 10 11 12 7 8 9...
Page 6: ...DART TACT ADAPTER SCREW 2 9x9 5mm 1 4 2 3 5 6 10 11 12 7 8 9...
Page 9: ...DART TACT ADAPTER SCREW 2 9x9 5mm 1 4 2 3 5 6 10 11 12 7 8 9...
Page 12: ...DART TACT ADAPTER SCREW 2 9x9 5mm 1 4 2 3 5 6 10 11 12 7 8 9...
Page 15: ...DART TACT ADAPTER SCREW 2 9x9 5mm 1 4 2 3 5 6 10 11 12 7 8 9...
Page 18: ...DART TACT ADAPTER SCREW 2 9x9 5mm 1 4 2 3 5 6 10 11 12 7 8 9...
Page 21: ...DART TACT ADAPTER SCREW 2 9x9 5mm 1 4 2 3 5 6 10 11 12 7 8 9...
Page 24: ...DART TACT ADAPTER SCREW 2 9x9 5mm 1 4 2 3 5 6 10 11 12 7 8 9...
Page 27: ...DART TACT ADAPTER SCREW 2 9x9 5mm 1 4 2 3 5 6 10 11 12 7 8 9...
Page 30: ...DART TACT ADAPTER SCREW 2 9x9 5mm 1 4 2 3 5 6 10 11 12 7 8 9...
Page 33: ...DART TACT ADAPTER SCREW 2 9x9 5mm 1 4 2 3 5 6 10 11 12 7 8 9...
Page 36: ...DART TACT ADAPTER SCREW 2 9x9 5mm 1 4 2 3 5 6 10 11 12 7 8 9...


