EN
31
RM3230
CUTTING
WARNING!
• Prior to any cleaning or change of attachments, make sure the switch is in the OFF position and that the feed
cord is disconnected from the socket.
• Take extra care while handling sharp parts.
• Make sure the safety lid and the working bowl lid are correctly fitted. Use all safety switches and devices.
• Never fit cutting extensions on the lower drive shaft without ensuring the working bowl is in place! First fit the
working bowl on the motor part and then insert the cutting extensions.
INSTRUCTIONS FOR PROCESSING SELECTED FOOD
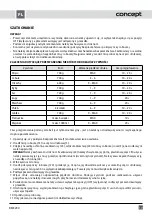
Food
Quantity
Recommended motor speed
Preparation time
Meat
700 g
MAX
10 – 20 s
Onions
700 g
4 - 6
10 – 20 s
Nuts
600 g
9 – MAX
10 – 20 s
Hal
700 g
1 – 9
10 – 20 s
Fish
700 g
1 – 9
10 – 20 s
Cheese
700 g
1 – 9
20 s
Soup
700 g
6 – 9
20 s
Carrots
4 slices
6 – 9
10 – 20 s
Bread
700 g
9 – MAX
10 – 20 s
Apples
max. 4 bunches
MAX
10 s
Mayonnaise
max. 1 000 ml
9 – MAX
20 s
Preparation times are informative only; they depend on specific foods and the required cutting grade.
1. Make sure the safety lid (1) is correctly fitted.
2. Fit the working bowl (13) on the motor part (5).
3. Remove the cutting blade safety cover (24) and insert the cutting blade (22) in the working bowl and fit it on
the drive centre shaft (6).
WARNING!
Take care. Hold the cutting blade (22) at its upper plastic part. After use, always take the blade out
of the bowl prior to taking out the food. Always store the blade with its safety cover (24) fitted.
4. Insert food in the bowl.
5. Fit the working bowl lid (20) and turn it a little. The pin on its edge will click into the notch in the motor part and
press the safety switch.
You will hear the pin clicking in.
6. Connect the feed cord into the socket.
7. Switch the motor on and set the required speed. Use the pusher to add food during the cutting process; do not
use any other objects or your hands to do so.
8. When you finish cutting, set the switch in the OFF position and disconnect the cord from the socket.
9. Open the bowl lid, remove the cutting blade by taking hold of the upper plastic part and use a spatula to clean
the blade.
10. Empty the working bowl.
11. Wash the attachments and let them dry properly.

