background image


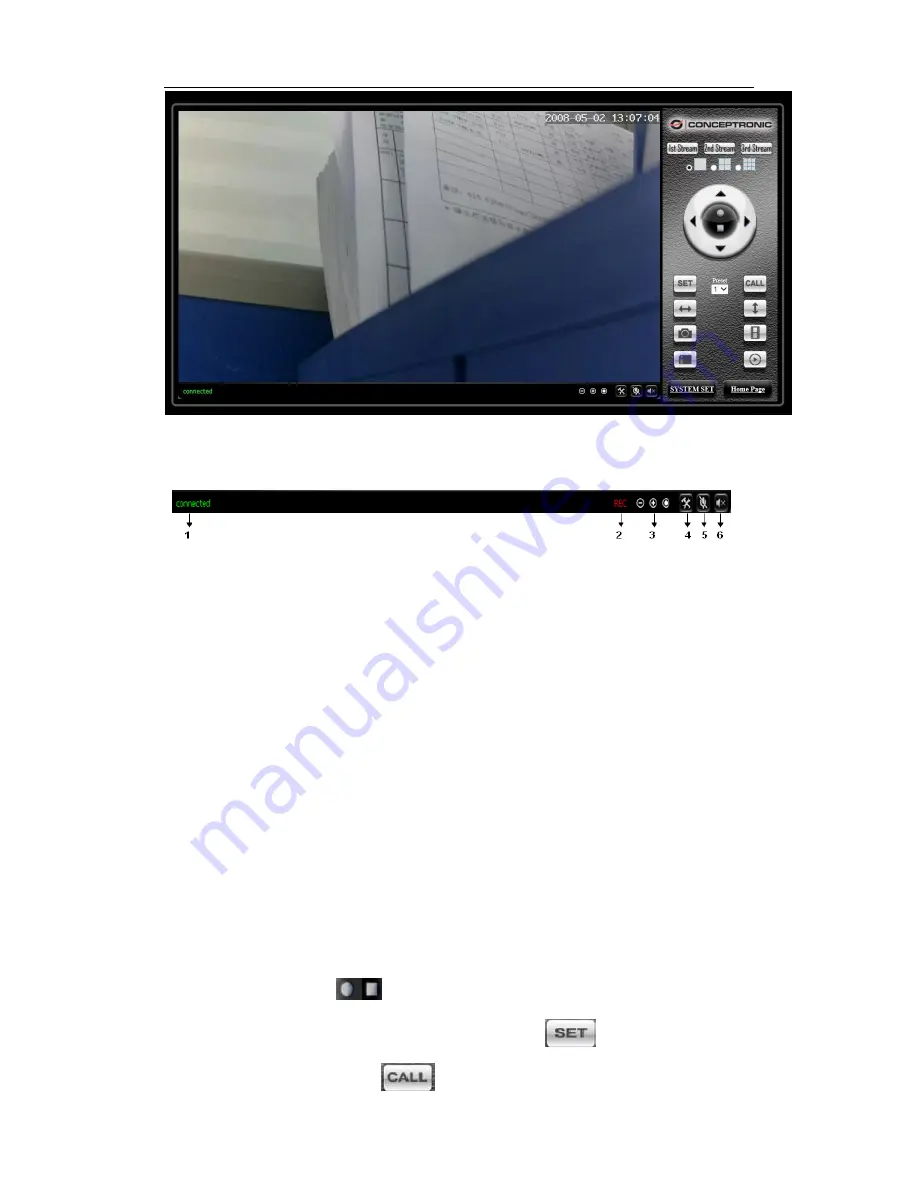
1)  Status bar 


Figure 4-1


  Display connection status; 


Display record status: if click “Record”, it will show “REC” which stands for 
recording; click record button again, it will stop;   

  Zoom out, zoom in and restore digital zoom; 

  Set saving file path: set the location for recording and capturing file storage; 

  Talk button: Click this button to hear what the person at the side of computer 

talks. Click it again, it will stop playing; 

  Audio monitor button: Click this button to hear what people talking about at the 

side of IP Cameras,   


2)  Choose video stream 

You can choose primary stream or second stream, third stream to view the video. 

Recommend to view by primary stream in LAN, by second stream in WAN and by third 

stream in mobile phone.   

You can view the video by four, nine pictures in same screen, but need to set the camera 

in 3.6.6 multiple setting. 

3)  PTZ control 

If the camera supports PTZ function, you can click up, down, left, right arrow to control 

the camera moving, click 

  button to center and stop the camera. 

When you set camera to a preset position, and then click ‘

, after the camera is 

changed to other direction, click 

  can move the camera to the position you have 

Summary of Contents for CIPCAM720OD

Page 1: ...Wireless Network Camera User Manual CIPCAM720PTIWL CIPCAM720OD CIPCAM720ODWDR CIPDC AM720OD V1 0 ...

Page 2: ...nd condensation Please disconnect the item from the mains before moving Notice 1 Be careful not to damage the camera or subject it to strong impacts or shocks 2 Do not touch the optical components for the image sensor such as the lens if necessary please place a clean and moistened cloth with alcohol and wipe the dirt gently When not in use please place the dust cover on to the item to protect the...

Page 3: ...etting 14 3 2 2 WIFI setting 14 3 2 3 WAN access setting 14 3 2 4 ONVIF setting 15 3 3 ALARM SETTING 15 3 3 1 External Alarm Input 15 3 3 2 Motion Detection Setting 15 3 3 3 Alarm mode setting 16 3 3 4 Alarm time setting 17 3 4 ADVANCE SETTING 17 3 4 1 User management 17 3 4 2 Auto Capture Setting 18 3 4 3 Timer recording 18 3 4 4 E mail Setting 18 3 4 5 FTP setting 19 3 4 6 Multiple settings 20 3...

Page 4: ...3 4 4 HD WATERPROOF CAMERA CIPCAM720OD 23 5 FAQ 24 ...

Page 5: ... functionality 2 Installation and Operation Guide 2 1 View video by mobile phone software You need to download and install iSmartviewPro mobile phone client software from attached CD and then scan QR code on the camera body to add camera for viewing video for detail please see Product Quick Application Guide 2 2 View video by wired connection in LAN Power on the IP camera please check carefully th...

Page 6: ...camera according to the information in the red frame on the left The numbers in the red circle should not be the same The Http port should be a number between 80 65535 4 Enter user name and password for the device the default is admin and 123456 5 Click update 6 After updating successfully click Search F3 choose the device again and click Browse F4 Then you can run the web browser enter user name ...

Page 7: ...lay prompt as figure 4 click run will download and install the ActiveX automatically Figure 4 Tips You can hold on reset button on the camera for 10 seconds to restore factory default if you forget user name and password or not sure the device parameters Click Video View in figure 3 to access video interface as below ...

Page 8: ...e talking about at the side of IP Cameras 2 Choose video stream You can choose primary stream or second stream third stream to view the video Recommend to view by primary stream in LAN by second stream in WAN and by third stream in mobile phone You can view the video by four nine pictures in same screen but need to set the camera in 3 6 6 multiple setting 3 PTZ control If the camera supports PTZ f...

Page 9: ...less router in pop up menu click OK and enter its password click apply to save the wireless settings And you can click check to check if the wireless setting is successful After setting successfully please pull out network cable and reboot the camera to use the wireless connection to view video Because the camera supports WPS QSS so you can set wireless by simple way as below 1 Please confirm if t...

Page 10: ...ers successfully 2 4 View video in internet You should connect your internal network to the internet first and configure port forwarding consult your router s manual for further details as figure 6 Figure 6 For example operation step of port forwarding as figure 7 Figure 7 1 Please go to the setting interface of Router and choose Port Forwarding IP camera Computer Computer Router ADSL Internet IOS...

Page 11: ...t software from attached CD and then add camera to view live video For detail please see the User manual for iSmartViewPro 2 6 View Video by other way 2 6 1 Other Web Browser In the Windows OS for using browser with IE kernel user must download the ActiveX While for Safari and Firefox browsers please download QuickTime plug in and install it to access the IP camera After installation please run th...

Page 12: ...ktime plug in 2 6 2 Other common software As the device supports RTSP protocol you can use VLC player to play IP Camera video It is compatible with VLC 1 1 12 version or above Please use below URL to visit rtsp ip port 11 View the video by first stream rtsp ip port 12 View video by second stream rtsp ip port 13 View video by third stream The port is RTSP port please refer to the settings of Figure...

Page 13: ...12 3 1 1 Video parameters Figure 10 JPEG stream is for some views by non windows platform for example click mobile view in first page it will transmit JPEG stream actually 3 1 2 Audio parameters ...

Page 14: ...io capture so it will transmit audio in corresponding video stream Please open the audio here should you hear the sound when clicking audio play button in figure 4 1 3 1 3 Image parameters Figure 12 You can select close to disable IR LED when you don t need it At night mode it will cut frame rate automatically to enhance night vision at night when you select on ...

Page 15: ...apter 2 3 you have known how to do port forwarding After the success of the port forwarding you can also visit camera by DDNS The manufacturer has established a DDNS system and allotted a DDNS to every device the user can view it from remote PC example of figure 14 Figure 14 User can also use third party DDNS such as www dyndns com User applies a free domain name from this website and fills the in...

Page 16: ...NVIF 2 0 1 at present 3 3 Alarm setting 3 3 1 External Alarm Input Figure 17 The camera should have external alarm input port for enable this functions Connect external alarm detector to the input port the detector will output switching signal when it detects any abnormal input port of the camera will detect the level change so it will detect the alarm therefore the detector should be switching se...

Page 17: ...on detection area as below Figure 18 Please click apply after finishing the settings and motion detection takes effect The higher value the higher sensitivity The camera will trigger corresponding alarm when any change occurs in the detection area 3 3 3 Alarm mode setting After camera detects any change it will alarm as several mode example of figure 18 Figure 19 ...

Page 18: ...tem time is correct before you set the alarm time period Please refer to chapter 3 5 2 to set system time 3 4 Advance setting 3 4 1 User management Click SYSTEM SET ADVANCED User to access it Figure 21 There are 3 levels of user authorization in it Administrator admin has the highest authority It can do any settings The factory default password 123456 User user can only operate the device but can ...

Page 19: ...ard during the setting time 3 4 3 Timer recording Click SYSTEM SET ADVANCED Record to TF SD to access it Figure 23 For example set up recording time from Mon 8 30 to 9 30 as figure 23 Tips Please insert TF SD card when the device power off to avoid damage the TF SD card or not to read it from the device 3 4 4 E mail Setting Click SYSTEM SET ADVANCED Email to access it ...

Page 20: ...il Please click Test to test if the E mail setting is successful 3 4 5 FTP setting Click SYSTEM SET ADVANCED FTP to access it Figure 25 Before to use FTP function please get the following ready 1 FTP user name and password 2 FTP storage space and the authority 3 Create sub category to store the video or pictures Notice The password should not be special character otherwise the camera can t identif...

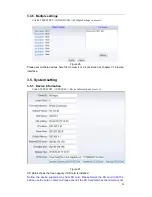
Page 21: ... at chapter 3 1 browse interface 3 5 System setting 3 5 1 Device information Click SYSTEM SET SYSTEM Device Information to access it Figure 27 SD status shows the free capacity if SD card is installed Notice the device supports max 32G SD card Please format the SD card to FAT32 before use the card on camera Please check if the SD Card matches the camera or not ...

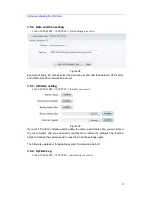
Page 22: ... Initialize setting Click SYSTEM SET SYSTEM Initialize to access it Figure 29 If you click Confirm of Backup setting data the camera will create a file you can store it to your computer and you can directly call this file to restore the settings The function helps to manage the cameras and no need to do all the settings again The firmware upgrade is for updating system firmware and web UI 3 5 4 Sy...

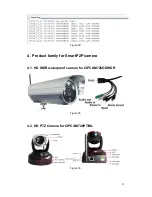
Page 23: ...22 Figure 30 4 Product family for SmartP2P camera 4 1 HD WDR waterproof camera for CIPCAM720ODWDR Figure 35 4 2 HD PTZ Camera for CIPCAM720PTIWL Figure 36 ...

Page 24: ...23 4 3 Outdoor HD Waterproof PTZ camera CIPDCAM720OD Figure 37 4 4 HD Waterproof Camera CIPCAM720OD Figure 39 ...

Page 25: ...does not work Is there a backup server If the DDNS server does not work please use a third party server or paid domain i e 3322 org 6 The video cannot be viewed in IE and cannot be saved also Please reset the saving location for the video file If you cannot view it in IE explorer please check to see if the control file has been downloaded and installed If still not please clear your browser 7 The ...

Page 26: ...s manual may be different with your using camera if you have any questions of the manual please contact our technical support 2 This manual will be updated periodically the company reserved the right without prior notice ...

Page 27: ...ceptronic net download php GPL License Agreement GPL may be included in this product to view the GPL license agreement goes to http download conceptronic net GPL GPL pdf For GNU General Public License GPL related information please visit http www conceptronic net download php Enjoy the use of your Conceptronic IP Camera ...

Reviews: