background image

CONDRE AutoTracer NAS  

••••

 User’s and Installation Manual   

09/26/02 


(18 of 22) 


Figure 17  Export Page 

 
The first step of an export operation is to define a root path for the export operation.  The contents of this folder and any folders under 
are candidates to be written to a CD/DVD volume. 
 

 Enter the UNC (Universal Naming Convention) for the path.  A UNC is composed of two (2) back slashes “\\” followed by the 

name of the target computer, followed by a path to the folder of interest. 
 
For example, the previous figure shows the string “

\\recon\temp

” (without the double quotes) indicating that the export operation 

should take files from the “

temp

” folder on the machine named “

recon

”.  The owner of the machine must have assigned access 

rights to the “

ATNAS_BACKUP

” account for the specified folder. 

 
At this time, the “Username” and/or “Password” fields do not have to be filled. 
 

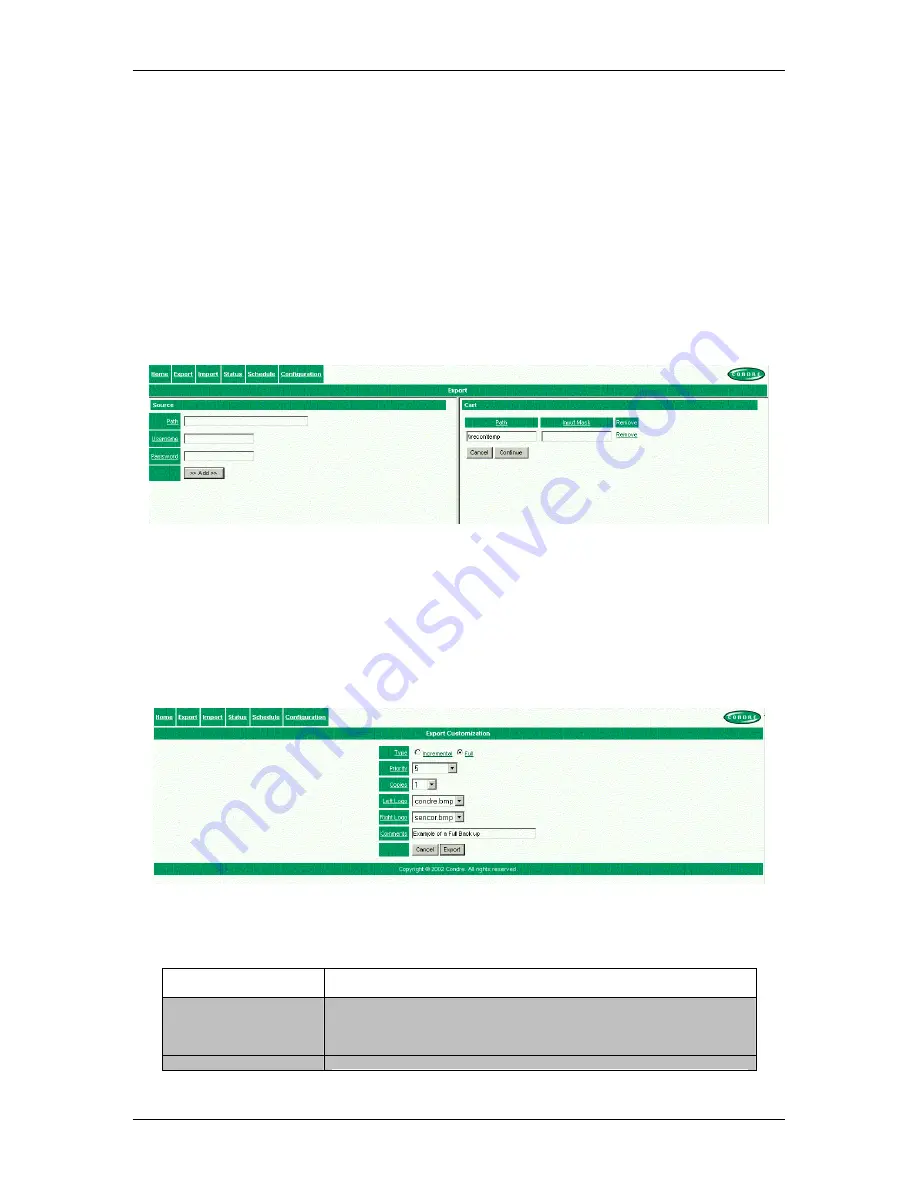
 When done, click on the “Add” button on the left pane of the window.  The right pane is updated with the selection.  This is 

illustrated on the following figure. 


Figure 18  Export Add 

 
You may remove the item from the Cart on the right pane by clicking on the “Remove” link. 
 
You may specify additional paths on the left pane.  This allows the export operation to include data from one (1) or more folders and 
one (1) or more machines. 
 

 When done with the selections click on the “Continue” button.  If the entire order needs to be canceled, click on the 

“Cancel” button on the right pane of the window. 

 
After the “Continue” button has been clicked, the following window is displayed. 


Figure 19  Export Customization 

 
The “Export Customization” screen is used to specify additional parameters for the export operation.  The following objects on the 
screen are used to specify the following: 
 

Object 


Description 


Backup Type 
 

Describes the operation to perform.  Click the desired radio button to perform a full 
or an incremental backup.  In case of exporting data, the “Full” radio button should 
be selected. 
 

Priority 

The priority for the export operation may be specified.  If multiple requests are 

Summary of Contents for AutoTracer NAS

Page 1: ...CONDRE AutoTracer NAS User s and Configuration Manual Thursday September 26 2002 Version 1 000...

Page 2: ...or any direct indirect special incidental or consequential damages in connection with the use of this document or referenced hardware or software The information described in this document may be prot...

Page 3: ...ectrical Power 5 2 2 Powering Up the Appliance 5 2 3 Powering Down the Appliance 5 3 CONFIGURATION 9 3 1 Setting the TCP IP Address 9 3 2 Creating the Backup Account 15 4 OPERATIONS 15 4 1 Manual Back...

Page 4: ...le to access folders on different computers Please ask your network administrator to create such account following the policies of your network environment FireWire An interface that may be used to at...

Page 5: ...abel printer power supply to a wall outlet Make sure the power requirements match Plug the power supply for the stacker to the back of the label stacker Plug the input cord for the stacker power suppl...

Page 6: ...ppliance The 216 17 32 188 TCP IP address used in this example is the default value for the appliance The proper address for the AutoTracer NAS appliance must be specified Select a Size for the window...

Page 7: ...CONDRE AutoTracer NAS User s and Installation Manual 09 26 02 7 of 22 Figure 2 Log On Screen After the OK button is clicked the following window is displayed...

Page 8: ...reen may look somewhat different depending on the version of the operating system used in the appliance From the Start menu select Start Shutdown The Shutdown dialog box appears The following figure i...

Page 9: ...mask and other pertinent information may be obtained from the network administrator at the installation site Have this information ready before starting to configure the appliance The second step is...

Page 10: ...w will be enclosed within the browser unless the Full screen option is selected Click on the Connect button The following figure illustrates the previously listed steps Figure 6 Tsweb Setup The applia...

Page 11: ...CONDRE AutoTracer NAS User s and Installation Manual 09 26 02 11 of 22 Figure 7 Log On Screen After the OK button is clicked the following window is displayed...

Page 12: ...ing system used in the appliance We now need to get to the window used to configure the Local Area Network LAN The following steps illustrate how to get to such window From the Start menu select Start...

Page 13: ...The following figure illustrates the contents of the terminal server window at this point in time Figure 10 Network and Dial up Connections Window Select the Local Area Connection icon from the Networ...

Page 14: ...Local Area Connection Properties window appears The following figure illustrates the Local Area Connection Properties window Figure 12 Local Area Connection Properties On the previous window select t...

Page 15: ...nce To reboot the appliance follow these steps Select the Start Shutdown menu item The Shutdown Window window appears Select the Restart option from the drop down menu Click the OK button The applianc...

Page 16: ...appliance No additional hardware or software is needed This section describes how to set up a schedule to perform an automated backup of a folder on a remote machine 5 GUI The GUI for AutoTracer NAS...

Page 17: ...ge after a new logo has been added Figure 16 New Logo Added 5 2 Export The export operation is used to take one 1 or more files and export them to one 1 or more DC DVD volumes If this is the desired o...

Page 18: ...the window The right pane is updated with the selection This is illustrated on the following figure Figure 18 Export Add You may remove the item from the Cart on the right pane by clicking on the Remo...

Page 19: ...lume Comments A line of comments that will be printed on all the volumes exported by this operation Cancel The cancel button cancels the export operation This is the last time the user is prompted to...

Page 20: ...twork Access permissions must be set prior to the operation If in doubt please consult with your network administrator The following figure illustrates the Import window Figure 22 Import Window The wi...

Page 21: ...Schedules are used to export data The reason they are not implemented to import data is due to current hardware limitations The input bin is used for both import and export operations A schedule may...

Page 22: ...al 09 26 02 22 of 22 The following figure illustrates a queue with a single order Figure 26 Status with Order After an order is completed the entry is removed from the screen The entry is removed if t...

Reviews: