Step 1.
2
Safe Installation
To reduce the risk of electrocution, drowning, entrapment, falls, or other
serious injury or death:
Check building codes/permitting.
Consult your local Building Department before installation of your pool
and equipment. Pool/equipment installation must comply with the codes of the authority having jurisdiction
and may require permits (e.g., building, plumbing, electrical, zoning, etc.).
Use for intended purpose only
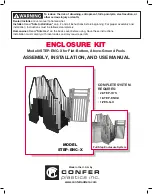
• Kit and assembled product must consist of two STEP-1X’s, one PES-G-X, and this enclosure kit.
• Use only as a swimming pool step system.
• This system is designed and manufactured for a specific pool wall height and/or deck of the pool -
check product specification and the height of your pool.
Check that you have all required parts.
Check the contents of the carton with the Parts list for this
system. All parts and hardware are required. If any parts are missing,
DO NOT attempt to assemble or
install the system.
Instead, call Toll Free U.S. - 800-635-3213 or visit our web site at www.conferladders.
com for assistance.
Select an appropriate location
- The system must be located on level, solid base and in a location that
will be in full view of competent adult supervision when in use.
Follow all instructions
• For stable, correct assembly and installation, all instructions must be followed completely and in the
sequence shown.
• Follow the manufacturer’s recommendations for the safe use of all hand tools and equipment used
during installation.
Cordless drill only - no corded drills near pool.
Use a cordless drill for assembly and installation. To
reduce the risk of electrocution, NEVER use a corded drill in or around a pool.
Lift safely.
When lifting awkward or heavy loads, have another person help you.
Double check after installation
• Before using the product, after assembly and installation, go over the instructions and procedures again
to make sure nothing has been overlooked.
• Make sure that safety labels are installed and legible.
PARTS LIST
Qty. Description
(Carton 1 of 2)
1 Connecting Step
2 Connecting Rail
2 Gate Adapter Post
2 Set of Pickets
(single, double, triple)
The following parts are supplied
in the gate carton:
(Carton 2 of 2)
1 Gate Installation Manual
2 Gate w/hardware & padlock
1 Hinge Mounting Post
1 Latch Mounting Post
HARDWARE
Qty. Description
40 #10x1-1/4” Screw
12 #10 x 3/4” Screw
12
Protective Cap
NEEDED FOR ASSEMBLY
• Pliers
• Mallet (or Hammer) and block of wood
• Drill (cordless)
• Phillips Bit
• Second person to assist
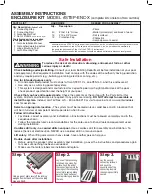
Assemble the two STEP-1X units as per their instructions, but do not attach the mounting brackets to the
posts (as described in Step 9). These parts will not be used. Also, do not attach the handrails to
the posts (as described in Step 11 of the STEP-1X instructions).
For best installation results, the outside unit should be placed on flat patio blocks on level ground.
ASSEMBLY INSTRUCTIONS
ENCLOSURE KIT MODEL #STEP-ENC-X
(complete kit consists of two cartons)
Step 2.
SAVE
Using a pair of pliers twist off the locking
wedges from both ends of the connecting
step and SAVE.
Lay one of the connecting
rails down on a clean, flat
surface. Push the end of
the connecting step into the
openings of the connecting
rail until fully seated. Make
sure the “tread” surface of
the step is facing up towards
the rails.
Lay the second
connecting rail down
and push the
opposite end of the
connecting step into
the openings until fully
seated.
Step 3.


