Digital calliper COXT710351
Operating and safety instructions
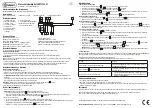
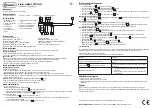
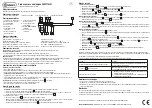
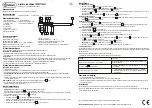
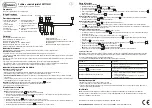
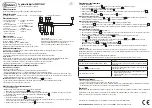
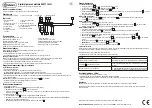
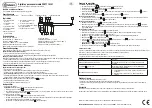
Part description
1. Graduated measure-
ment surfaces
2. Inner measuring jaws
3. Inch/mm key
4. Locking screw
5. LCD display
6. Depth measuring
blade
Intended use
For private use only. Not for commercial use.
Package contents
1 x digital calliper gauge
Technical data
Unit of measurement: mm, inch
Measuring range: 0 - 150 mm/ 0 - 6"
Resolution: 0.01 mm / 0.0005"
Accuracy: 0 - 200 mm/ 0 - 8" ± 0.03 mm/ 0.001"
Maximum measuring speed: 1.5 m/s, 60"/s
Measuring system: contactless, linear CAP measuring system
OFF
ON
ZERO
mm/inch
mm
1 2
4
11
10
9
8
7
6
5
3
Safety instructions
Please read the operating instructions before use! Please keep the operating instructions in a safe place!
Caution! Risk of injury!
• The product should not be used by children. This product is not a toy!
• Never leave children unsupervised with the packaging material. There is a risk of suffocation.
Danger of death!
Batteries can be swallowed, which can be life-threatening. Seek medical attention immediately if a battery is swallowed.
• Never expose the product to high temperatures and humidity, otherwise the product may be damaged.
• Do not put the calliper under tension. Otherwise, the chip in the calliper may be damaged.
• Keep the calliper clean and dry. Liquid can damage the calliper.
1 x battery 1.5 V LR44
Display: LCD display
Operating temperature: 0°C ~ +40°C
Influence due to humidity: insignificant within 0% to
80% relative humidity
Battery: 1.5 V LR44 (included in delivery)
Safety instructions for batteries
Caution! Danger of explosion!
• Never recharge batteries!
• Remove a depleted battery from the product immediately. There is an increased risk of leakage!
• Pay attention to the correct polarity (+ and -) and use only the specified battery type.
•
Wear protective gloves!
Leaking or damaged batteries can cause burns if they come into contact with the skin.
• Avoid contact with skin, eyes and mucous membranes. In case of contact with battery acid, rinse the affected area with plenty
of water and/or consult a doctor!
Warning!
Turn the product OFF before inserting the battery (LCD display is off).
• Remove the battery from the unit if it will not be used for an extended period.
• Do not short-circuit the connection poles under any circumstances.
5
Before commissioning
1. Insert / replace battery
Note:
Low battery warning by flashing indicator.
• Slide open the battery compartment cover and remove the old battery.
• Insert a new battery into the battery compartment, observing the polarity (+ and -). Make sure that the positive pole is facing
outwards and push the battery compartment cover shut again.
2. Prepare calliper gauge
• Loosen the locking screw so that you can move the calliper.
• Clean all measuring surfaces and the calliper bar with a dry cotton cloth. Otherwise, incorrect measurement results may
occur, for example due to humidity.
• Check all buttons, switches and the LCD display for proper reactions.
8
8
4
5
Putting the device into operation
1. Use calliper gauge
• Loosen the locking screw by turning it anticlockwise.
• Push the outer measuring jaws /inner measuring jaws together.
• Turn on the LCD display by pressing the ON / OFF button .
• Press the inch/mm button to set the unit of measurement (inch or mm) you want to use. Either „mm“ or „inch“ appears in
the LCD display .
• Press the zeroing (ZERO) button to reset the LCD display to zero.
Measuring the object from the outside:
• Push the outer measuring jaws apart by turning the adjusting wheel anticlockwise outwards. Place the outer measuring
jaws on the object to be measured.
Measuring the object from the inside:
• Place the inner measuring jaws from the inside against the object to be measured.
• Turn the adjusting wheel anticlockwise outwards. Push the inner measuring jaws apart until they touch the object on
both inner sides. Be careful not to damage the object to be measured by applying too much pressure.
Measuring the depth of an object:
• Slide the depth gauge blade out of the calliper.
• Place the depth measuring blade against the object to be measured until it touches the surface (e.g. inside a hole).
• Slide the body of the calliper down until you feel resistance.
• Be careful not to damage the depth measuring blade or the object to be measured by applying too much pressure.
• The LCD display now shows the measurements.
• After taking the measurement, push the outer measuring jaws / inner measuring jaws back together by turning the
adjusting wheel clockwise inwards.
• Switch the LCD display off again by pressing the ON / OFF button .
Note:
After approx. 5 minutes, the LCD display switches off automatically.
• Tighten the locking screw again by turning it clockwise until you feel resistance.
2. Troubleshooting
The unit contains sensitive electronic components. Therefore, it is possible that it may be disturbed by radio transmitting equipment
in the immediate vicinity. If faulty indications appear in the display, remove such devices from the vicinity of the unit.
Electrostatic discharges can lead to malfunctions.
• In case of such malfunctions, remove the battery for a short time and reinsert it.
4
2
2
2
3
5
5
9
5
5
5
6
6
6
7
7
11
11
11
10
7
2
10
5
4
11
Maintenance and cleaning
• Always keep the calliper clean and dry.
• Clean with a dry cotton cloth. Do not use solvents.
• Switch off the display when not in use to save battery power. When not in use for a long time, remove the battery and store it
separately.
Disposal
When your device has reached the end of its service life, do not throw it in the household rubbish, but dispose of it properly.
Defective or used batteries must be recycled in accordance with Directive 2006/66/EC. Return batteries and/or the appliance via the
collection facilities provided.
You can find the declaration of conformity on our website www.conmetallmeister.de
Conmetall Meister GmbH ·
Hafenstraße 26
·
29223 Celle
·
GERMANY
·
www.conmetallmeister.de
7. Adjusting wheel for measuring
jaws
8. Battery compartment cover
9. Button for zeroing (ZERO)
10. ON/OFF button (ON/ OFF)
11. Outer measuring jaws
1 x storage box
1 x instruction manual
Problem:
Solution:
Every second, 5 digits jump simultaneously.
The battery voltage is below 1.45 V. Remove cover and replace
battery.
The LCD display does not continue counting.
Faulty circuit. Replace battery, put it back in the compartment
after 30 sec.
No display on the LCD screen.
1. Poor battery contact. Check battery compartment, clean if
necessary.
2. Battery voltage is below 1.3 V. Replace the battery with the
correct battery.
5

