Getting Started
Getting Started
10
2.4
Unpacking and Installing
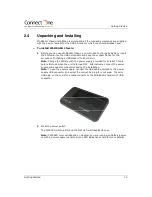
Wi-REACH Classic installation is simple and all the required accessories are supplied
with the device (except for the USB 3G modem which you should already have).
➣
To install Wi-REACH Classic:
1
Before you can use Wi-REACH Classic, you will need to charge its battery, insert
the SIM card into the USB 3G modem and keep the modem handy for the
procedure "Installing a USB Modem" further down.
Note
: Charge the battery with the power supply provided for at least 3 hours
before first use when the unit is turned OFF. Alternatively, connect the power
supply and keep this connection during the installation.
Note
: To use the power supply, connect the USB cable provided to the power
supply USB connector and select the correct AC plug for your area. The mini
USB plug on the end of the cable connects to the Wi-REACH Classic mini USB
connector.
2
Press the power switch.
The PWR LED will turn ON and the NET LED will flash BLUE once.
Note
: PWR LED color will depend on whether you are running on battery power,
or with a power supply connected. (see LED indications chart for more details)


