NOTES:
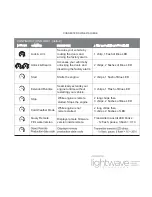
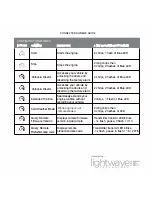
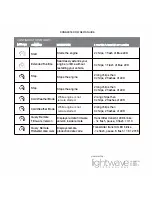
1. All functions must be enabled by an Authorized Dealer during installation to
be functional on remote
2.
= Press & release button
3.
= Press & hold button for the amount of seconds indicated in the center of icon.
4. Coma (,) between icons = Press buttons one after the other
5. Timeout between each button press = 3 seconds
This Single button transmitter can be configured in 3 different way to change it’s behaviour with your vehicle.
To configure your transmitter, please follow the steps below.
1- Choose which configuration mode is desired from the next pages of this guide.
2- Once the Configuration mode is chosen, Press and hold the button on the transmitter for at least
10 seconds. The White LED will blink once + 1 chirp.
3- Then the White LED will blink 1 or 2 or 3 times to display the current transmitter configuration mode.
(you now have 10 seconds to proceed to Step 4)
4- Press and Release the button until the White LED blinks the desired configuration mode.
5- When the White LED is blinking the desired selection, Press and Hold the transmitter button for 10 seconds.
After 10 seconds, the White LED will blink the 1 or 2 or 3 blinks depending on the saved configuration mode.
6- Release the transmitter button.
Note: To exit programming at any time, do not press transmitter button for at least 10 seconds. Also removing
the batteries will not alter the programmed configuration mode.
COMMAND
S & CONFIRMATIONS
In order to get the most out of your Connected RFK2101 remote, please take a moment to get
acquainted with the following commands and confirmations below:
5s


