ES-U-1001-R10(R100) Premier Gold USB-RS232 Adapter cable Data Sheet
Version 1.1
Document Reference No.: CP_000057 Clearance No.: CP#047
Copyright © Connective Peripherals Pte Ltd
12
7)
Steps 2 through 6 will repeat. The first time installs the basic USB Serial Converter in the USB
device tree. The second time installs the Virtual COM Port layer in the Ports tree and assigns the
COM port number.
8)
When both portions of the device driver have been installed successfully, the following message
will appear, indicating that the device is ready.
Figure 3-6 Hardware Ready
COM Port Assignment
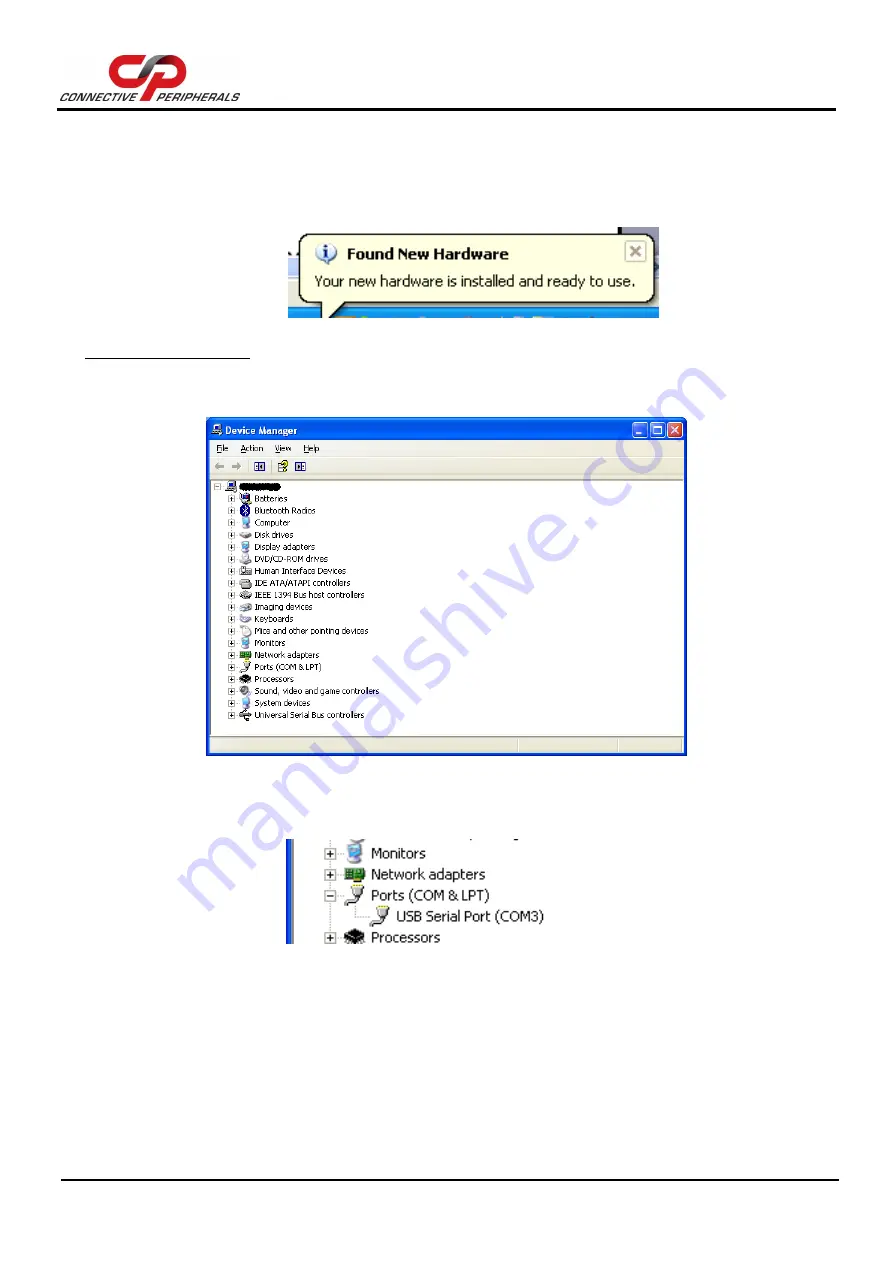
Next, to determine which COM port has been assigned, open the Windows Device Manager from the
System Control Panel.
Figure 3-7 Device Manager
Click on the Plus “+” sign next to the Ports tree to list the available COM port. You will see “Connective
Peripherals USB COM Port”, followed by a COMn assignment. In the figure below, the ES-U-1001-R10 is
assigned to COM3.
Figure 3-8 COM Port Assignment
Use this COM port number with your application software in order to access the ES-U-1001.
If an application requires use of a different COM port number, the assignment may be changed through
the Advanced Driver Options settings.
From the Device Manager listing above, right-click on the Connective Peripherals USB COM Port and
select Properties.


