WORK
SCRUBBING WITH DRYING
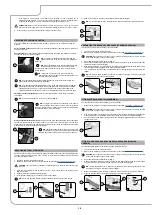
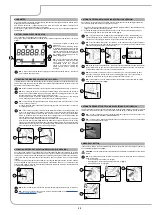
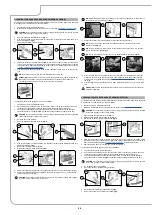
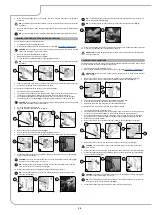
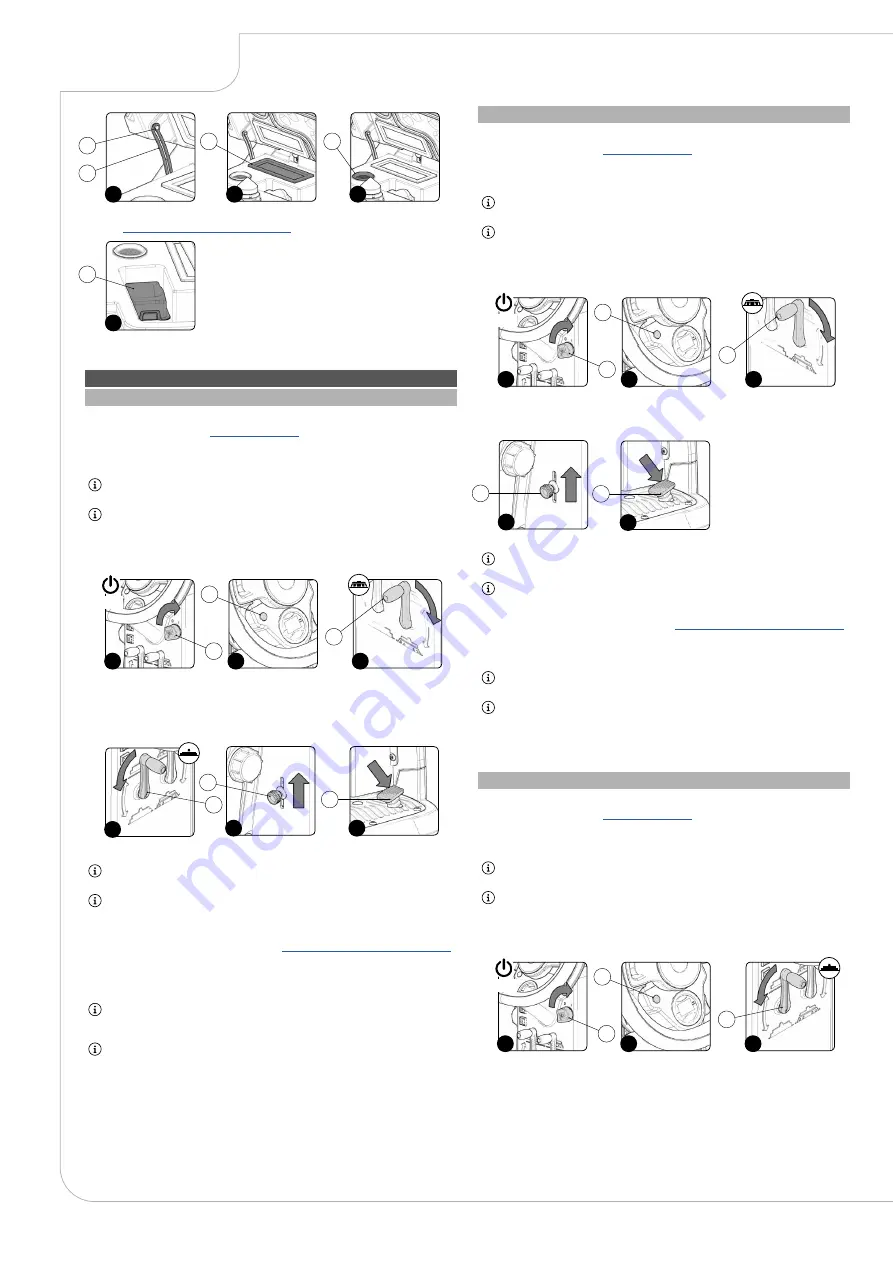
To carry out “SCRUBBING AND DRYING” tasks, proceed as follows:
1. Make all the checks listed in “
”.
2. Sit on the driver’s seat.
3. Insert the key (1) into the main switch on the control panel. Bring the main switch to its "I" position
by turning the key (1) a quarter turn clockwise (
Fig.1
).
N.B.
: As soon as the machine turns on, the control board will perform a diagnostics procedure,
during which the red LED indicator (2) on the control panel (
Fig.2
) will remain on.
N.B.
: If the control board's diagnostics procedure returns a positive outcome, the red LED
indicator (2) on the control panel (
Fig.2
) will turn off, and an acoustic signal will sound indicating
that the work operations may be initiated.
4. Lower the brush head body by turning the brush head control lever (3) on the rear part of the
steering column (
Fig.3
).
5. Lower the squeegee body by turning the squeegee control lever (4) on the rear part of the steering
column (
Fig.4
).
6. Check to make sure that the detergent solution tap is completely open. If this is not the case, adjust
the lever (5) on the left-hand side of the steering column (
Fig.5
).
7. Press the drive pedal (6) (
Fig.6
) to begin moving the machine.
N.B.
: Once the drive pedal is pressed, the brush head body and the squeegee body will begin
to descend into their working positions.
N.B.
: Once the brush head body and the squeegee body have reached their working positions,
the relative motors will enter into function, and the solenoid valve will dispense the detergent
solution.
8.
During the first few metres, check that the detergent solution coming out is suitable for the task in
hand. If it isn't, adjust it after reading the section "
REGULATING THE DETERGENT SOLUTION
The appliance will now begin to work with full efficiency until the battery is flat or until the detergent
solution has finished. During the first few metres, check that there is sufficient solution and that the
squeegee is drying correctly.
N.B.
: If the drive pedal is released during the scrubbing/drying operation, the brush motor and
the solenoid valve will be deactivated, and the vacuum motor will continue to function for a few
seconds in order to ensure that all the liquid present in the vacuum hose is extracted.
N.B.
: when filling the solution tank, it is good practice to empty the recovery tank using the
special drainage hose.
2
3
1
1
2
3
ON
4
4
6
5
5
6
SCRUBBING WITHOUT DRYING
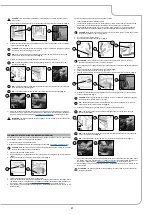
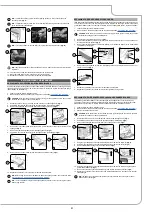
To carry out “SCRUBBING WITHOUT DRYING” tasks, proceed as follows:
1. Make all the checks listed in “
”.
2. Sit on the driver’s seat.
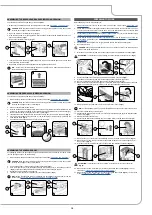
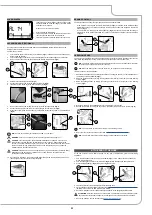
3. Insert the key (1) into the main switch on the control panel. Bring the main switch to its "I" position
by turning the key (1) a quarter turn clockwise (
Fig.1
).
N.B.
: As soon as the machine turns on, the control board will perform a diagnostics procedure,
during which the red LED indicator (2) on the control panel (
Fig.2
) will remain on.
N.B.
: If the control board's diagnostics procedure returns a positive outcome, the red LED
indicator (2) on the control panel (
Fig.2
) will turn off, and an acoustic signal will sound indicating
that the work operations may be initiated.
4. Lower the brush head body by turning the brush head control lever (3) on the rear part of the
steering column (
Fig.3
).
5. Check to make sure that the detergent solution tap is completely open. If this is not the case, adjust
the lever (4) on the left-hand side of the steering column (
Fig.4
).
6. Press the drive pedal (5) (
Fig.5
) to begin moving the machine.
N.B.
: Once the drive pedal has been pressed, the brush head body will begin to descend into
its working position.
N.B.
: Once the brush head body has reached its working position, the brush gear motors will
enter into function and the solenoid valve will begin to dispense the detergent solution.
7.
During the first few metres, check that the detergent solution coming out is suitable for the task in
hand. If it isn't, adjust it after reading the section "
REGULATING THE DETERGENT SOLUTION
".
The appliance will now begin to work with full efficiency until the battery is flat or until the detergent
solution has finished. During the first few metres, check that there is sufficient solution.
N.B.
: If the drive pedal is released during the scrubbing without drying operation, the brush
motor and the solenoid valve will be deactivated.
N.B.
: when filling the solution tank, it is good practice to empty the recovery tank using the
special drainage hose.
2
3
1
1
2
3
ON
5
4
5
5
DRYING
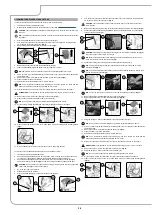
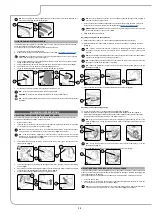
To carry out “DRYING WITHOUT SCRUBBING” tasks, proceed as follows:
1. Make all the checks listed in “
”.
2. Sit on the driver’s seat.
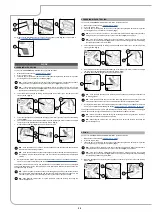
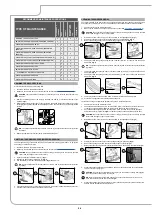
3. Insert the key (1) into the main switch on the control panel. Bring the main switch to its "I" position
by turning the key (1) a quarter turn clockwise (
Fig.1
).
N.B.
: As soon as the machine turns on, the control board will perform a diagnostics procedure,
during which the red LED indicator (2) on the control panel (
Fig.2
) will remain on.
N.B.
: If the control board's diagnostics procedure returns a positive outcome, the red LED
indicator (2) on the control panel (
Fig.2
) will turn off, and an acoustic signal will sound indicating
that the work operations may be initiated.
4. Lower the squeegee body by turning the squeegee control lever (3) at the rear of the steering
column (
Fig.3
).
2
3
1
1
2
3
ON
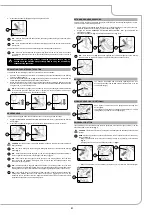
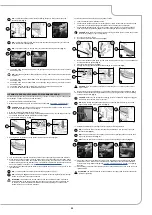
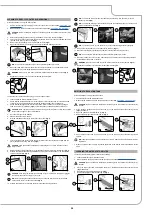
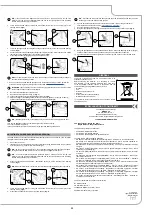
22.
Make sure the filter-strainer (17) is correctly connected and is clean (
Fig.16
). If it isn't, clean it
CLEANING THE RECOVERY TANK FILTERS
”).
14
15
13
14
13
15
16
16
17
20


