Intended use
The pump is suitable for use e.g. in an indoor fountain, a small indoor pond or a mini water feature. Due to its
construction, it can also be used in a model railroad system to pump water for a river course.
Always observe the safety instructions and all other information included in these operating instructions!
Any other use, than that described above, could lead to damage to this product and involves a risk for short
circuits,
fi
re, electric shock, etc.
This product complies with the applicable national and European requirements. All names of companies and
products are the trademarks of the respective owners. All rights reserved.
Contents
• Indoor fountain pump
• Operating instructions
Safety Instructions
The warranty will be void in the event of damage caused by failure to observe these safety
instructions! We do not assume any liability for any resulting damage!
We shall not accept liability for damage to property or personal injury caused by incorrect
handling or non-compliance with the safety instructions! In such cases, the warranty will
be null and void.
a)
General
• The unauthorised conversion and/or modi
fi
cation of the product is not permitted for safety and
approval reasons (CE).
• The product is not a toy. Devices operated using mains voltage do not belong in the hands of
children. Therefore, be especially careful when children are around. Use the product where it
is out of the reach of children.
• The pump is designed according to Protection Class II and Protection Type IPx8. Use only a
proper outlet of the public mains as a voltage/current source for the pump.
• In commercial institutions, the accident prevention regulations of the Employer’s Liability
Insurance Association for Electrical Systems and Operating Facilities are to be observed!
• Do not leave packaging material carelessly lying around, since it could become a dangerous
plaything for children.
• Handle the product with care; it can be damaged by impacts, blows, or accidental falls, even
from a low height.
• If you have any questions that are not answered in these operating instructions, please con-
tact our technical support centre or consult a professional. Please consult a specialist if you
have any doubts regarding the use or safety of the product.
b)
Operation
• The mains socket at which the pump is connected must be easily accessible.
• The mains plug must not get damp or wet. When placing the pump, make sure that the water
does not run on the mains cable in the direction of the plug; the mains cable must form a drip
loop.
There is a life-threatening hazard through an electric shock!
• The pump may be connected to and operated on only a mains outlet that is connected through
a pre-switched earth leakage circuit breaker (ELCB) with a trigger current of max. 30 mA.
• Use in swimming pools, bathtubs or showers is not permitted.
• The product may be used only indoors. It is not suited for outdoor use.
• Do not pull the power plug from the mains socket by pulling on the cable.
• Make sure that the mains cable is not pinched or damaged by sharp edges.
• If the pump or power cord is damaged, do not touch it; there is danger to life from electric
shock!
First switch off the mains voltage to all poles of the mains socket to which the pump is con-
nected (e.g. switch off at the corresponding circuit breaker or remove the safety fuse, then
switch off at the ELCB).
Then you can remove the mains plug from the mains socket.
Do not use the pump any longer and dispose of it in an environmentally-friendly manner. A
damaged mains cable cannot be replaced!
• The pump is not suitable for dry runs; it will be destroyed after a short time of running dry-loss
of warranty. Operate the pump only when it is fully submerged under water.
• Only clear water is permitted as the liquid to be pumped (tempe5.....+35 °C). Never
use other liquids (e.g. salt water, gasoline, heating oil, chemicals, solvents or foodstuffs).
Connection and Getting Started
Please consult the chapter “Safety Instructions”.
Secure a suitable hose at the outlet connection, if necessary. Ensure that the hose is stable and cannot work
itself loose. Secure the hose, for example, with a cable tie.
Set the pump in the water, e.g. in an indoor fountain. The pump must be submerged completely. Move the
pump around somewhat so that the air in the pump can escape.
Depending on the operating location, the pump needs to be attached e.g. with a cable tie so that it cannot
move itself. Make sure that the intake openings of the pump are not covered.
During operation, you may need to use a suitable underlay (e.g. around the outside of the indoor
fountain), so that any water that sprays out cannot cause any damage to furniture or
fl
oors.
To start the pump, plug the mains plug into a mains socket.
The pump will start up immediately after connection.
If little or no water is pumped, there is still some air in the pump. Wait a few seconds, or unplug the pump
brie
fl
y and then plug it back in.
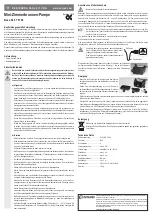
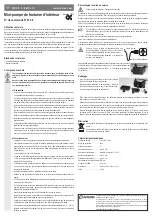
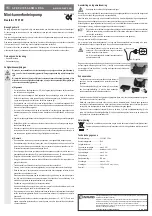
When you do this, it is imperative that you make sure
that the mains cable forms a drip loop. This prevents
the water from being able to
fl
ow along the mains cable
toward the mains outlet.
Failure to observe this causes a danger to life from elec-
tric shock!
The desired output can be adjusted with the valve on the front of the pump. If
you move it in the “+” direction, the output is increased. If you move the valve in
the “-” direction, the output is decreased.
Cleaning
• Before you take the pump out of the water for a cleaning,
pull the mains plug out of the mains socket.
• Remove the intake cover (2) from the burner pump (1).
Then the fan wheel cover (3) with the output valve in it can
be pulled out.
Finally, you still need to pull out the fan wheel (this is held onto by the motor magnets, so it does not fall
out by itself).
• Clean all parts carefully under clear lukewarm water. Do not use any aggressive chemicals or cleaning
agents. Algae or other heavy soiling can be removed carefully with a brush (e.g. a toothbrush), but do not
use force.
• After cleaning, place the fan wheel (4) back in the pump (1). Insert the fan wheel cover (3) in the pump.
Finally, clip the intake cover (2) on the pump; in so doing, pay attention to the correct position to the output
valve.
Disposal
Electrical and electronic devices must not be disposed of as domestic waste!
Please dispose of the product when it is no longer of use according to current statutory require-
ments.
Technical data
Operating voltage ........................230 V/AC, 50 Hz
Protection type .............................IP68
Protection class ...........................II
Power consumption .....................max. 2.5 W
Output ..........................................adjustable, approx. 60 - 120 L/h
Output height ...............................max. 0.4 m
Submersion depth .......................max. 0.4 m
Hose connection ..........................Ø 8 mm
Cable length ................................approx. 1.5 m
Dimensions ..................................58.5 x 42 x 36 mm (L x W x H)
Weight .........................................180 g
O P E R A T I N G I N S T R U C T I O N S www.conrad.com
Mini Indoor Fountain Pump
Item no. 57 01 00
Version 10/13
These operating instructions are a publication by Conrad Electronic SE, Klaus-Conrad-Str. 1,
D-92240 Hirschau (www.conrad.com).
All rights including translation reserved. Reproduction by any method, e.g. photocopy, micro
fi
lming,
or the capture in electronic data processing systems require the prior written approval by the editor.
Reprinting, also in part, is prohibited.
These operating instructions represent the technical status at the time of printing. Changes in
technology and equipment reserved.
© Copyright 2013 by Conrad Electronic SE.
To pump
Drip loop
2
3
1
4


