background image


Before you install the amplifier 


Unpacking


At more than 200 pounds each, the Hercules II amplifier is too heavy for one person to lift safely. Four strong 
people are required to lift each amplifier and to move it from place to place. 
 
Likewise, do not place this amplifier on surfaces that cannot safely support their weight. Lightweight furniture 
and equipment racks should not be used to support these amplifiers. 
 
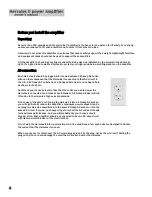
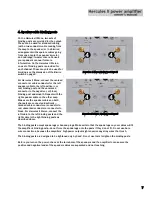
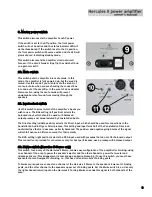
Lift the amplifier by hooking your fingers under the side edges, as indicated by the arrows in the photos at 
right. It’s a good idea to wear soft gloves to protect your fingers and help avoid fingerprints on the amplifier.  
 

AC connection 

 
Each Hercules II should be plugged into its own dedicated 20-amp AC outlet, 
with no other component but the Hercules II connected to that AC circuit. In 
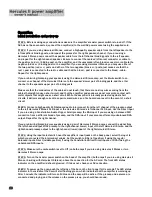
the U.S., all 20-amp AC outlets have a T-shaped hole next to an I-shaped hole, 
as shown in the photo. 
 
Confirm at your home’s electrical box that the outlet you use to power the 
Hercules is connected to a 20-amp circuit breaker. A 15-amp breaker will trip 
often due to the Hercules’ high current demands. 
 
Do not use a “cheater” cord to plug the Hercules II into a 15-amp AC socket—
you will significantly reduce the amplifier’s maximum power output. Also, do 
not plug two Hercules amplifiers into the same 20-amp AC socket or into the 
same AC circuit. If you do, each amp will get only half the AC current it needs 
for maximum performance, and you will probably trip your home’s circuit 
breaker often. Each amplifier should be connected to its own 20-amp circuit 
with its own circuit breaker at the electrical box. 


Do not plug the Hercules II into a power strip or AC line conditioner—few such units are designed to handle 
the current that the Hercules II can pull. 
 
When you connect or disconnect the AC cord, always grasp it by the plug, not by the cord itself. Pulling the 
plug out by the cord can damage the cord, the AC socket, and/or the Hercules. 

Summary of Contents for Hercules II

Page 1: ......

Page 2: ...xcessive humidity The lightning flash with arrowhead within an equilateral triangle is intended to alert the user to the presence of uninsulated dangerous voltage within the product s enclosure that may be of sufficient magnitude to constitute a risk of electrical shock to persons The exclamation point within an equilateral triangle is intended to alert the user to the presence of important operat...

Page 3: ...l and following the simple steps outlined within you can ensure that your amplifier performs at its very best Contents Page Topic 4 Before you install the amplifier Unpacking AC connection Locations Speakers In the event of malfunction 6 Connections BAL input Direct input RCA input Speaker cable binding posts 20 amp IEC AC socket Trigger jack 8 Controls displays indicators Front power switch LED s...

Page 4: ...haped hole as shown in the photo Confirm at your home s electrical box that the outlet you use to power the Hercules is connected to a 20 amp circuit breaker A 15 amp breaker will trip often due to the Hercules high current demands Do not use a cheater cord to plug the Hercules II into a 15 amp AC socket you will significantly reduce the amplifier s maximum power output Also do not plug two Hercul...

Page 5: ... The Hercules II Mono and Stereo both have sufficient voltage and current to drive practically any loudspeaker made regardless of the speaker s impedance sensitivity or power rating However the Hercules II Stereo and especially the Hercules II Mono have enough power to damage some loudspeakers if used carelessly When you turn up the volume on your preamp do it gradually If you hear distortion crac...

Page 6: ...hat is in essence perfectly balanced The positive and negative going halves of the signal will exhibit near zero difference except for their polarity To select this input set the input switch to Direct middle position To remove the XLR plug push on the tab above the jack and pull the plug out 3 RCA input This input is provided as a convenience You can use it if you elect to feed the amplifier with...

Page 7: ...ble on the other amp Make sure the speaker cables on both channels are connected identically marked cable conductor or connector to red unmarked conductor or connector to black For Hercules II Stereo connect the left cable to the left binding posts and the right cable to the right binding posts as described above Hercules II Mono binding post layout Hercules II Stereo binding post layout The bindi...

Page 8: ...ft end of the bar and hold it for 3 seconds to turn the amp on and off Press and release the left side of the bar to activate and deactivate mute mode 8 Status indicator LED This LED shows if the amp is on or off and also indicates mute warm up and cool down modes Here are the LED modes SOLID RED Standby mode Amp is powered down but ready to use FLASHING RED Cool down mode Amp is powered off but c...

Page 9: ...tting middle position selects the Direct input which should be used for connections to the Constellation Audio Virgo or Altair preamp This setting and input form half of the Constellation Direct an audio interface that is in essence perfectly balanced The positive and negative going halves of the signal will exhibit near zero difference except for their polarity The RCA setting right position sele...

Page 10: ...lt in the event of a short circuit STEP 3 Connect a high quality XLR balanced audio interconnect from the left channel of the preamp output to the left Hercules II Mono s XLR input or the Hercules II Stereo s left channel XLR input Use the Direct input if you are using a Constellation Audio Virgo or Altair preamp the BAL input if you are using a balanced XLR connection from a different brand of pr...

Page 11: ...r s surface becomes dusty simply wipe it off with a soft dry cloth Do not spray cleaners on the surface To clean fingerprints from the surface of the amplifier spray a small amount of mild window cleaner such as Windex onto a soft dry cloth then use the cloth to remove the fingerprints Do not spray the cleaner directly onto the amplifier If dust collects inside any of the amplifier s vents vacuum ...

Page 12: ...inal set was functioning properly E Check the connections between the amplifier s and the speakers Make sure the speaker cables have not come loose If it has turn the power off on the amplifier s wait for the front LED to glow red then re install the cable F If you are using two Hercules II Stereo amps for biwiring make sure the input cables are connected to the right channel lower inputs of the a...

Page 13: ...laying but now only the right speaker is playing contact your Constellation Audio dealer Sound seems unfocused 1 Play a CD of typical pop vocals and sit in front of your speakers at an equal distance from both at least 8 feet away from each speaker If the vocals seem to come from between the speakers they are connected correctly Alternatively you can use the barking dog test from the Stereophile T...

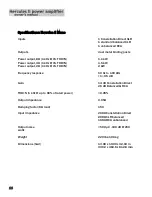
Page 14: ...er output 2Ω 1 kHz 1 THD N 2 kW Frequency response 10 Hz to 100 kHz 1 0 5 dB Gain 14 dB Constellation Direct 26 dB Balanced RCA THD N 1 kHz up to 90 of rated power 0 05 Output impedance 0 05Ω Damping factor 8Ω load 150 Input impedance 20KΩ Constellation Direct 20KΩ XLR balanced 10KΩ RCA unbalanced Output noise 500 µV 100 dB 250 watts Weight 220 lbs 100 kg Dimensions hwd 13 00 x 19 00 x 32 00 in 33...

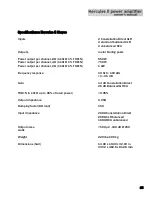
Page 15: ...Power output per channel 2Ω 1 kHz 1 THD N 1 kW Frequency response 10 Hz to 100 kHz 1 0 5 dB Gain 14 dB Constellation Direct 26 dB Balanced RCA THD N 1 kHz up to 90 of rated power 0 05 Output impedance 0 05Ω Damping factor 8Ω load 150 Input impedance 20KΩ Constellation Direct 20KΩ XLR balanced 10KΩ RCA unbalanced Output noise 500 µV 100 dB 250 watts Weight 220 lbs 100 kg Dimensions hwd 13 00 x 19 0...

Page 16: ...ve you many years of trouble free maintenance free service If you encounter any problems you cannot solve or have technical questions please contact your Constellation Audio dealer For more information about Constellation Audio products please visit our website www constellationaudio com ...

Reviews: