background image

43

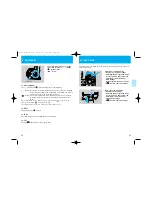
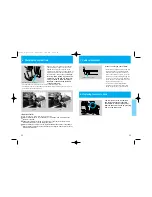
In the “CAF” (continuous autofocus) mode

Point the camera at the subject on which you want to focus, position
the subject within the focusing frame, then half-press the shutter but-

ton.

The focus is adjusted continuously while the shutter button is half-pressed.

Check that the focus display in the viewfinder is lit, then press the
focus button.

The focus is locked when the focus button is pressed.

Still pressing the focus button, position the camera to achieve the
desired composition. 

The focus is locked as long as the focus button is pressed.

Press the shutter button all the way in to take the picture.

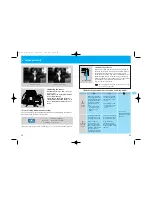
<Subjects that may cause problems for the autofocusing system>

For the subjects described below, the camera may not be able to focus auto-
matically and the “

” (focusing not possible) display may flash. In such cases,

either use the focus lock function to first focus on a different object at the same
distance as the subject or adjust the focus in the manual focus mode.

Extremely bright or extremely dark subjects.
Subjects which have little or no contrast.
When the sun or other strong light sources are within or near the focusing
frame.
When there are two or more subjects at extremely different distances within
the focusing frames.
A very small subject in relation to the focus frame.
Subjects with repeating patterns.
When the ambient light level is very low or an ND or polarizing filter is used.

42

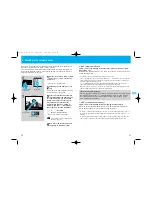
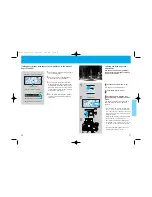
<Focus lock>

If the subject is not within a focusing frame with the desired composition, use
the procedure described below to lock the focus on that subject.

In the “SAF” (single autofocus) mode

Point the camera at the subject on which you want to focus, position
the subject within a focusing frame, then half-press the shutter button.

The focus is adjusted automatically. When the subject is in focus, the focus dis-
play (“

”) lights in the viewfinder and the focus is locked at that position.

Still half-pressing the shutter button, position the camera to achieve
the desired composition, then press the shutter button all the way in to

take the picture.

• The focus is locked as long as the shutter button is half-pressed, so it does not change

when the camera is repositioned.

• The focus lock is canceled when you release your finger from the shutter button.

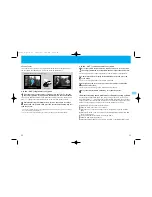
Half-press

Example: Center focus frame selected.

07-1BC(E)_P038-46  11/15/01  7:28 PM  Page 42

Summary of Contents for Contax NX

Page 1: ...e 38 A 1020 Wien Austria Tel 01 720 34 34 YASHICA AG Z rcherstra e 73 CH 8800 Thalwil Switzerland KYOCERA YASHICA U K Ltd Unit 7 Suttons Industrial Park Sutton Park Avenue Earley Reading RG6 1AZ U K T...

Page 2: ...is manual contains the following warnings to ensure safe use of the camera Please read the explanations thoroughly before use Caution Warning Failure to use the product correctly may result in serious...

Page 3: ...for important occasions such as overseas trips or weddings Always carry spare batteries Caution Warning If the batteries becomes overheated the camera may emit smoke or a burning smell In this case re...

Page 4: ...the specified batteries in the camera Do not throw batteries in the fire short circuit while charging dismantle or heat under any circumstances Do not mix new and used batteries batteries from differe...

Page 5: ...ing the batteries and checking the battery power 16 4 Mounting and removing lenses 18 5 Holding the camera 19 4 F and R dials 29 5 Mode button and mode details 30 6 Selecting the mode 31 2 Focusing in...

Page 6: ...button page 68 AF supplementary light page 38 Viewfinder contacts page 11 DX contact page 22 Film chamber page 20 Cable switch socket page 97 Film tip mark page 21 Spool page 21 Eye cup F 3 Page 15 Ba...

Page 7: ...ing page 23 Custom functions page 87 89 This page describes the contents of the displays All the information is indicated on these diagrams for explanation purposes The display will not show all this...

Page 8: ...another 16 seconds Display time may be changed Power hold time page 87 The viewfinder display turns off in the following cases Photography Film finished Rewinding Rewinding finished Film advance failu...

Page 9: ...uld be taken prior to photographing and includes basic operations of this camera If you already have basic knowl edge on handling a camera and wish to start taking photographs immediately proceed to S...

Page 10: ...ye cup F 3 is fitted as shown below When using the selftimer light entering the viewfinder when the eye is moved away may interfere with a correct reading of incident light In such cases fit the viewf...

Page 11: ...r The mark appears in the display panel Even when using new batteries during con tinuous shooting or at low temperatures the voltage may decrease momentarily and the mark may light If this happens set...

Page 12: ...nt adapter page 102 4 Mounting and removing lenses Mount mark Lens mark Lens release button Removing lenses 5 Holding the camera Tuck in your elbows and stabi lize the camera Hold your breath when pre...

Page 13: ...m Open the camera back by lifting the camera back release knob while sliding the camera back open ing lever downwards The first time you use the camera be sure to remove the protective sheet inside th...

Page 14: ...et it is stored in memory until it is changed again Photographs cannot be taken if the position dial is set to SET ISO or CF Automatic setting of the ISO film speed When DX is displayed on the dis pla...

Page 15: ...graphs than the reg ular number of frames on the film have been taken the last frame may be cut during the developing process Rewinding mid way through the film To rewind film mid way through the film...

Page 16: ...25 BASIC OPERATIONS 05 1BC E _P025 034 11 15 01 7 27 PM Page 25...

Page 17: ...N The camera s power is on AEL Use this when you want to lock the exposure AE lock It is often used when photographing backlit subjects It is also used when a subject that is con stantly lit moves thr...

Page 18: ...h mode may be altered as necessary page 31 37 2 SET Setting details for green 3 ISO Checking film speed and setting film speed manually 4 CF Setting Custom Functions page 86 The F dial front command d...

Page 19: ...focusing 2 Exposure mode Aperture priority auto page 51 Used for automatic photography with a fixed aperture Shutter priority auto page 52 Used for automatic photography with a fixed shutter speed Pr...

Page 20: ...ode flashes Turn the F dial to the desired metering mode The selected metering mode flashes select the metering mode details Turn the R dial in the direction of the arrow to display Drive mode details...

Page 21: ...34 05 1BC E _P025 034 11 15 01 7 27 PM Page 34...

Page 22: ...ON DIAL Used the green position for simple photography This setting is recom mended if you are using a camera for the first time or if you wish to take pho tographs without worrying about aperture and...

Page 23: ...pped from the factory Focusing mode Exposure mode Metering mode Drive mode The mode details appear on the display panel If the display differs from the mode details shown above reset in accordance wit...

Page 24: ...frame while setting custom functions page 87 When making this setting select the frame with the focusing frame select lever while pressing the LIGHT button 38 39 FOCUSING This camera offers two types...

Page 25: ...to focus on the desired subject if is flashing Focus on a different object at the same distance as the subject lock the focus then recompose and photo graph the original subject Page 42 If is flashing...

Page 26: ...or other strong light sources are within or near the focusing frame When there are two or more subjects at extremely different distances within the focusing frames A very small subject in relation to...

Page 27: ...focus the focusing frame lights red Picture is in focus Picture is not in focus lit Focused on subject No display Not focused on subject flashing Cannot focus Relationship between the focus mode and...

Page 28: ...cus is locked while the focus button is pressed AF operation is not possible with the shutter button One shot autofocus possi ble with the focus button Fine adjustment is not possible with the focus r...

Page 29: ...ed partial metering See page 31 for setting details To achieve highly effective photographs with higher precision read Types of metering modes and their features on the next page carefully and select...

Page 30: ...agonally from 16 the Planar T 50 mm minimum aperture is F16 and 1 4 the maximum aperture on the aperture table s ISO 100 section intersects with the vertical line the EV line and horizontal line the s...

Page 31: ...the camera automatically sets the shutter speed for a correct exposure Example 1 When photos are taken with a larger aperture the zone of sharpness Depth of Field page 68 is narrowed Use a larger aper...

Page 32: ...ition The set shutter speed and automatically set aperture value are displayed on the display panel and in the viewfinder 53 52 2 Taking photographs with shutter speed priority settings Tv shutter pri...

Page 33: ...warn of over exposure As the subject is too bright adjust the aperture or shutter speed until the flashing display is lit continuously Optional or other commercially available ND filters light reducti...

Page 34: ...ay indicating the elapsed bulb shooting time The counter counts from 00 to 59 59 seconds then starts over from 00 The entire viewfinder display remains off while the film is being exposed Taking photo...

Page 35: ...d using the three methods described below 1 Setting exposure compensation manually with Av Tv P Turn the F dial to set the amount of exposure compensation Compensation may be set in 1 3 EU steps withi...

Page 36: ...he shutter button to change to AE lock page 87 60 2 Taking photographs with the AE lock AE lock allows you to hold a certain exposure value even if the light changes or the composition is altered It a...

Page 37: ...underex posed This mode allows photography under very subtle lighting condi tions without the need to determine exposure Continue pressing the shut ter button to catch that important shot ABC stands...

Page 38: ...mes The flash cannot be used in the ABC Exposure mode The compensation sequence may be changed to over exposure standard expo sure under exposure page 87 65 Use this mode to include yourself in the ph...

Page 39: ...time after replac ing the battery 66 The date and time may be imprinted during photography in cameras fitted with the data back The separately available Contax Data Back D 11 may be fitted to cameras...

Page 40: ...er however when the aper ture stop down button is pressed the aperture is closed down to the previ ously set value to allow checking of the depth of field and the fuzziness of the background The viewf...

Page 41: ...70 09 1BC E _P050 70 11 15 01 7 28 PM Page 70...

Page 42: ...TTL direct metering function for controlling the built in flash automatically from the camera when it is used together with a Contax TLA flash system When using the TLA360 flash be sure to read 2 Tak...

Page 43: ...lash by pressing it 72 1 Taking photographs using the TTL auto flash function with the internal flash The amount of light from the flash reflected off the subject onto the film is mea sured TTL direct...

Page 44: ...units in m Illumination from the built in flash is insufficient for use with the Vario Sonnar 17 35mm F2 8 lens Use a Contax TLA flash except the TLA200 with this lens When the distance to the subject...

Page 45: ...rect metering to control the intensity of the flash Fit the TLA flash to the camera accessory shoe shown and switch the flash power supply ON The built in flash cannot be used simultane ously with a C...

Page 46: ...the manual setting mode is set The zoom focal length switches each time the zoom button is pressed Display the desired focal distance on the display panel 78 2 Taking photographs using a Contax TLA360...

Page 47: ...ation is set to 1 the flash intensity compensation is 2EV Press the flash s SEL button The compensation scale appears on the display panel and the mark flashes Use the flash s and up and down buttons...

Page 48: ...onization with the shutter speed set at 1 30 second or slower less can be effective for shooting evening or night views using a flash Slow synchronization often adds more ambient light to the final pi...

Page 49: ...hronization Normally with flash photography the flash is emitted directly after the shutter s front curtain has finished traveling first curtain synchronization When an internal flash or a Contax flas...

Page 50: ...rk with this camera you will develop your own personal approach Standard set ting 0 Power hold time Illumination time also changed 16 sec Changed set ting 1 12 sec Changed set ting 2 8 sec Changed set...

Page 51: ...stopped down while pressed Aperture switches between stopped down and open each time button is pressed Focus button function in MF mode SAF CAF Red eye reduc tion with internal flash Off On Exposure c...

Page 52: ...in which the shutter is open The length of time that the shut ter is open is called the shutter speed Aperture value The aperture is an opening in the lens The amount of light passing through the aper...

Page 53: ...charging Switch to a differ ent drive mode Wait until charging is complete i e lit before tak ing the photo graph 31 73 Cause 6 Photographs are blurry Focus is not prop erly adjusted Camera is shak i...

Page 54: ...steps of 1 2 within the aperture range of the currently mounted lens When operating with a precision of greater than 1 2 step the closest value is displayed For example when the aperture is 3 3 the a...

Page 55: ...95 MAIN ACCESSORIES This section describes the main accessories for expanding the range of photo graphic possibilities 13 1BC E _P095 107 11 15 01 7 29 PM Page 95...

Page 56: ...d closes exposure stops when the switch is set back to its original position 96 The D 11 is a quartz clock controlled LCD data back mounted on the camera in place of the Contax NX camera back The auto...

Page 57: ...er supply Four 1 5V AA size alkali batteries or four 1 2V AA size NiH batteries cheap AA size manganese batteries have insufficient capacity and should not be used 98 3 Contax Power pack P 8 P 8D Batt...

Page 58: ...lls Using flash 50 of time Approx 10 rolls Approx 5 rolls Using flash 100 of time Condition B Close up close up single shutter release leave for 4 seconds Normal temperature 20 C Low temperature 10 C...

Page 59: ...rn in the direction of the arrow to mount Removing 1 To remove the lens slide the mount adapter s release button hold it there then turn the lens counterclockwise and remove it 2 To remove the mount a...

Page 60: ...stom functions See list of custom functions on page 86 Camera back Opened and closed with camera back release lever removable with film check window Batteries 3V lithium battery CR2 x 2 Battery check...

Page 61: ...accessories Contax warranties do not cover accidents or damage resulting from the use of products of other manufacturers even when such prod ucts are sold for use with Contax products Normal temperatu...

Reviews: