2. Setup
16
ECH-PCI-CE-H2B, ECH-PCI-CE-F2B, ECH-PCI-CE-H4B, ECH-PCI-CE-F4B
Step 4 Installing the expansion adapter board
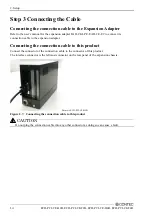
Refer to the user’s manual for the expansion adapter EAD-CE-LPE, EAD-CE-EC to install the
expansion bus adapter on the PC.
Step 5 Setup and Check
Starting the system
This product is turned on and off in sync with the PC’s power supply. When the PC detects the
expansion adapter, this product is turned on.
Turning on the system
(1) Plug the power plug of this product into a wall outlet.
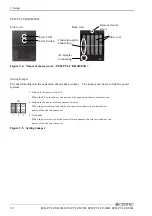
You do not need to press the POWER switch on the front panel (*1).
(2) The power supply of a PC is turned ON.
(3) As soon as the expansion adapter is recognized by the PC, this product is turned on automatically.
(4) Make sure that the POWER LED on this product is on.
Turning off the system
(1) The power supply of a PC is turned OFF.
(2) This product is turned off in synchronization with the PC’s power supply.
*1 Pressing the POWER switch on the front panel of this product turns on this product
or puts it to sleep. Use the switch, for example, to turn on only this product.
CAUTION
Do not turn on or off this product with the PC main unit powered.
Doing so cancels the detection of the bus adapter. When turning this product on back, restart the
PC main unit.


