Installation
19
Set up USB connected scanner for sharing on the network
Set USB scanner for sharing on the network (Optional)
You can enable other PCs on the LAN to use the USB connected scanner. This is called “Sharing”. After
activating the scanner, You can set it up as a “shared scanner” through WIDEsystem.
NOTE:
These instructions apply only for scanners using USB interfacing to PCs. Gigabit interfaced
scanners will be shared automatically.
1. Make sure your PC with the scanner connected via USB is connected to the LAN.
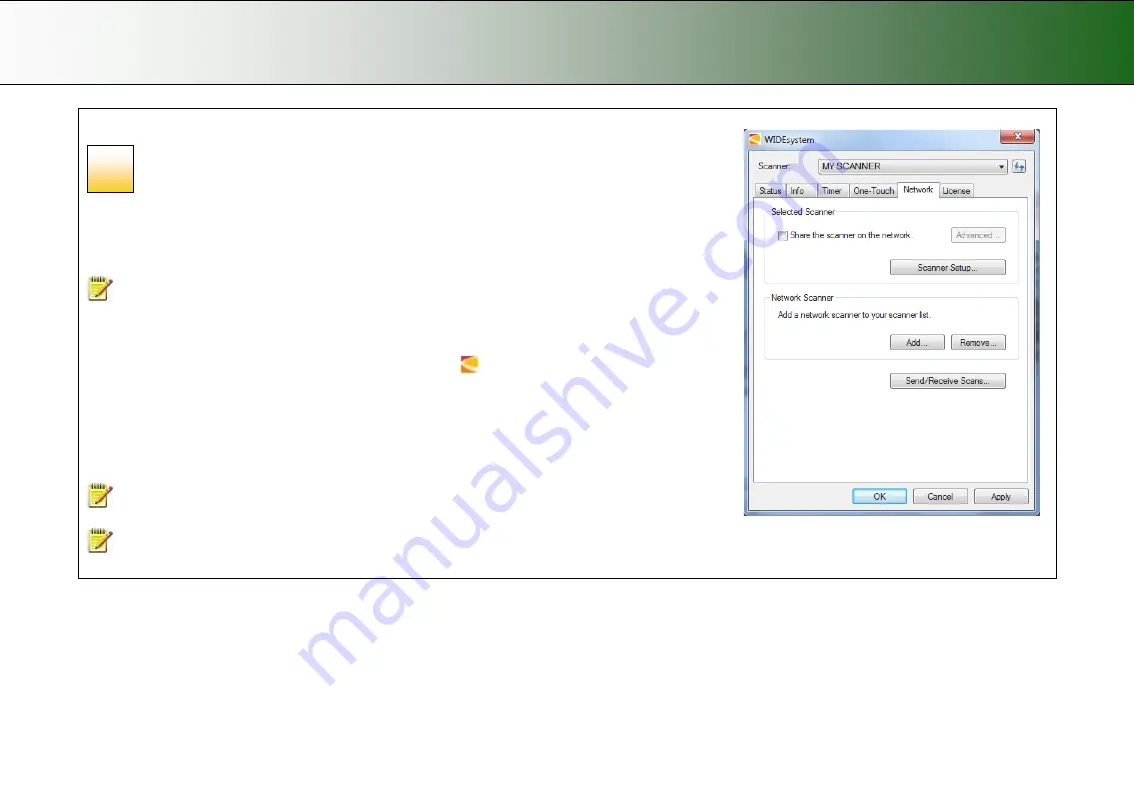
2. Double -click on the WIDEsystem program icon
and select the
Network
tab.
3.
Select the option:
Share the scanner on the network.
4. Press the
OK
button to accept the settings.
On most LAN systems, this is all you have to do. However, some systems will require
Advanced
settings,
such as specific communication port numbers. Contact your LAN administrator for information regarding
Advanced
settings.
NOTE:
Open WIDEsystem and press the <F1> key for viewing complete on-line help regarding
the
Network setup
procedures and options including Advanced settings.
NOTE:
PCs on the LAN that will use the scanner must be installed with WIDEsystem and compatible
scan/copy software.
19


