- Do not let cord hang over edge of table or counter, or touch hot
surfaces.
- To disconnect, turn any control to `of
f`, then remove plug from wall
outlet.
- Keep hair, clothing, and jewelry
, as well as spatulas and othe utensils,
away from food chute during operation to prevent the possiblity of severe
injury to persons and/or damage to the appliance.
- Do not wash grating sieve in an automatic dishwasher. If bent or
damaged, do not use, as it could break into small pieces and cause
personal injury and/or damage the appliance.
- Wash all detachable parts before using it.
SAVE THESE INSTRUCTIONS!
INSTRUCTIONS FOR USE
HOW TO
ASSEMBLE
1. Assemble the appliance according to the structure.
2. Place the pulp bin in place; then close it and be sure it snaps into
place.
3. Insert the spout cover into the seperator. Place the seperator onto the
motor base.
4. Lay the grating sieve into the seperator and pres s it down slightly.
5. Put the cover in place and close the locking handles tightly with both
hands.
6. Put the juice container underneath the juice spout.
7. Put the plunger into the food chute. Pay attention on the derection
symbol on the plunger and put it into the food chute to the same direction
symbol shown on the food chute.
HOW TO USE THE SWITCH
Move the rotary switch to the desired setting.
Pulse for Pulse switch for required blending duration
Off for Stop
1 for Low speed setting
2 for High speed setting
HOW TO USE
1. Wash the fruits /vegetables well, peel fruit such as lemon, mango, kiwi,
melon, and pineapple.
2. Remove the cores of e.g. apples. And remove the stone, seeds, pips
from prunes, apricots peaches, etc. Tiny seeds such as those found in
kiwi fruit, strawberries may be ignored.
alguna caída o cualquier otro daño. Lleve el electrodoméstico al centro de
servicio técnico autorizado más cercano para que se lo examine, repare o
se le hagan los ajustes eléctricos o mecánicos necesarios.
- Si se experimentara algún problema con el aparato, póngase en con-
tacto con el centro de servicio técnico post venta o el centro de servicio
autorizado. No intente desarmar o arreglar el electrodoméstico usted
mismo.
- Este producto ha sido diseñado sólo para uso doméstico. No ha sido
diseñado para fines comerciales.
- Evite tocar las partes en movimiento. Mantenga los dedos fuera del tubo
de alimentación.
- El uso de accesorios o aditamentos no recomendados o vendidos por
parte del fabricante podrían causar el riesgo de que se produzca fuego,
una descarga eléctrica o lesiones personales.
- No permita que el cordón cuelgue del borde de la mesa o repostero de
cocina, ni que entre en contacto con superficies calientes.
- Para desconectar, gire la perilla de control a “OFF” y luego proceda a
desenchufar.
- Mantenga el pelo, ropa y joyas así como espátulas y otros utensilios
fuera del tubo de alimentación durante el funcionamiento para evitar po-
sibles lesiones y /o daños al aparato.
- No lave el colador para rallar en una máquina lavavajillas. Si se dobla o
se daña, no lo use ya que podría romperse en trozos pequeños y causar
lesiones y/o daños al electrodoméstico.
- Lave todas las piezas antes de usar.
GUARDE ESTAS INSTRUCCIONES
INSTRUCCIONES DE FUNCIONAMIENTO
CÓMO ARMAR
1. Arme el electrodoméstico de acuerdo a su estructura.
2. Coloque el recipiente para la pulpa en su lugar. Luego ciérrelo y
asegúrese que quede fijado en su lugar.
3. Coloque la tapa del pico en el separador. Coloque el separador sobre
la base del motor.
4. Coloque el colador para rallar sobre el separador y presiónelo hacia
abajo ligeramente.
5. Coloque la tapa en su lugar y asegure con los cerrojos de seguridad
utilizando ambas manos.
6. Coloque el recipiente para jugo debajo del pico.
7. Coloque el introductor de alimentos dentro del tubo. Preste atención
al símbolo que indica la dirección en la que introductor debe insertarse y
colóquelo dentro del tubo de acuerdo al mismo símbolo que se encuentra
dentro del tubo.
Summary of Contents for CP42322
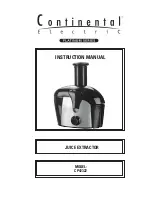
Page 1: ...MODEL CP42322 INSTRUCTION MANUAL JUICE EXTRACTOR...
Page 7: ...MODELO CP42322 EXTRACTOR DE JUGO MANUAL DE INSTRUCCIONES...
Page 8: ...1 2 3 4 5 6 7 8 9 1 11 1 1 R el o c th ta a m a th p a th...
Page 10: ...su o a inj d p 1 2 pl 3 m 4 5 h 6 7 sy sy M 1 m 2 fr ki...
Page 12: ...9 in 1 as w 11 D M V W K P...

