background image

Full Auto Mode

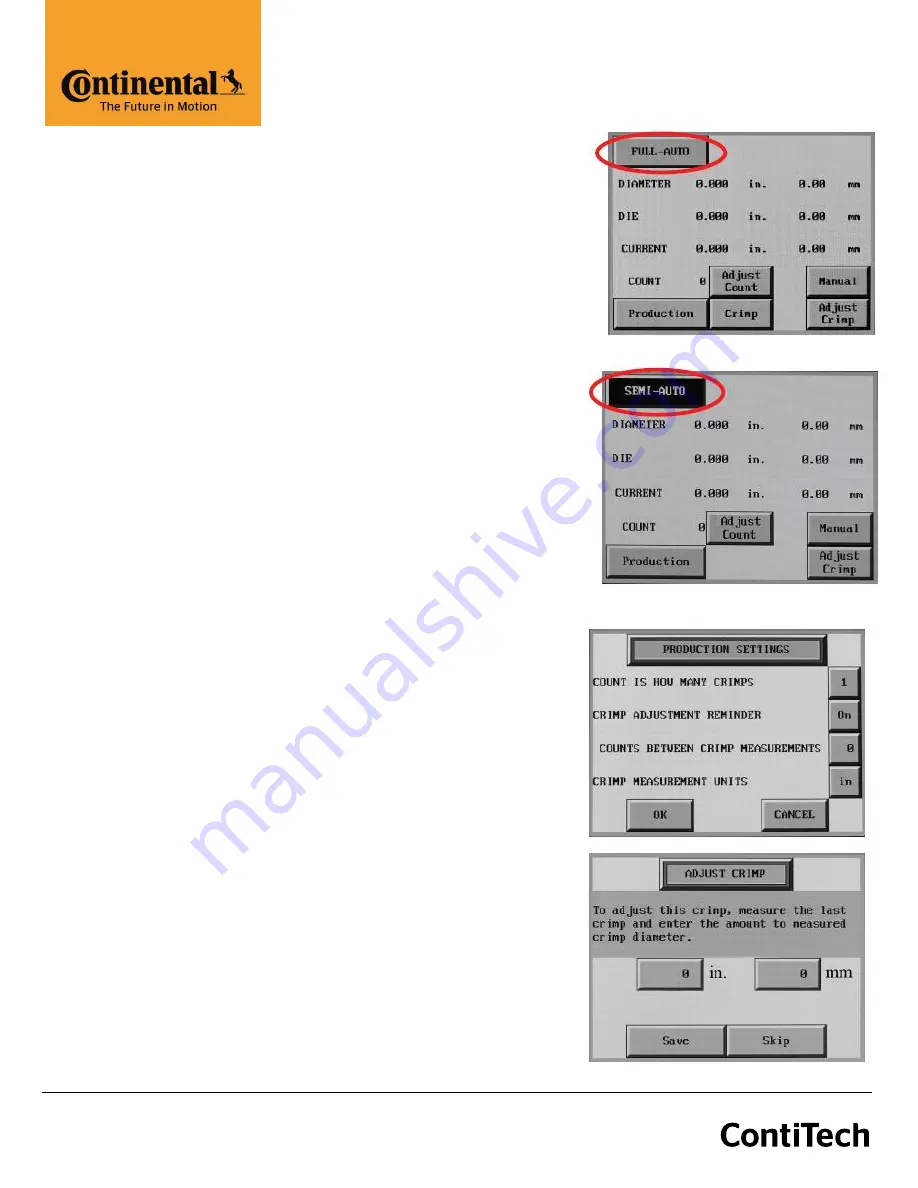
With the crimper in FULL AUTO mode additional functions are 
available:

The crimper will cycle automatically from the CRIMP 
button on the touch screen, the green CYCLE START 
button on the panel, or the foot switch.

To set the position to which the dies will retract, close 
the crimper to the desired retract position prior to 
pressing the FULL AUTO button.

Pressing the FULL AUTO button will toggle the crimper 
into SEMI-AUTO mode. In SEMI-AUTO mode, pressing the 
FOOT SWITCH or the CLOSE button will close the crimper 
head and releasing it will cause the head to stop closing. 
This mode allows the crimper to be jogged into position 
allowing more precise positioning of a fitting in the dies. 
Pressing the SEMI AUTO button will toggle the crimper 
back to FULL AUTO mode.

In FULL AUTO mode pressing the foot switch will start the 
crimp cycle and the dies will stop closing when the crimp 
cycle is complete

The COUNT function is activated allowing the operator to 
monitor the number of crimps made.

A measurement can be required after a preset number of 
crimps. See 

SET REQUIRED MEASUREMENT

.

Set Required Measurement

Press the PRODUCTION button.

Determine if 1 or 2 crimps will count as a crimp.

Toggle the CRIMP ADJUSTMENT REMINDER to ON.

Set the COUNTS BETWEEN CRIMP MEASUREMENTS to 
the desired number and press OK.

At the set interval, the ADJUST CRIMP screen will come 
up and the operator will be asked to measure the last 
crimp and enter a correction if required.

703 S. Cleveland Massillon Road, Fairlawn, OH 44333  I  800.234.4632  I www.contitech.us

Summary of Contents for PC440

Page 1: ...703 S Cleveland Massillon Road Fairlawn OH 44333 I 800 234 4632 I www contitech us ...

Page 2: ...IONS AND INITIAL SET UP 4 ACT CONTROL OPERATION 5 DIE SET UP AND INSTALLATION 13 INITIAL SET UP AND MAINTENANCE 14 TROUBLESHOOTING 15 EXPLODED PARTS BREAKDOWN 16 703 S Cleveland Massillon Road Fairlawn OH 44333 I 800 234 4632 I www contitech us ...

Page 3: ...ent Part Identification Mirror Patented ACT Controller Grease Fittings 4 on each side Oil Filter Cap Grease Fittings 4 on each side Master Dies 160 to 99 mm Adapter Dies 99 mm Hydraulic Dies Fixed 6 o clock die for easy positioning of fittings Master Die Location Holes Adjustable Back Stop ...

Page 4: ...nal Motor 7 5 HP 1 Stage Pump Reservoir Capacity 8 US GAL Oil Type ISO 46 Hydraulic Oil Adapter Dies 160 MM to 99 MM Hose Capacity 2 Inch 4 Spiral 4 Inch Industrial Initial Crimper Set Up Check reservoir oil level with sight glass on the front of the power unit Check electrical circuit to be certain that it matches the crimper requirements as shown on the tag attached to the crimper cord Make cert...

Page 5: ...ead If the crimper is in AUTO MODE the buttons functions as cycle start and cycle stop buttons If the crimper is in SEMI AUTO MODE pressing the foot switch or the close button will close the crimper head and releasing will halt the closing action Touch Screen Control Panel Emergency Stop Manual Mode Function Open Dies Auto Mode Function Cycle Stop Manual Mode Function Close Dies Auto Mode Function...

Page 6: ... will add 3 decimal places Enter the finished crimp diameter and press ENTER From the ENTER CRIMP screen press the MANUAL button to put the crimper in manual mode Confirm that the die and finished crimp diameters are correct and that MANUAL MODE is displayed Press and hold the green close button until the crimper stops closing Check the final crimp diameter If a minor correction is required see HO...

Page 7: ...ot enter the amount of correction and press ENTER Press SAVE Make another crimp and verify that the fitting is within specifications EXAMPLE If the hose and fitting manufacturer specifies that the finished crimp should measure 1 500 to 1 520 and the measured crimp diameter was 1 530 simply enter the measured diameter 1530 Controller will supply 3 decimal places and press SAVE The finished crimp di...

Page 8: ...ers Enter diameter units inch or metric Enter the closed diameter of the die Press SAVE and EXIT The saved die will now appear on the SELECTED DIE screen From this screen individual dies can be cleared or edited How To Recall a Saved Die Select CRIMP TO DIAMETER and from the OPTION screen select USE SAVED DIE Select the saved die 1 50 and press LOAD and then OK The die parameters will now be used ...

Page 9: ... to 12 characters Press SAVE and EXIT The die and crimp setting can now be recalled from the saved location as required How To Recall a Saved Crimp Select USE SAVED CRIMP from the option screen Select a previously saved crimp from location 1 150 Press LOAD The saved crimp will appear on the manual screen 703 S Cleveland Massillon Road Fairlawn OH 44333 I 800 234 4632 I www contitech us ...

Page 10: ...g of a fitting in the dies Pressing the SEMI AUTO button will toggle the crimper back to FULL AUTO mode In FULL AUTO mode pressing the foot switch will start the crimp cycle and the dies will stop closing when the crimp cycle is complete The COUNT function is activated allowing the operator to monitor the number of crimps made A measurement can be required after a preset number of crimps See SET R...

Page 11: ...ller can be accessed by pressing the MORE button on the MACHINE SET UP screen When Allow Crimp to Diameter is set to YES all of the adjustment functions of the crimper are available When Allow Crimp to Diameter is set to NO only the settings entered as a saved crimp can be used English or Spanish language options are available The Use Pressure Compensation is set to YES for all crimpers equipped w...

Page 12: ...they are accessed in the following manner Press the Crimp Memory Table Button Press the access button to bring up the stored crimp specifications Scroll through the crimp specifications to select the correct one The right hand rocker button moves through the crimp specs one line at a time and the left hand rocker button moves one screen at a time When the correct crimp specification is selected pr...

Page 13: ...Adapter Dies and with the crimper in manual mode SLOWLY close the crimper head on the die set Bring the crimper head to a fully closed position and remove the die insertion tool The dies may also be inserted manually with the crimper head in the fully open position Proceed to the ACTTM controller operating instructions to set up the crimper for the hose and fitting being crimped Note that the fixe...

Page 14: ...ricate the fittings visible through the 2 bottom lubrication holes in the protective plate of the crimper Note that there are also 8 lubrication fittings on the side of the machine as shown on the Component Identification page Use only a high quality grease Failure to do so may result in damage to the wearing surfaces PLC Reset Procedure The PLC Programmable Logic Controller requires a relatively ...

Page 15: ... in the direction of the arrow on the motor housing For three phase units rotation can be reversed by switching any two wires in the plug PROBLEM CRIMPER WILL CLOSE ON FITTING BUT DOES NOT DEVELOP POWER TO COMPLETE THE CRIMP Check oil level Position dies to the fully open position and check oil sight gage to be certain that the correct amount of oil in the machine Be sure the oil level is in the m...

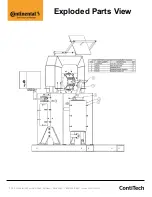
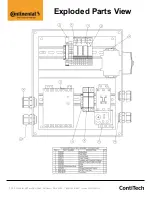
Page 16: ...Exploded Parts View 703 S Cleveland Massillon Road Fairlawn OH 44333 I 800 234 4632 I www contitech us ...

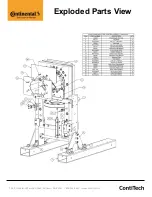
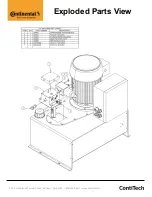
Page 17: ...Exploded Parts View 703 S Cleveland Massillon Road Fairlawn OH 44333 I 800 234 4632 I www contitech us ...

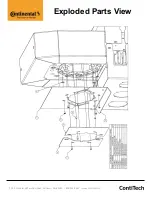
Page 18: ...Exploded Parts View 703 S Cleveland Massillon Road Fairlawn OH 44333 I 800 234 4632 I www contitech us ...

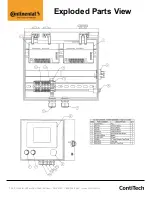
Page 19: ...Exploded Parts View 703 S Cleveland Massillon Road Fairlawn OH 44333 I 800 234 4632 I www contitech us ...

Page 20: ...Exploded Parts View 703 S Cleveland Massillon Road Fairlawn OH 44333 I 800 234 4632 I www contitech us ...

Page 21: ...Exploded Parts View 703 S Cleveland Massillon Road Fairlawn OH 44333 I 800 234 4632 I www contitech us ...

Page 22: ...Exploded Parts View 703 S Cleveland Massillon Road Fairlawn OH 44333 I 800 234 4632 I www contitech us ...

Page 23: ...om Machining Services Inc 326 North Co Rd 400 East Valparaiso IN 46383 If any product or part manufactured by CustomCrimp is found to be defective by CustomCrimp at its option CustomCrimp will either repair or replace the defective part or product and return via ground transportation freight prepaid Custom Crimp will not cover any incoming or outgoing freight charges for machines sold outside The ...

Page 24: ... our customers around the world Our bespoke solutions are specially tailored to meet the needs of the market With extensive expertise in materials and processes we are able to develop cutting edge technologies while ensuring we make responsible use of resources We are quick to respond to important technological trends such as function integration lightweight engineering and the reduction of comple...

Reviews: