Teledyne Continental Motors, Inc.
TM
Non-Overhaul Removal and Replacement
IOF-550 Permold Series Engine Maintenance Manual
10-93
1 April 2007
11.
While supporting the cylinder, install, but do not torque, the cylinder flange nuts (41
& 42).
12.
Install the 7th stud brackets (47 & 48) and flange nut (49). The 7th stud nuts have a
conical seat.
13.
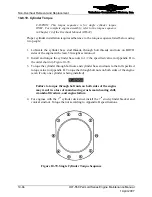
Torque the cylinder fastening hardware according to Section 10-8.10, “Cylinder
Torque.”
14.
Install hydraulic tappets and pushrod housings according to instructions in Section
10-8.12.
15.
Install the pushrods and rocker arms according to instructions in Section 10-8.14
16.
Install the springs (68).
17.
Install the bolts (61), washers (62), baffle support (63), lower baffle (66), and baffle
base.
18.
Install the drain tubes according to instructions in Section 10-8.9.
19.
Install the spark plugs with new copper gaskets, according to the “Ignition System
Maintenance” section of Chapter 9.
20.
Install the Induction and Exhaust System components according to instructions in
Chapter 11, Engine Assembly of TCM Overhaul Manual (OH-24) and applicable
airframe manufacturer’s instructions.
21.
Install the Fuel Injector according to instructions in Section 10-6.11.
22.
Install the Fuel Injector Solenoid according to instruction in Section 10-6.12.
23.
Set the aircraft Fuel Selector Valve to the ON position, activate the fuel boost pump
and leak check the fuel delivery system, including fuel lines and fittings.
24.
Service the engine with mineral oil by following the steps in the section “Oil Change
Procedure” in Chapter 9. Be sure to use mineral oil for cylinder break-in.
25.
Install the aircraft cowling and airframe-supplied accessories according to the Aircraft
Maintenance Manual.
26.
Perform the tasks listed in Chapter 6, Operational Performance Checks.
27.
Perform the steps in “25-hour Initial Operation Inspection” in Chapter 7 at the
designated interval. When oil consumption has stabilized, replace the mineral oil with
ashless dispersant aviation engine oil according to the “Oil Change Procedure” in
Chapter 9.
10-8.9. IOF-550-N, P & R Cylinder Drain Tube Installation
Procedure
1.
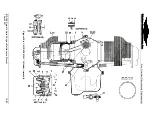
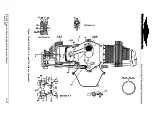
Coat the male tapered threads of the drain tube fittings (16) (Figure 10-61) with
Loctite 592 Teflon PS/T Pipe Sealant. Coat the male tapered threads only.
2.
Install the drain tube fittings (16) in the cylinders and torque per Appendix B.
3.
Install the cylinder drain tube (45) on the cylinders; torque according to Appendix B.
4.
Install the drain valve assemblies in accordance with the airframe manufacturer's
instructions.

