Your roll-in model comes with one cart ramp per door opening. To install the
ramp(s), simply open the cabinet door and position the ramp slots onto the screws
located along the cabinet bottom front. If the door wiper rubs along the ramp to the
extreme where the door will not self-close, you will need to adjust the door (see
"door adjustment" section) or level the cabinet as explained above.
Important Note:
It is extremely important that your new reach-in or roll-in
model is perfectly level for proper operation.
If it is not level, the following
adverse conditions will become apparent:
1. The door(s) will not be properly aligned and consequently will not provide a
good seal. Roll-in door wiper(s) may bind.
2. Your model will run excessively due to improper door seal(s).
3. An excessive amount of ice will accumulate inside the cabinet, around the
door opening(s) and especially on the finned evaporator coil. If allowed to
continue, ice will eventually block the coil and the model will fail. This will result
in the loss of all product stored within the cabinet.
4. Defrost water will fail to drain properly and will overflow the evaporator coil
drain pan and into the cabinet of both refrigerator and freezer models.
INSTALLING CASTERS AND LEVELING REACH-IN MODELS
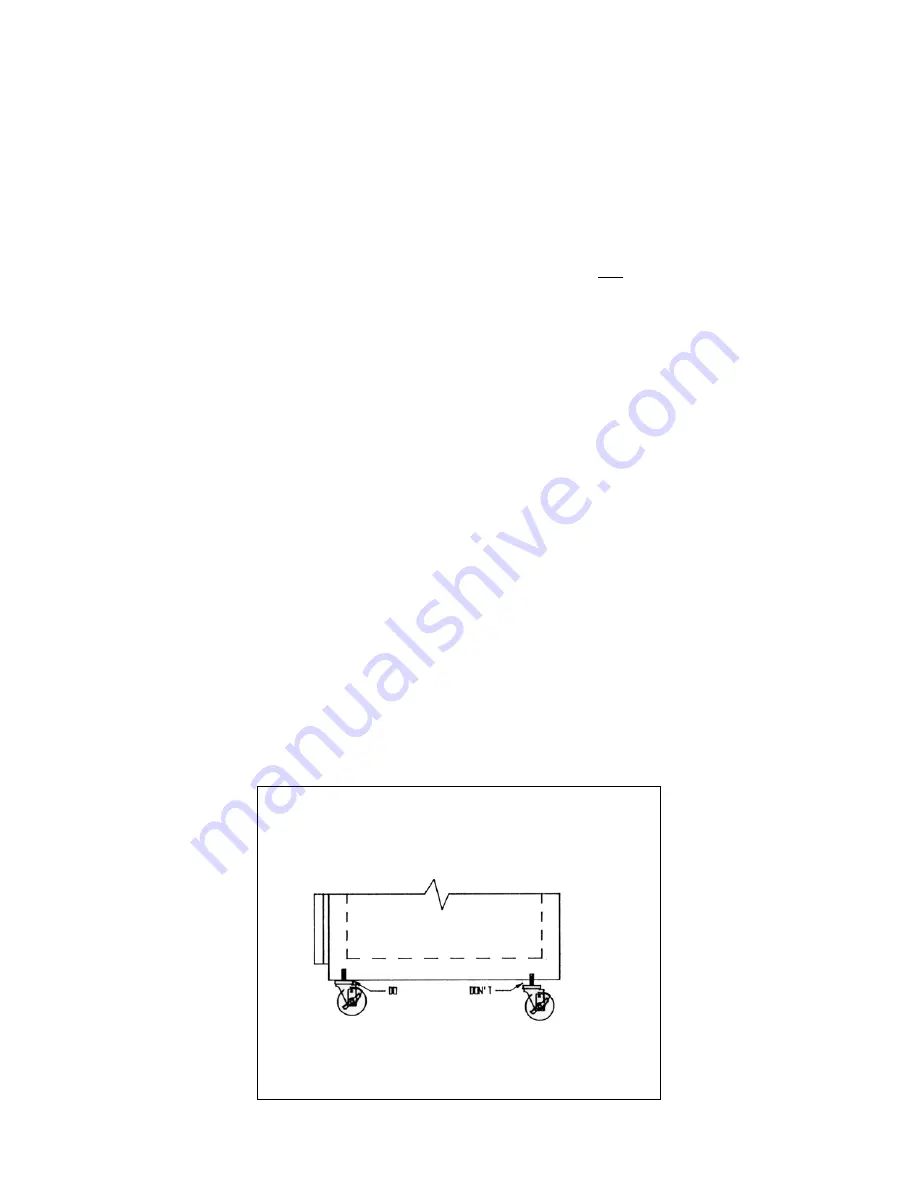
If you wish to install casters on your new reach-in model, follow the steps above for
"installing legs" to install the casters, making sure again that the casters are
tightened extremely well (see figure 3). If the casters are not installed tightly, the
cabinet will sway or rock with each opening or closing of the doors, possibly
causing damage to the case bottom.
To assure that your cabinet is level, caster cups must be installed under the
casters which need leveling. Caster cups are not provided with your new model but
can be purchased at most hardware or furniture stores.
Do not attempt to level
casters by unscrewing them from the case bottom as this will cause damage
to the cabinet bottom and leg hole threads, voiding all warranties.
- 5 -
Summary of Contents for Refrigerators and Freezers
Page 3: ...TROUBLESHOOTING AND SERVICING GUIDE 22 WIRING DIAGRAMS 26...
Page 29: ...WIRING DIAGRAMS 26...
Page 30: ...27...
Page 31: ...28...
Page 32: ...29...
Page 33: ...30...
Page 34: ...31...
Page 35: ...32...
Page 36: ...33...


