background image

C

ONTOUR

®

TS meter   C

ONTOUR

®

TS test strips

Setup and Use

18

Setting the T

ime, Date and Sound

Your C

ONTOUR

®

TS meter allows you to set the date, time, 

and sound as you like them. 

 You can view 12 or 24 hour time; 

 month/day or day.month, and; 

 choose to have your meter beep or not. 

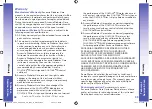
To get into set-up mode when the meter is off, press 
and hold   for 3 seconds. A complete display will briefly 
appear, then numbers will flash in the bottom right corner 
of the display.

Setting the Time, Date and Sound

Setting the Time

The number in the hour 

position will be flashing. 

Press   until you reach the 

correct hour.
Press   to set.

The number in the minute 

position will now flash. 

Press   until you reach the 

correct minutes. 
Press   to set. 

5718657_CntrTS_Karajishi_UG_EN_FpBp_v0.indd   18

3/24/17   4:13 AM

Setup and Use

19

Setting the Date

The year will be flashing. 

Press   to select the 

current year. 
Press   to set.

The month will now flash. 

Press   to select the month. 
Press   to set.

The day will now flash. 

Press   to select the day. 
Press   to set.

Setting the T

ime, Date and Sound

The flashing bell symbol will 

now appear on the display.
This option controls whether 

you want to hear the beep 

sound during testing.

Press   to set.

Setting the Sound

5718657_CntrTS_Karajishi_UG_EN_FpBp_v0.indd   19

3/24/17   4:13 AM

C

ONTOUR

®

TS meter   C

ONTOUR

®

TS test strips

Setup and Use

18

Setting the T

ime, Date and Sound

Your C

ONTOUR

®

TS meter allows you to set the date, time, 

and sound as you like them. 

 You can view 12 or 24 hour time; 

 month/day or day.month, and; 

 choose to have your meter beep or not. 

To get into set-up mode when the meter is off, press 
and hold   for 3 seconds. A complete display will briefly 
appear, then numbers will flash in the bottom right corner 
of the display.

Setting the Time, Date and Sound

Setting the Time

The number in the hour 

position will be flashing. 

Press   until you reach the 

correct hour.
Press   to set.

The number in the minute 

position will now flash. 

Press   until you reach the 

correct minutes. 
Press   to set. 

5718657_CntrTS_Karajishi_UG_EN_FpBp_v0.indd   18

3/24/17   4:13 AM

85718657_CntrTS_Karajishi_UG_EN_FpBp_v4_placed.pdf:20

Summary of Contents for TS

Page 1: ...s Alt 4 06 20 17 Copy Changes June 20 2017 Ascensia Diabetes Care Contour TS Karajishi User Guide English 922269 1807B Parent BAN 84500411 6 0 H 4 5 W 10000774658 REV 01 FONTS Helvetica Berthold Akzidenz Grotesk Fruitiger DFHei COLORS Cyan Magenta Yellow Black NOTE THIS COLOR PROOF INDICATES COLOR BREAK ONLY AND MAY NOT ACCURATELY REFLECT ACTUAL PRODUCTION COLOR Regional Master Template No M GDE U...

Page 2: ...1 Viewing Stored Results 22 Table of Contents Getting Ready to Test 7 Getting the Blood Drop 9 Testing Your Blood 10 Cleaning Your Meter 13 Control Solution Testing 14 Setup and Use 5718657_CntrTS_Karajishi_UG_EN_FpBp_v0 indd 1 3 24 17 4 13 AM Getting Started Testing Technical Service Care Your Meter Overview 2 Your Meter Features 4 Information For Safety 5 Error Codes and Symbols 24 Changing the ...

Page 3: ...ults or will appear if the meter is in 12 hour setup 5718657_CntrTS_Karajishi_UG_EN_FpBp_v0 indd 3 3 24 17 4 13 AM 3 Getting Started 3 3 or Displays the date format 14 day average Control result marker Indicates the meter is ready to test When battery symbol remains on display screen during testing the battery is low and needs to be changed Results are displayed as either mmol L or mg dL Beeper on...

Page 4: ...opened the bottle It will help to write the six month discard date on the control solution label 5718657_CntrTS_Karajishi_UG_EN_FpBp_v0 indd 5 3 24 17 4 13 AM 5 Getting Started 5 5 Information For Safety Information For Safety Always keep the test strips in the original bottle Tightly close the bottle immediately after removing a test strip The bottle is designed to keep the test strips dry Exposu...

Page 5: ...rofessional Do not reuse lancets Use a new lancet each time you test 5718657_CntrTS_Karajishi_UG_EN_FpBp_v0 indd 7 3 24 17 4 13 AM Testing 7 Preparing the Test Strip 1 Wash and dry your hands well before testing 2 Remove a CONTOUR TS test strip from the bottle 3 Hold the test strip with the grey end facing up 4 Insert the grey end into the test strip port on the meter The following steps are shown...

Page 6: ...ure site 3 Test immediately after a good blood drop has formed 5718657_CntrTS_Karajishi_UG_EN_FpBp_v0 indd 9 3 24 17 4 13 AM Testing 9 Getting Ready to Test Suggested drop size 6 Rotate the endcap dial to adjust the puncture depth The amount of pressure applied to the puncture site also affects puncture depth Getting the Blood Drop and Testing 1 Press the lancing device firmly against the puncture...

Page 7: ...onsult with your health care professional for expected values specific to your needs 5718657_CntrTS_Karajishi_UG_EN_FpBp_v0 indd 11 3 24 17 4 13 AM Testing 11 Testing Your Blood 6 Remove the test strip to turn your meter off Dispose of the used test strip as medical waste or as advised by your health care professional If your blood glucose reading is under 2 8 mmol L or you see less than 0 6 mmol ...

Page 8: ...care professional Do not reuse lancets Use a new lancet each time you test 5718657_CntrTS_Karajishi_UG_EN_FpBp_v0 indd 13 3 24 17 4 13 AM Testing 13 The exterior of the CONTOUR TS meter can be cleaned using a moist not wet lint free tissue with a mild detergent or disinfectant solution such as 1 part bleach mixed with 9 parts water Wipe dry with lint free tissue after cleaning Cleaning Your Meter ...

Page 9: ...p until the meter beeps 5 Gently rock the control bottle before opening to ensure it is mixed well 5718657_CntrTS_Karajishi_UG_EN_FpBp_v0 indd 15 3 24 17 4 13 AM Testing 15 Control Solution Testing The meter will turn on An image of a test strip with a flashing blood drop will appear letting you know the meter is ready to test 6 Squeeze a small drop of control solution on a clean nonabsorbent surf...

Page 10: ...ntrol results will not be included in your 14 day blood glucose average 5718657_CntrTS_Karajishi_UG_EN_FpBp_v0 indd 17 3 24 17 4 13 AM Testing 17 Control Solution Testing If your control test result is out of range do not use your meter for blood glucose testing until you resolve the issue See What You Should Do on page 27 To turn your meter off simply remove the test strip Dispose of the used tes...

Page 11: ...n controls whether you want to hear the beep sound during testing Press to set Setting the Sound 5718657_CntrTS_Karajishi_UG_EN_FpBp_v0 indd 19 3 24 17 4 13 AM Setup and Use 19 Setting the Date The year will be flashing Press to select the current year Press to set The month will now flash Press to select the month Press to set The day will now flash Press to select the day Press to set Setting th...

Page 12: ... responsible for any erroneous results from the use of other software Transferring Results to a Computer 5718657_CntrTS_Karajishi_UG_EN_FpBp_v1 indd 21 4 3 17 9 17 AM Setup and Use 21 Transferring Results to a Computer You can transfer test results from the CONTOUR TS meter to a computer where they can be summarized in a report with graphs and tables To make use of this feature you need GLUCOFACTS...

Page 13: ...ompleted and saved to the memory Press to turn the meter off or it will automatically turn off after 3 minutes 5718657_CntrTS_Karajishi_UG_EN_FpBp_v0 indd 23 3 24 17 4 13 AM Setup and Use 23 Viewing Stored Test Results NOTES Averages include the specified time period plus the current day The meter will hold 250 results in the memory When the maximum is reached the oldest test result will be remove...

Page 14: ...omer Service See the back cover for contact information 5718657_CntrTS_Karajishi_UG_EN_FpBp_v1 indd 25 4 3 17 9 17 AM 25 Technical Service Care Error Codes and Symbols WHAT YOU SEE WHAT IT MEANS WHAT YOU SHOULD DO Test strip not inserted correctly Remove the test strip and insert it properly see page 7 Use only CONTOUR TS test strips E5 E10 E6 E12 E8 E13 E9 Potential software or hardware issue Rem...

Page 15: ...e the problem contact Customer Service See the back cover for contact information 5718657_CntrTS_Karajishi_UG_EN_FpBp_v0 indd 27 3 24 17 4 13 AM 27 Technical Service Care Error Codes and Symbols WHAT YOU SEE WHAT IT MEANS WHAT YOU SHOULD DO Some display segments do not appear when the meter initially turns on Possible meter electronics failure Press and hold while the meter is off Compare meter di...

Page 16: ...mer Service See the back cover for contact information Control test result is out of range too high or too low Test strip is deteriorated due to exposure to humidity or heat Control solution is past expiration date or is past the open use date Test strip is past expiration date or is past the open use date Incorrect control solution was used Control solution is not at room temperature Control solu...

Page 17: ...netic radiation as these may interfere with the proper operation of the meter System Specifications 5718657_CntrTS_Karajishi_UG_EN_FpBp_v0 indd 31 3 24 17 4 13 AM 31 Technical Service Care System Specifi cations Test Sample Venous arterial or capillary whole blood Test Result Referenced to plasma serum glucose Sample Volume 0 6 μL Measuring Range 0 6 33 3 mmol L Results 5 second countdown Memory Fea...

Page 18: ...l Range Normal Control Range Low Control Range High Discard Date Control Discard Date 5718657_CntrTS_Karajishi_UG_EN_FpBp_v0 indd 33 3 24 17 11 30 AM 33 Technical Service Care Specifi cations The following symbols are used throughout the product labeling for the CONTOUR TS blood glucose monitoring system meter packaging and labeling and test strip and control solution packaging and labeling Symbols...

Page 19: ...ose meters and 3 lots of CONTOUR TS blood glucose test strips The following precision results were obtained 5718657_CntrTS_Karajishi_UG_EN_FpBp_v1 indd 35 4 3 17 9 17 AM 35 Technical Service Care Technical Information Table 3 System accuracy results for glucose concentrations between 2 0 and 24 6 mmol L Within 0 83 mmol L or 15 586 of 600 97 7 Acceptance criteria in ISO 15197 2013 are that 95 of t...

Page 20: ..._______________ 3 Check the battery icon on the display See page 28 Changing the Battery 5718657_CntrTS_Karajishi_UG_EN_FpBp_v0 indd 37 3 24 17 4 13 AM 37 Technical Service Care B A Service Information Service Information If you have a problem and none of the problem solving steps in this user guide help contact Customer Service See the back cover for contact information We have trained specialist...

Page 21: ... instructions for obtaining service of this instrument See the back cover for contact information 5718657_CntrTS_Karajishi_UG_EN_FpBp_v1 indd 39 4 3 17 9 17 AM 39 Technical Service Care Warranty the performance of the CONTOUR TS meter when used with any test strips other than CONTOUR TS test strips or when the CONTOUR TS test strip is altered or modified in any manner 5 Ascensia Diabetes Care make...

Page 22: ...44 Supplies 5718657_CntrTS_Karajishi_UG_EN_FpBp_v1 indd 40 4 3 17 9 17 AM 5718657_CntrTS_Karajishi_UG_EN_FpBp_v0 indd 41 3 24 17 4 13 AM 5718657_CntrTS_Karajishi_UG_EN_FpBp_v0 indd 41 3 24 17 4 13 AM CONTOUR TS meter CONTOUR TS test strips pplies can contact Customer Service for supplies See the cover for contact information PLACEMENT PARTS m 3 volt lithium battery DL2032 or CR2032 NTOUR TS user g...

Page 23: ...censia com Ascensia Diabetes Care Singapore Pte Ltd 600 North Bridge Road 06 01 Parkview Square Singapore 188778 Tel 65 6202 4270 Email diabetescare ascensia com www diabetes ascensia com Ascensia Diabetes Care Malaysia Sdn Bhd Lot 2 2 Level 2 Tower B The Troika 19 Persiaran KLCC 50450 Kuala Lumpur Malaysia Tel 60 3 2178 6162 www diabetes ascensia com Manufacturing site 製造廠 110 Oaza Inoshiri aza N...

Reviews: