

Calendar/Thermometer Clock displays the current time of
day in either 12- or 24-hour format. To set:
1.
Slide the LOCK/TIME SET/CALENDAR switch to TIME
SET position.
2.
On the back of the unit slide the time zone switch to the
appropriate position (i.e. EST, CST, MST or PST).
3.
Slide the DST (Daylight Savings Time) to the ON position
unless you are in an area without Daylight Savings Time
(i.e. parts of Arizona and Indiana).
4.
On the back of the unit, press the 12/24 HR button to
select between a 12-hour (A.M./P.M.) and a 24-hour
(international) time format.
5.
Press the HOUR and MIN buttons until the current time is
displayed.
6.
Slide the LOCK/TIME SET/CALENDAR switch to the
LOCK position.
SETTING TEMPERATURE
This unit constantly displays the current room temperature in
either degrees Fahrenheit (°F) or degrees Celsius (°C). To
choose a temperature scale depress °C/°F button on the
back of the unit with the tip of a pen until the desired tem-
perature scale (°C or °F) is displayed on front of the unit.
Each press of the °C/°F button toggles between degrees
Celsius and degrees Fahrenheit.
TROUBLESHOOTING
If external “noise” is severe, the clock may display irrelevant
time even when the “Wave Symbol” shows that reception is
good. Press the RESET button on the back of the unit with
the tip of a pen or the “wave” button on the bottom of the
clock. The clock will start to search for the signal and reset
itself.
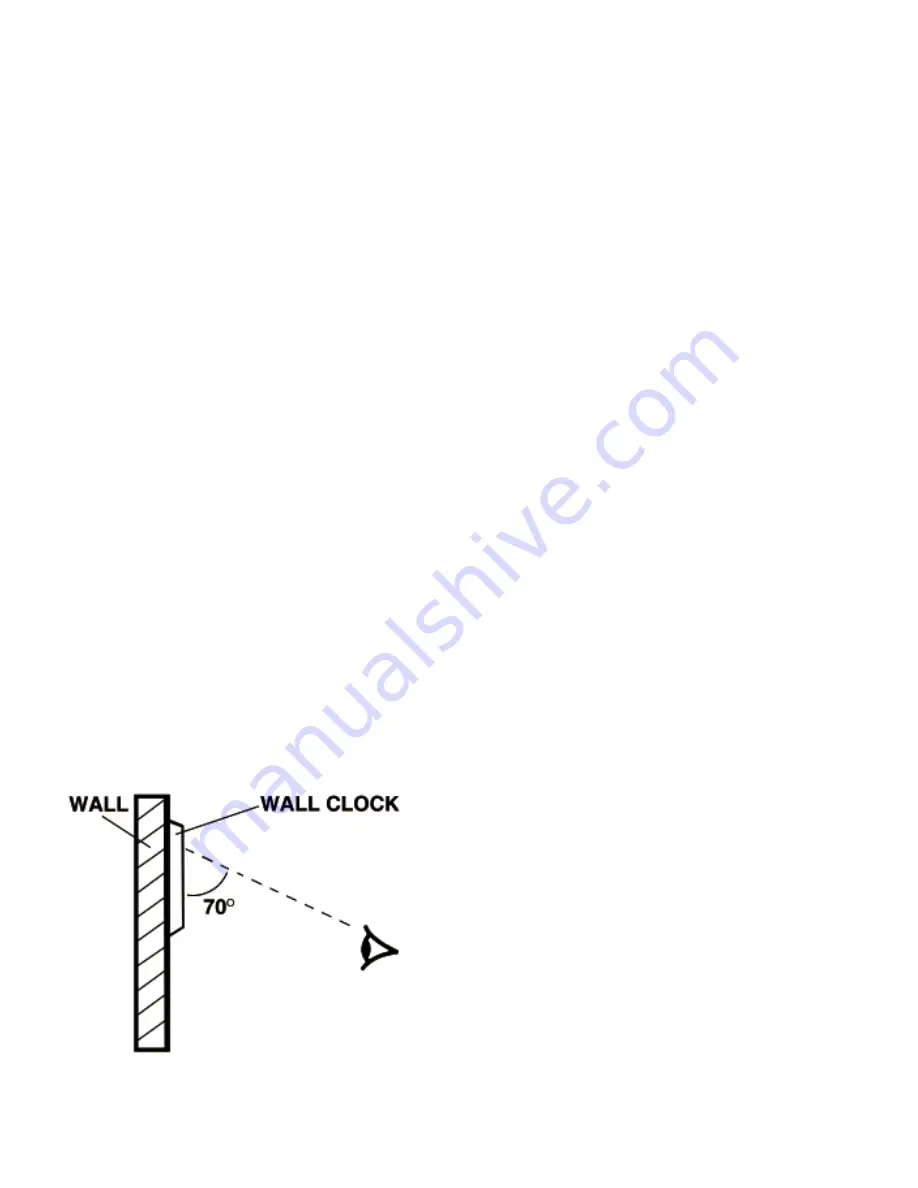
ON A WALL
This clock is supplied with a screw for hanging on a wall.
For best viewing of the LCD, hang the clock at a minimum
height of 6 foot 5 inches to obtain the viewing angle of
approximately 70° as indicated.
WARRANTY, SERVICE, OR RECALIBRATION
For warranty, service, or recalibration contact:
CONTROL COMPANY
4455 Rex Road
Friendswood, Texas 77546 USA
Ph. 281-482-1714
Fax 281-482-9448
E-mail sales@control3.com
www.control3.com
Control Company is
ISO 9001 Quality-Certified by DNV
and ISO 17025 accredited as a
Calibration Laboratory by A2LA.
Cat. No. 1076
Traceable® Digital Radio Atomic Wall Clock Instructions
92-1076-10
Rev 3 091107
Traceable® is a registered trademark
of Control Company
©
2007 Control Company
CARE AND MAINTENANCE
This product is engineered to provide years of satisfactory
service if handled carefully. Here are a few precautions:
1. Never use chemicals such as benzene or petroleum-
based solvents for cleaning, as they may damage the
case.
2. Do NOT expose the clock to direct sunlight, spotlight, or
extremely hot or cold temperatures.
3. Clean the case by using a cloth slightly dampened with
water and wipe dry.
OPERATIONAL DIFFICULTIES
If this clock does not function properly for any reason,
replace the batteries with new, high-quality batteries (see
“Battery Replacement “ section). Low battery power can
occasionally cause any number of “apparent” operational
difficulties, such as screen dimming or difficulty in reading
the display. Replacing the batteries with new, fresh batteries
will solve most difficulties.
BATTERY REPLACEMENT
Erratic readings, a faint display, or no display are indicators
that the batteries must be replaced. Lift the battery compart-
ment door on back of unit. Remove the exhausted batteries
and replace with two new AA alkaline batteries. Replace the
battery compartment door. The clock will start running from
12:00 a.m., January 1, 1999.
TRACEABLE
®
DIGITAL RADIO ATOMIC WALL CLOCK INSTRUCTIONS
(continued from previous page)


