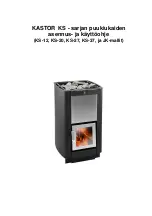
51
GB
Contents
Technical specifications
52
Installation distances to walls and ceilings
53
Air supply
54
Unpacking the stove
55
Installing the smoke baffle
56
Connection to the flue
57
Assembling the soapstone surround
58
Installing the fan (optional extra)
62
Fitting an extra glass side panel (optional extra)
64
How to use your wood-burning stove
65
A warm welcome to Contura
A warm welcome to the Contura family. We hope you
will get a great deal of pleasure from your new stove.
As a new owner of a Contura stove, you have secured
a product with timeless design and long service life.
Contura also has a combustion process that is both
environmentally friendly and efficient, for the best heat
production.
Read through these installation instructions carefully
before installation. Read how to best light your stove
in the lighting instructions.
NOTE!
Report the installation of a stove to your
local authority.
The owner of the house is personally responsible
for ensuring compliance with the mandatory safety
requirements and must have the installation approved by
a qualified inspector. Your local chimney sweep must also
be informed about the installation as this will affect the
routines for regular chimney-sweeping services.
WARNING!
The stove becomes very hot
During operation, certain surfaces of the stove become very
hot and can cause burn injury if touched. Also, take heed
of the strong heat radiated through the door glass. Placing
flammable material closer than the safe distance indicated
may cause a fire. Smoulder combustion can cause quick gas
ignition with the risk of damage to property and personal
injury.


