background image

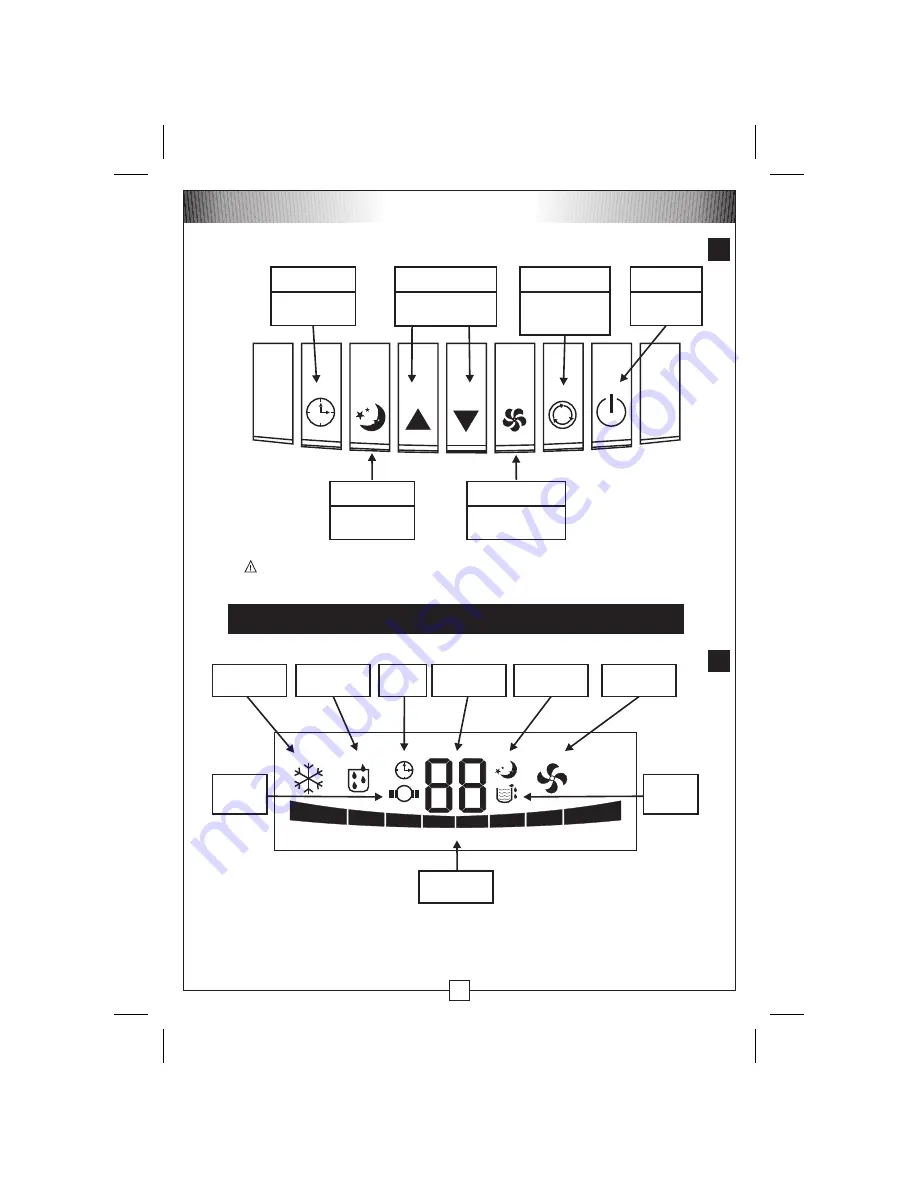
Fan Speed

control button

Press to cycle the fan

speed between low

and high

Sleep

button

Press to enter the

sleep mode

To avoid damage to the control panel, do not operate with sharp objects.

NOTE!

7

CONTROL PANEL

DISPLAY PANEL

8

Press to cycle from

Cooling, Dehumidifying

and Fan modes.

Press to enter the

timer setting mode

and time

Press to turn the

air conditioner on

and off

Press

to increase,

to decrease the

set temperature

r

s

Power ON / OFF

button

Timer Set

button

Mode Select

button

Temperature adjust

buttons

comp

Cooling Mode

Indicator

Compressor

Active

Indicator

Water Tank

Full

Indicator

Dehumidifying

Mode Indicator

Timer

Indicator

Set Temperature

Display

Fan Speed

Indicator

Sleep Mode

Indicator

Fan Mode

Indicator

5

Summary of Contents for ClimateMaster CM10W

Page 1: ...Instruction Manual CP10S CM10W ClimateMaster Portable Refrigerated Air Conditioner...

Page 2: ......

Page 3: ...NTENTS Introduction 1 Safety 2 Component location 3 Installing the exhaust hose 4 Control panel 5 Remote control 6 Operation 7 8 Maintenance 9 Troubleshooting 10 Specifications 11 Warranty 12 CONTENTS...

Page 4: ...ts must not be disposed of with household waste This product should be taken to your local recycling centre for safe treatment Please read these instructions prior to using the appliance and save them...

Page 5: ...a portable air conditioning unit that supplies refrigerated air to a personal area within a room It is not intended to function as a house or room air conditioner Be sure the appliance has been secur...

Page 6: ...Safety cont Caution before connecting the electrical power cord to a power outlet check that the air conditioner voltage is the same as your power supply refer to the rating label located on the side...

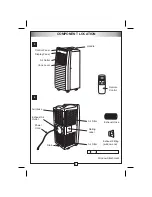
Page 7: ...Air Outlet Handle Vane Lever Display Panel Control Panel Air Filter Air Filter Drain Air Intake Power Cord Exhaust Air Outlet Exhaust Hose Window Attachment Exhaust Fitting window end Rating Label CO...

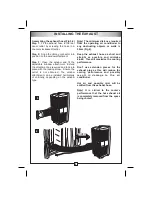
Page 8: ...vertically depending on the window type Note Note The minimum distance required from the operating air conditioner to any obstructing objects or walls is 50cm Fig 6 Keep the exhaust hose as short and...

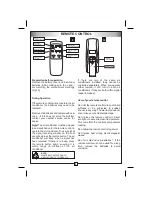
Page 9: ...fying and Fan modes Press to enter the timer setting mode and time Press to turn the air conditioner on and off Press to increase to decrease the set temperature r s Power ON OFF button Timer Set butt...

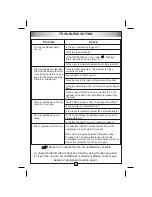
Page 10: ...cover and insert new batteries Remove the batteries and replace with new ones If this does not solve the problem contact your nearest service centre for advice AAA making sure the and are matching the...

Page 11: ...ING or FAN modes Press the FAN SPEED button on the control panel or remote control to adjust the fan speed Each press will cycle the fan speed between low and high In Cooling mode the fan will continu...

Page 12: ...e air conditioner ON press the TIMER button on the remote control or control panel The control panel display will flash and show the time setting Press the TIMER button to increase the time in 1 hour...

Page 13: ...filters Note Use a soft damp cloth to wipe the body clean Never use aggressive chemicals spirits detergents chemically treated cloths or other cleansing solutions These substances could possibly dama...

Page 14: ...needs to be completely removed from the room The air conditioner is not as cool as it once was Are the filters dusty or dirty restricting the airflow Is the air inlet or outlet blocked Is the room tem...

Page 15: ...sure Maximum MPa Low Side Pressure Maximum MPa Water Ingress Protection Rating Weight kg Dimensions mm width depth height Based on manufacturer s test results using the Air Enthalpy method As a policy...

Page 16: ...on examination prove defective by reason of improper workmanship or material We will repair at our nearest service centre or replace at our option the product or any part thereof without charge Should...

Page 17: ...ty Period and b return the Goods to your nearest service centre or to us at the address below by prepaid freight within the Warranty Period together with i the legible and unmodified proof of purchase...

Page 18: ...included in this warranty To ensure that service either pursuant to the above warranty or otherwise is readily available we have established in all States authorised service centres which are availabl...

Page 19: ...15 NOTES...
Page 20: ...the policy of Seeley International to introduce continual product improvement Accordingly specifications are subject to change without notice Please consult with your dealer to confirm the specificat...

Reviews: