background image

MR 2

Battery Powered Portable


Multifunctional


Amplifier

Summary of Contents for MR 2

Page 1: ...MR 2 Battery Powered Portable Multifunctional Amplifier ...

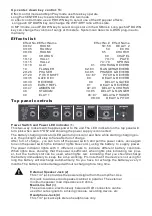
Page 2: ...his feature is located on the top panel as well and is also explained in this section Each product feature is numbered Refer to the front and rear panel diagrams in this manual to locate the particular features next to their number Please read this guide carefully to ensure your personal safety as well as the safety of your amplifier FEATURES 3channel 60 watts 8Ω 80 watts 4Ω plenty of power 1x10 8...

Page 3: ...h a 1 4 phone plug Headphone Level 7 This sets the level to the headphone jack on the rear panel To avoid damage to your hearing make sure to turn the dial fully counter clockwise before using headphones Slowly turn the knob clockwise until a comfortable listening level is set This does not affect the master level Master Level 8 This knob sets the overall level for the unit Make sure the Master le...

Page 4: ...ATED 40 43 EARLY REFL 91 DELAY REVERSE 44 47 AMBIENCE 92 93 DELAY CHORUS 48 STADIUM 94 95 DELAY FLANGER 49 ELAY 1 96 97 DELAY PHASER 98 99 DELAY PITCH Effects list After full of charge you can turn off the power switch and pull the power cable once again tune on the power switch the indicator lights blue color using the battery to supply power The power indicator lights with 3 different colors to ...

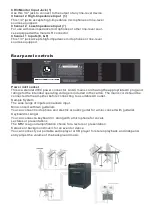
Page 5: ...tures or presentations The MR2 is a good amplification choice for a lecture or presentation Karaoke or background music for an event or dance You can connect your portable audio player or CD player for stereo playback and independ ently adjust the volume of the background music Rear panel controls CH3 Monitor Input Jack 5 Use this 1 4 jack to connect to the output of any line level device Channel ...

Page 6: ...k to add a second speaker cabinet in parallel The external minim um speaker load impedance is 8 ohms you can create a stereo PA system with greater out put power MR 2 SPECIFICATIONS PREAMP SECTION The following preamp specs are measured 1 kHz nominal signal levels are with channel level controls set at 5 minimum levels are with channel level controls set at 10 Channel 1 Inputs Input Impedance 100 ...

Page 7: ... purpose of the polarized or grounding type plug A polarized plug has two blades with one wider than the other A grounding type plug has two blades and a third grounding plug The wide blade or third prong is provided for your safety When the pr ovided plug does not fit into your inlet consult an electrician for replacement of the obsolete outlet Never break off the grounding Write for our free boo...

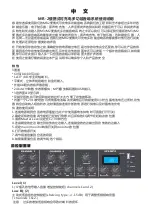
Page 8: ... MP3播放解码器和USB接口 3层界面LED显示屏 及其坚固的 并可收回和锁定的拉杆大大方便了功放的移动 内置一个12V14安培的可充电蓄电池 每次充满电后可持续使用8小时 当蓄电池电压过低时 功放 器将会自动转入哑音状态 这时请直接连接外部的电源进行供电以及对蓄电池充电 快速的使用说明 1 连接电源线到合适的电源插座 当在户外使用蓄电池供电时可直接打开开关 2 确定所有的音量调节旋钮已经被打倒零 并且所有的EQ调节在起始点的位置 3 请将Master Level设定在12 00 钟方位 4 连接键盘的左边输出到功放的左边输入 连接键盘的右边输出到功放的右边输入 5 设定main monitor转换开关到monitor的位置 6 打开的电源开关 7 调节频道音量到合适的级别 8 如果需要请合适的调节EQ各个频段 感谢你选择使用我们的MR2便携式可充电多功能音响系统 我们的工程师和艺术家经...

Page 9: ...ontrol 13 Up center down控制键的使用 99种效果器的选择和MP3播放器的播放都是通过调节这3个控件 来完成的 长按ENTER键可选择效果器和MP3模式 当你选择效果器模式时 使用UP或DOWN 键 你可以随意选择99种不同的音色效果 长按UP 或 DOWN键时可以改变音色效果的干湿度 当你选择MP3模式时 使用UP或DOWN键 你可以随意选择储存在你U盘里的任何歌曲曲目 长 按UP 或 DOWN键时可以改变歌曲信号的音量大小 系统能自动识别U盘插入 Power Switch电源开关和电量指示灯 1 便携式可充电多功能音响系统总电源开关 当你使用外部电源时在打开该开关前请一定要确认你 当地的电源电压 否则将会损坏你的设备 当开关打到ON的位置时 顶板的粉红色电源指示灯 会亮 说明电源已接通 当蓄电池在充电时该指示灯为闪耀状态 充电完毕后闪耀将停止 然后关 掉设备的电源...

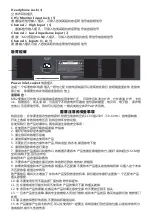
Page 10: ...你可能长时间不使用本产品的情况下 请将插头拔掉 12 考虑到本产品的重量 在搬运本产品时请注意安全操作 不要被压到手指头 13 一旦本产品发生故障 请找专业的维修人员进行维修 或将本产品发回购买地 由我们的维修部门 处理 14 请妥善的保管好电源线 不要将其折叠或刮花 15 本产品能够产生极大的声压 所以在使用时一定要注意将音量打到合适的位置 以免给你的听力 造成临时 或永久性的伤害 Headphone Jack 4 立体声耳机插孔 CH3 Monitor Input Jack 5 通道3监听信号输入插孔 可接入各类高阻抗的话筒信号或音频信号 Channel 2 High Input 6 通道2信号输入插孔 可接入各类高阻抗的话筒信号或音频信号 Channel 2 Low Impedance Input 7 通道2 M2 低阻抗XLR输入插孔 可接入各类低阻抗的话筒信号或音频信号 Chan...

Reviews: