STEP 1
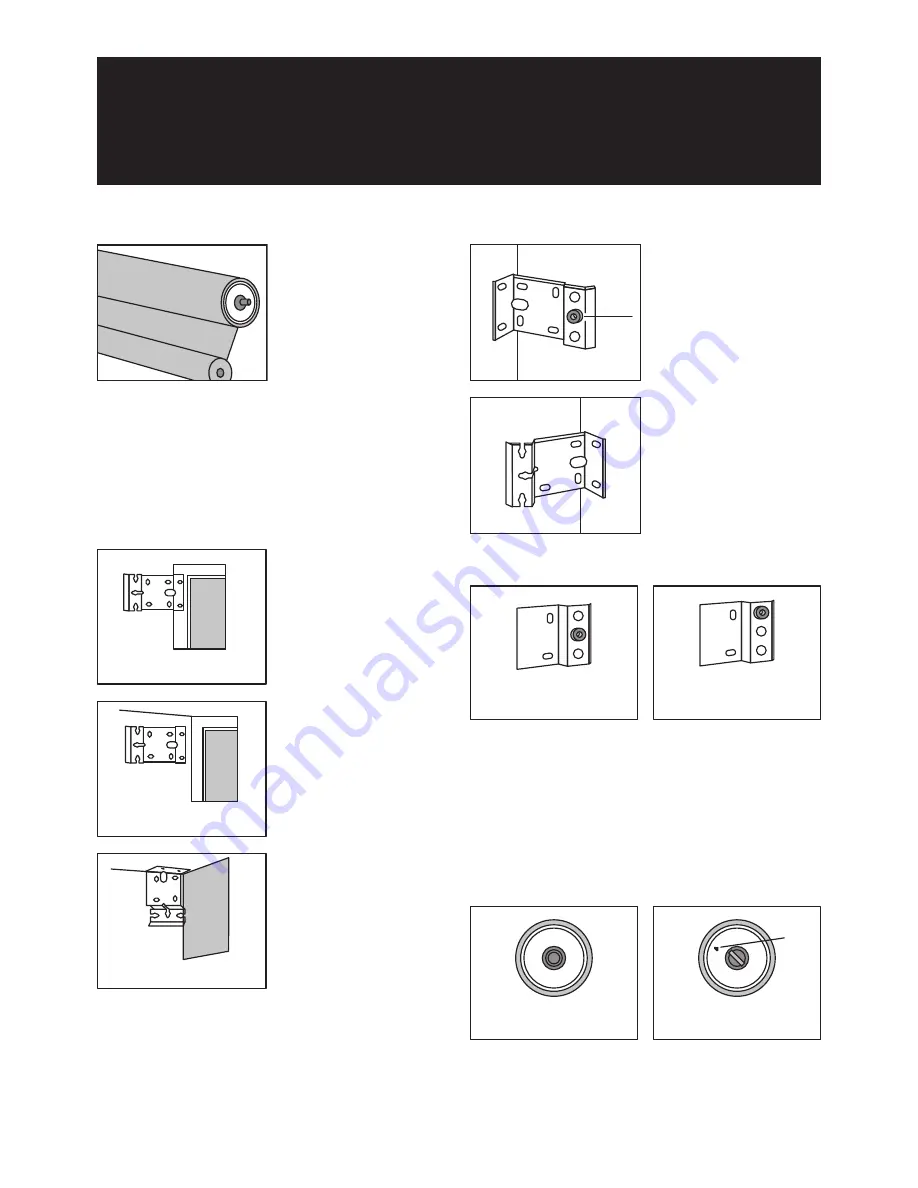
Select the location for
your Exterior Blind by
holding the aluminium
headrail in place
where you would like it
installed. Fully unroll the
blind. Hold the headrail,
with the spring mechanism (flat pin) on your left side,
ensure the fabric is going over the headrail and away
from you. The fabric should be positioned closest to
the window with the front of the fabric (smooth side)
facing you. Roll the headrail towards yourself until
the blind is wound up.
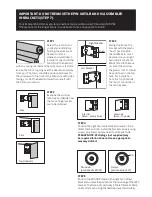
STEP 3
Facing the frame, the
bracket with the plastic
“bush” positioned in
the middle hole, must
be placed on your right
hand side. For Exterior
Blinds fitted to the face
or side of the window,
the plastic “bush” should
be positioned in the top
hole. For installation
from the top (Internal)
the “bush” should be in
the centre space.
Bush
Right Bracket
Left Bracket
Face
Side
Top (Internal)
STEP 2
Examine the window
carefully and decide how
the mounting brackets
are to be installed.
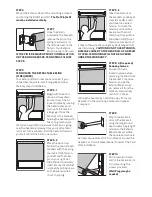
STEP 4
Position the right hand side bracket where it is to be
fitted, mark and drill. Install the bracket securely using
screws provided. You may need to drill a pilot hole.
PLEASE NOTE: Wall plugs (not supplied) may
be required for brick work. Use an appropriate
masonry drill bit.
Internal
(Bush – centre hole)
Face/side
(Bush – top hole)
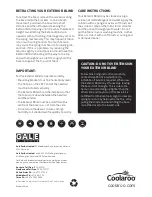
STEP 5
Position the ROUND PIN end in the right hand fitted
bracket and mark the position for the mounting of the LEFT
bracket. The flat pin sits vertically in the left bracket. Mark,
drill and install ensuring the headrail is level horizontally.
Round pin
(positioned to RIGHT)
Flat pin
(positioned to LEFT)
Pin
IMPORTANT: DO NOT REMOVE THE PIN UNTIL BLIND IS ASSEMBLED
IN BRACKETS (STEP 7).
Your Exterior Blind comes pre-tensioned but can be re-tensioned if required (STEP 8).
*Please note for the longer blinds it is advisable to have two people to install.


