

Step 4:
Set the cooler onto the motherboard and screw the cooler
with the nuts and the backplate. Test the assembly with pres-
sing a lile on each side of heatsink. Ready
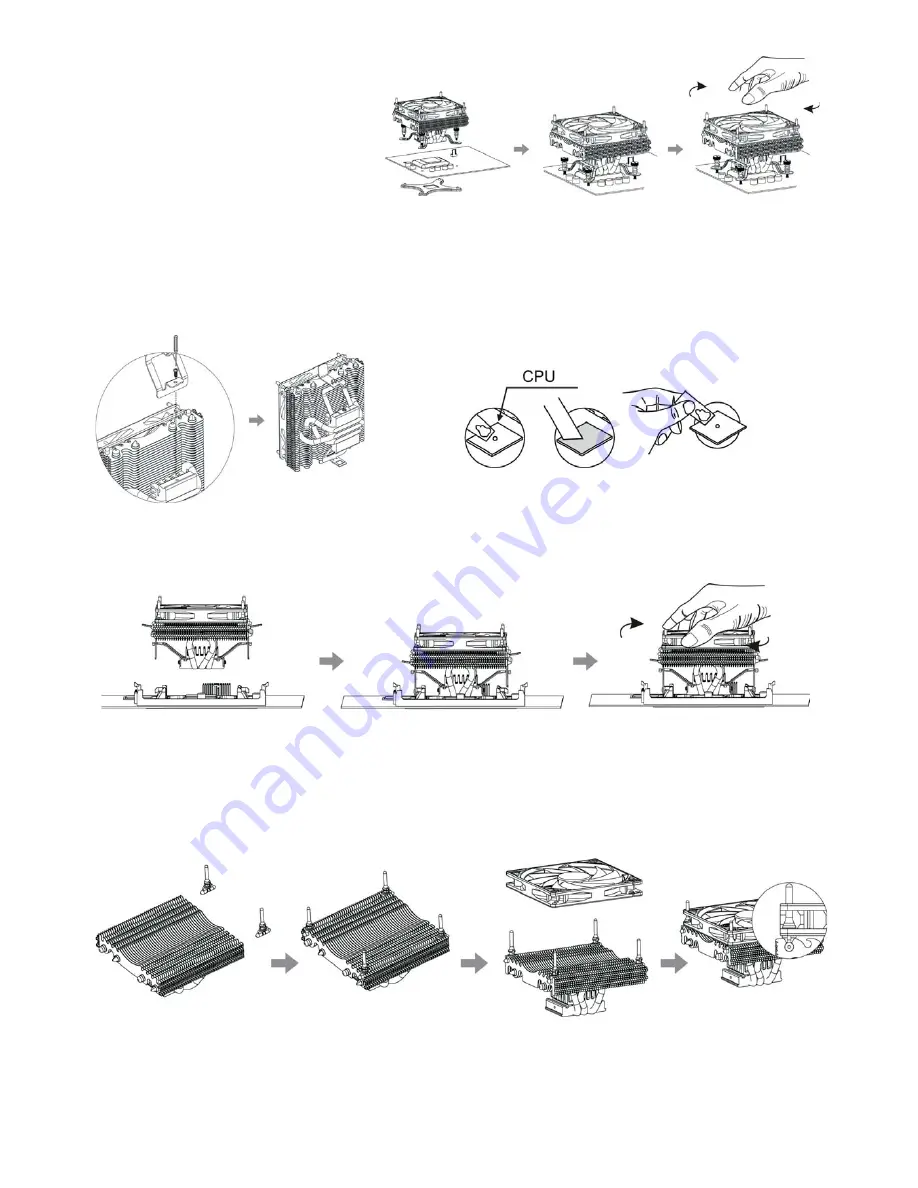
Installation for AMD AM2, AM2+ und AM3:
Step 1:
Aach the two AMD clips with the enclosed Phillips screw according to the
drawing.
Step 2:
Apply some thermal grease in the center of your CPU and allocate it carefully
and as thin as possible (e.g. using an old credit card). But please noce that
coolers based on the “HDT”-technology need more thermal grease than other
coolers.
Step 3:
Set the cooler onto the CPU. Hook one of the clips into the bracket of the mainboard. Take the second clip and hook it into the opposite side of the frame. Make
sure that the clips are hooked in properly and test the assembly with pressing a lile on each side of heatsink. Ready
Fanmounting:
Put the 4 rubber bolts between the fins of the heatsink. Jusfy the bolts into direcon of the mounng holes of the fan supplied. Put the fan onto the heatsink
and pull the rubber bots carefully to the holes of the fan carefully unl the fan is fixed properly. The fan should blow into direcon of heatsink. The arrows on
the fan frame help to find the right orientaon.
Start-Up:
Assembling of Cooltek “CoolForce 2” is completed. Please check proper funcon of fan and check CPU-temperature using your mainboard or suitable monitoring
soware when starng your PC in order to avoid any damages.
Thermal Grease


