background image

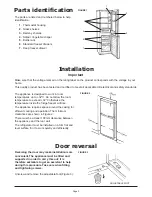
1. Thermostat housing

2. Glass shelves

3. Balcony shelves

4. Salad / Vegetable crisper

5. Bottle rack

6. Standard freezer drawers

7. Deep freezer drawer

Page 3

Parts identification

The parts are listed and numbered below to help
identification.

FIGURE 1

1

2

3

Important

Make sure that the voltage marked on the rating label on the product corresponds with the voltage in your
home.

This quality product has been tested and certified to meet all applicable UK electrical and safety standards.

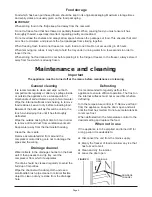
Installation 

The appliance is designed to work in room
temperatures up to +32°C. Do not allow the room
temperature to 32°C otherwise the
temperature inside the fridge freezer will rise.

The appliance requires space around the casing for
efficient cooling and operation. The minimum
clearances are shown in Figure 2.

There must be at least 100mm clearance between
the appliance and the rear wall

The refrigerator must be installed on a firm flat and
level surface for it to work quietly and efficiently.

Reversing the door may make installation more
convenient. The appliance must be tilted and
supported in order to carry this out; it is
therefore advisable to get an assistant to help
during this procedure. Take care when fitting
and tightening screws.

Door reversal

Unscrew and remove the adjustable foot (Figure 3).

FIGURE 3

ADJUSTABLE FOOT

FIGURE 2

100mm

25mm

25mm

4

5

6

7

Summary of Contents for CZ51198

Page 1: ...U US SE ER R I IN NS ST TR RU UC CT TI IO ON NS S Please read these instructions carefully before using this product and keep them safe for future reference CZ51198 CZ51215 Fridge Freezer...

Page 2: ...ransported in a horizontal position Do install to allow for adequate ventilation around the appliance Do not install near heaters or other heat sources Do unplug before cleaning and maintenance Do fre...

Page 3: ...room temperature to exceed 32 C otherwise the temperature inside the fridge freezer will rise The appliance requires space around the casing for efficient cooling and operation The minimum clearances...

Page 4: ...PIVOT PIN BOTTOM HINGE PLATE FOOT PLIERS BLANKING CAP SCREW WORKTOP Release the blanking caps and unscrew and remove the screws securing the top of the worktop Figure 4 FIGURE 4 FIGURE 10 Fit the bot...

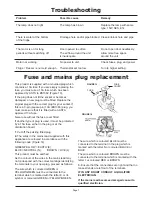
Page 5: ...ge temperature to a point at which certain fresh foods may begin to freeze Use of a freezer thermometer not supplied is recommended to monitor conditions in the freezer Lamp replacement To remove the...

Page 6: ...the internal surfaces must not exceed 6mm before defrosting Turn the temperature control to 0 Remove all food from the appliance keep the doors open and wait until the frost has melted Do not use met...

Page 7: ...which is coloured GREEN or YELLOW GREEN must be connected to the terminal which is marked with the letter E or E symbol or coloured GREEN or YELLOW GREEN The wire which is coloured BLUE must be conne...

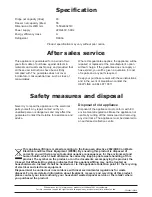
Page 8: ...nsions HxWxD mm 1450x480x510 Power supply 220 240V 50Hz Energy efficiency class A Refrigerant R600a Product specification may vary without prior notice This appliance fitting is marked according to th...

Reviews: