14-20
WR 3M
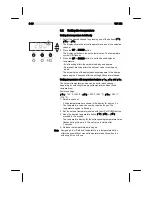
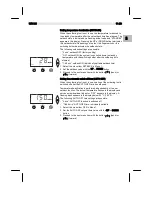
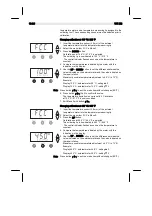
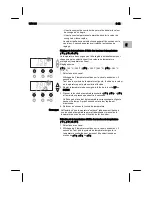
Setting the vacuum OFF delay (VAC OFF)
To prevent the desoldering bit from becoming clogged, it is possible
to set a vacuum OFF delay of 0 to 5 s (factory setting 2 s).
1. Select the menu item VAC OFF in Menu 1.
2. Set the time value (VAC OFF) with the UP or DOWN button.
3. Proceed to the next menu item with the button ┌ 1 ┐ (back) or
┌ 2 ┐ (forward).
Setting the vacuum ON delay (VAC ON)
In order to prevent the pump from starting prematurely or to ensure a
defined soldering-joint preheating time, it is possible to set an ON
delay of 0 to 9 s (factory setting 0 s: Off).
1. Select the menu item VAC ON in Menu 1.
2. Set the time value (VAC ON) with the UP or DOWN button.
3. Proceed to the next menu item with the button ┌ 1 ┐ (back) or
┌ 2 ┐ (forward).
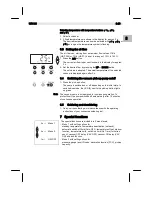
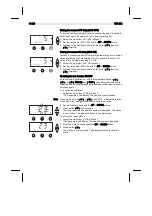
Switching the lock function ON/OFF
After the lock is switched on, only the temperature buttons ┌ 1 ┐,
┌ 2 ┐ and ┌ 3 ┐, Pick-Up and ┌ 1·2·3 ┐ can still be operated on the
repair station. All other settings are disabled until the repair station is
unlocked again.
To lock the repair station:
1. Select the menu item LOCK in Menu 1.
"OFF“ appears in the display. The padlock symbol flashes.
Note Pressing the buttons ┌ 1 ┐ or ┌ 2 ┐ while "OFF“ is displayed results
in the menu item being exited without a stored lock code.
2. Set a 3-digit lock code with the UP or DOWN button.
3. Press button ┌ 3 ┐ for 5 seconds.
The code is stored. The padlock symbol is displayed. The station
is now locked. The display switches to the main menu.
To unlock the repair station:
1. Select the menu item LOCK in Menu 1.
"ON“ appears in the display. The padlock symbol is displayed.
2. Enter the 3-digit lock code with the UP or DOWN button.
3. Press button ┌ 3 ┐.
The station is now unlocked. The display switches to the main
menu.
Summary of Contents for Weller WR 3M
Page 2: ......
Page 4: ...WR 3M II ...
Page 5: ...EN FR IT ES PT NL SV DK FI GR TR CZ PL HU SK SL EE LV LT WR 3M Betriebsanleitung DE ...
Page 25: ...EN FR IT ES PT NL SV DK FI GR TR CZ PL HU SK SL EE LV LT DE WR 3M Operating Instruction ...
Page 45: ...EN FR IT ES PT NL SV DK FI GR TR CZ PL HU SK SL EE LV LT WR 3M Mode d emploi DE ...
Page 67: ...EN FR IT ES PT NL SV DK FI GR TR CZ PL HU SK SL EE LV LT WR 3M Istruzioni per l uso DE ...
Page 89: ...EN FR IT ES PT NL SV DK FI GR TR CZ PL HU SK SL EE LV LT WR 3M Manual de uso DE ...
Page 111: ...EN FR IT ES PT NL SV DK FI GR TR CZ PL HU SK SL EE LV LT WR 3M Manual do utilizador DE ...
Page 131: ...EN FR IT ES PT NL SV DK FI GR TR CZ PL HU SK SL EE LV LT WR 3M Gebruiksaanwijzing DE ...
Page 151: ...EN FR IT ES PT NL SV DK FI GR TR CZ PL HU SK SL EE LV LT WR 3M Instruktionsbok DE ...
Page 171: ...EN FR IT ES PT NL SV DK FI GR TR CZ PL HU SK SL EE LV LT WR 3M Betjeningsvejledning DE ...
Page 191: ...EN FR IT ES PT NL SV DK FI GR TR CZ PL HU SK SL EE LV LT WR 3M Käyttöohjeet DE ...
Page 211: ...EN FR IT ES PT NL SV DK FI GR TR CZ PL HU SK SL EE LV LT WR 3M Οδηγίες Λειτουργίας DE ...
Page 233: ...EN FR IT ES PT NL SV DK FI GR TR CZ PL HU SK SL EE LV LT WR 3M Kullanım kılavuzu DE ...
Page 253: ...EN FR IT ES PT NL SV DK FI GR TR CZ PL HU SK SL EE LV LT WR 3M Návod k použití DE ...
Page 273: ...EN FR IT ES PT NL SV DK FI GR TR CZ PL HU SK SL EE LV LT WR 3M Instrukcja obsługi DE ...
Page 295: ...EN FR IT ES PT NL SV DK FI GR TR CZ PL HU SK SL EE LV LT WR 3M Üzemeltetési utasítás DE ...
Page 315: ...EN FR IT ES PT NL SV DK FI GR TR CZ PL HU SK SL EE LV LT WR 3M Návod na používanie DE ...
Page 335: ...EN FR IT ES PT NL SV DK FI GR TR CZ PL HU SK SL EE LV LT WR 3M Navodila za uporabo DE ...
Page 355: ...EN FR IT ES PT NL SV DK FI GR TR CZ PL HU SK SL EE LV LT WR 3M Kasutusjuhend DE ...
Page 375: ...EN FR IT ES PT NL SV DK FI GR TR CZ PL HU SK SL EE LV LT WR 3M Lietosanas instrukcija DE ...
Page 395: ...EN FR IT ES PT NL SV DK FI GR TR CZ PL HU SK SL EE LV LT WR 3M Naudojimo instrukcija DE ...
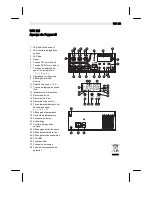
Page 415: ...WR 3M Circuit Diagram DE EN FR IT ES PT NL SV DK FI GR TR CZ PL HU SK SL EE LV LT ...
Page 416: ...WR 3M Exploded Drawing ...
Page 417: ......


