background image

4

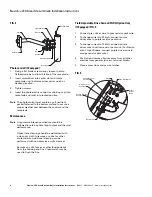
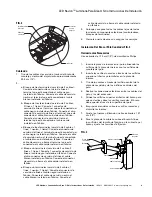
FIG. 4

Photocontrol (If Equipped) 

1.

Using a flat blade screw driver, loosen the two
flathead screws to allow rotation of the receptacle.

2.

Insert screwdriver into center slot and rotate
receptacle until indicator arrow points north or
desired direction.

3.

Tighten screws.

4.

Insert the photoelectric control (or shorting cap) into
receptacle and twist into locked position.

Note

:  

The photocontrol must contain a soft, resilient 
gasket fastened to the bottom surface to assure a 
proper weather seal between the control and the 
receptacle.

Maintenance

Note

 A regular maintenance schedule should be 
followed to retain optimal light output and thermal 
performance.  

Optical lens cleaning should be performed with 
a clean dry cloth to remove any dust or other 
contaminants. Additional cleaning can be 
performed with non-abrasive acrylic cleanser.

Remove any dirt, leaves or other foreign debris 
from the housing and fi ns. Clean water may be 
used to fl ush the fi ns. 

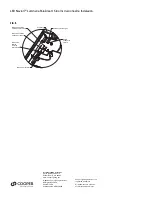
Field Adjustable Drive Current (FADC) Option Only 
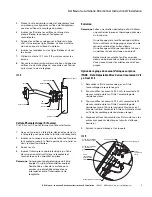
(If Equipped) FIG. 5

1.

Connect grey driver wire to grey resistor pack wire.

2.

To change current to 525mA, connect purple
driver wire to purple resistor pack wire.

3.

To change current to 700mA, connect purple
driver wire to yellow resistor pack wire. (For Navion
with 1 Light Square, connect purple driver wire to
orange resistor pack wire).

4.


Position and secure all wires away from all other
electrical components (drivers, terminal blocks).

5.


Close access door and secure latches.

FIG. 5

Navion

TM

 LED Area/Site Luminaire Installation Instructions

    IMI-812    ADH140462    

www.cooperlighting.com

Navion

TM

 LED Area/Site Luminaire Installation Instructions

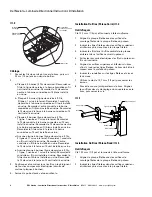
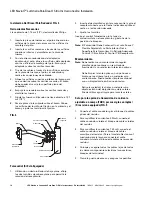
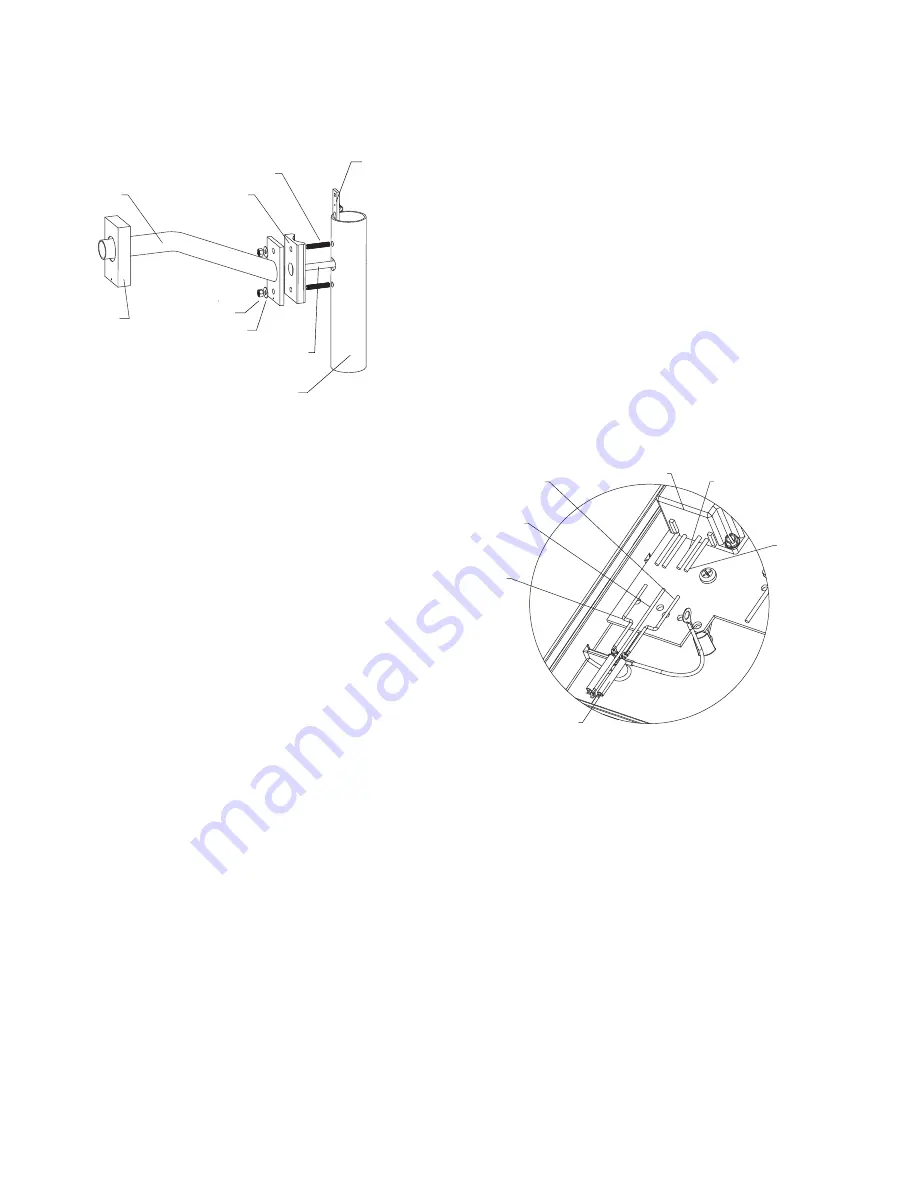
Arm

Adapter

Threaded Rods

Backup Plate

Cover Plate

Electrical Wires

Round Pole

Nuts

Washer

Yellow Resistor

Pack Wire

Grey Resistor

Pack Wire

Purple Resistor

Pack Wire

Resistor Pack

Driver

Grey Driver Wire

Purple 

Driver 

Wire

Summary of Contents for Navion Series

Page 1: ...S IMI 812 NavionTM LED Area Site Luminaire Installation Instructions DEL NavionTM Luminaire directionnel Instructions D installation LED NavionTM Luminaria para rea o sitio Instrucciones De Instalaci...

Page 2: ...s purpose please contact your nearest representative NOTE Specifications and dimensions subject to change without notice WARRANTY LIABILITY Consult www cooperlighting com for current Limited Warranty...

Page 3: ...Arm Installation Square Pole FIG 3 Tools Required 1 2 open wrench Phillips screw driver 1 Insert nut plate into pole aligning holes on nut plate with mounting holes on the pole 2 Insert threaded rods...

Page 4: ...ser Remove any dirt leaves or other foreign debris from the housing and fins Clean water may be used to flush the fins Field Adjustable Drive Current FADC Option Only If Equipped FIG 5 1 Connect grey...

Page 5: ...reil Si des renseignements additionnels sont n cessaires afin de r soudre un probl me insuffisamment d crit pour l utilisation veuillez communiquer avec votre repr sentant le plus pr s de chez vous RE...

Page 6: ...ir install en usine Raccordez le fil neutre au fil blanc install en usine Raccordez le fil de mise la terre au fil vert install en usine 3 Positionnez et s curisez tous les fils en les loignant de tou...

Page 7: ...au bas de la surface pour assurer une tanch it ad quate aux intemp ries entre l interrupteur et le r ceptacle Entretien Remarque Faites un entretien p riodique afin d obtenir une sortie lumineuse et t...

Page 8: ...el funcionamiento o el mantenimiento Cuando necesite informaci n adicional para satisfacer un problema que no tenga la cobertura suficiente para el objetivo del usuario comun quese con su representant...

Page 9: ...alado en f brica Conecte el conector de servicio a tierra al cable verde instalado en f brica e Bloque sin terminales servicio de 3 cables 1 l nea 1 neutro 1 tierra Conecte el conector de servicio de...

Page 10: ...el recept culo hasta que la flecha indicadora apunte al norte o a la direcci n deseada 3 Ajuste los tornillos Inserte el control fotoel ctrico o la tapa de cortocircuito en el recept culo y g relo ha...

Page 11: ...140462 Cooper Lighting Solutions is a registered trademark All trademarks are property of their respective owners FIG 5 LED NavionTM Luminaria Para rea O Sitio Instrucciones De Instalaci n Bloque de c...

Reviews: