User Manual: WaveLinx Lite (1.5)
18
www.cooperlighting.com
Initial Site Setup Using the Mobile Application
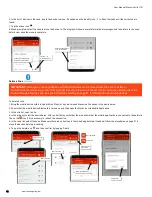
The WaveLinx Lite Mobile Application will be used to provision and organize WaveLinx Lite devices. This process consists of multiple steps:
Step 1: Create a site(s) (requires internet connection)
Step 2: Create areas
Step 3: Provision an area’s first device
Step 4: Manage the area’s zones
Step 5: Manage the area’s occupancy sets
Step 6: Provision the remaining area devices and assign to zones
Step 7: Repeat process for additional areas
Step 1: Create a Site
To start a new location’s setup, first create a site for the facility. Each facility administered by the WaveLinx Lite App is created as a unique site.
There is no limit on the number of sites that one user can create. Large projects with more than 28 areas may require multiple sites.
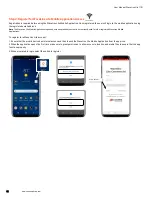
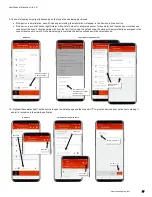
1: Open the WaveLinx Lite Mobile Application.
2: Tap ‘Add a Site’ or tap the ‘ ’ icon.
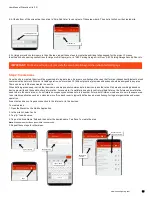
3: When prompted, enter a unique site name (alpha numeric) and the site details. Fields marked with the asterisk (*) are required. Tap ‘Next’ to
continue. If the app displays the message “Error, site name already exists”, the site name has already been taken by another user for their site.
Try adding on a unique number or change the site name to something else.
Note
: For easy identification, use naming conventions for large multi-site projects, i.e. “ABC Parking Garage First Floor”, ABC Parking Garage Second
Floor, etc.
IMPORTANT:
Although the Mobile App may allow creation and provisioning in a different order, follow the
recommended step order outlined in this manual for best results.
IMPORTANT:
The process of creating a site requires a connection to the internet. If internet access on site will be
limited, setup the site in advance. Once the site is created, the mobile application does not require an internet
connection to provision and organize devices.
Enter site details
Site name has already
been taken. Try a
different site name.
Tap ‘Next’
Select to ‘Add a Site’
or tap on ‘+’


