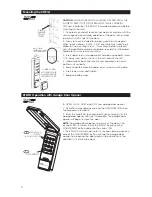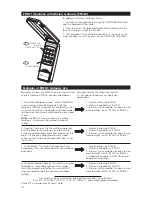
1. Raise Keyless Entry cover to expose battery cover.
2. Snap open battery cover with a coin and remove old battery.
3. Replace 9 volt battery, then replace battery cover.
WARNING!
IF BATTERY IS SWALLOWED, CONTACT PHYSICIAN
IMMEDIATELY.
WARNING!
FIRE AND BURN HAZARD. DO NOT RECHARGE,
DISASSEMBLE, HEAT, OR INCINERATE. KEEP BATTERY OUT OF THE
REACH OF SMALL CHILDREN. INSTALL BATTERY CORRECTLY.
DISPOSE OF USED BATTERIES PROMPTLY.
NOTE: Replace the 9 volt battery when keypad light becomes
dim or does not light up.
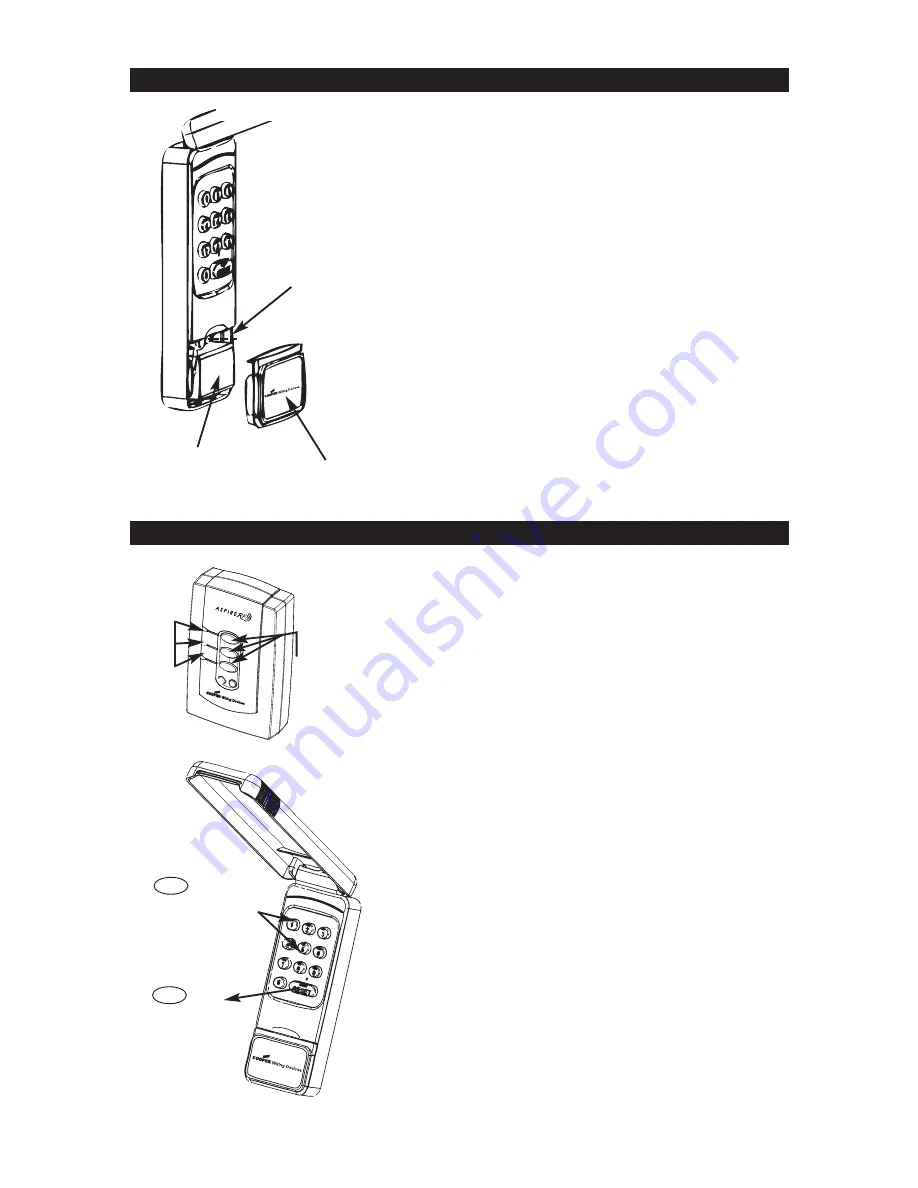
To program a PIN to a Scene button on the Wireless Gateway
(RFBGD), or to reassign a PIN to a Scene button:
1. Press and Hold the Scene button you wish to program on the
Wireless Gateway, either Scene 1, 2 or 3, until the LED turns off,
then immediately release the Scene button (before the LED turns
on again).
2. Open the cover of the RFWGT, then push the ON/OFF/RESET
button of the Keyless Entry (RFWGT). The RFWGT keypad will light
up indicating it has been activated and is waiting for commands
(illumination may not be visible in direct sunlight).
3. Press the desired 4-digit PIN number (example 1-2-3-4).
Programming to the Scene is now complete.
The LED on the Wireless Gateway will flash 3 times quickly to
indicate that the programming is successful.
NOTE:
Your RFWGT cannot directly operate Z-Wave™ modules,
the Z-Wave™ modules must be programmed to the Gateway
Module to which you have programmed your RFWGT PIN code.
See the Gateway User Manual (RFBGD) for instructions on
programming Z-Wave™ modules.
NOTE:
Each Scene button on the Gateway must be programmed
with a different PIN.
USE COIN TO SNAP
OPEN BATTERY
COVER
RFWGT Battery Replacement
Programming RFWGT to Wireless Gateway (RFBGD)
ON/OFF/RESET
USE KEY PAD
TO INPUT
4-DIGIT PIN CODE
3
2
BATTERY
COVER
BATTERY
WIR
ELESS
CONTRO
L SYST
EM
WIRELESS CONTROL SYSTEM
LEDs
CHOOSE 1
SCENE
Button
5
WIRELESS GATEWAY
RFBGD
RFWGT

