9
Loose the snap hooks of the
trapeze shaped cover at the
entries- and mounting-side of
the luminaire (Fig. 4). According
to as-sembly conditions close
open cable entries with sealing
stoppers and stamp or cut out a
hole.
Details see SV Euro 1.
Mount the luminaire with
appropriate screws to the
ceiling or use CEAG
accessories (Fig. 6).
5.2 Mains Connection
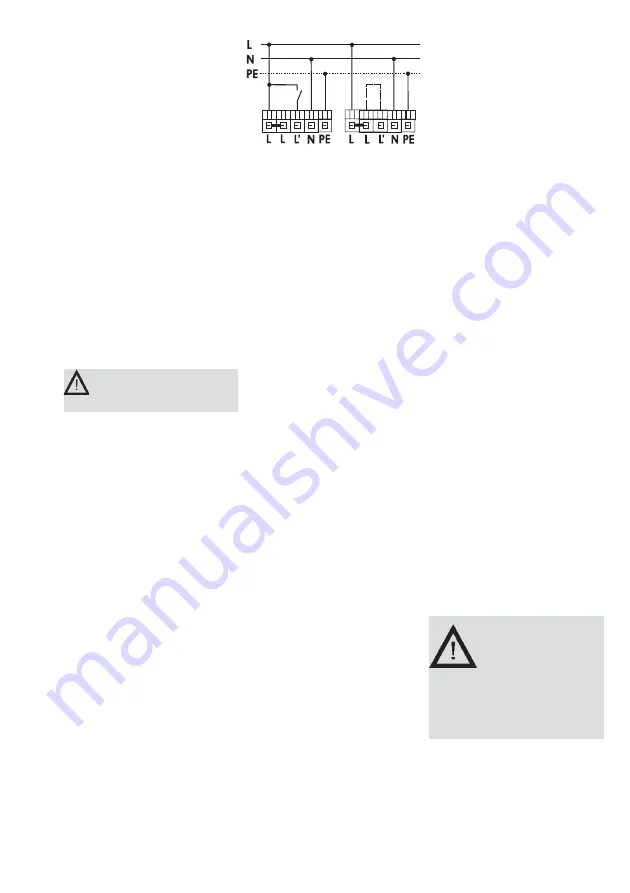
The mains cable should be
connected to the terminals N,
L, L’ and PE terminal, where L
is an un-switched permanent
connection for the electronics
and L’ is used for switching the
lamp on and off with a light
switch as and when required
(Fig. 7).
The PE-connection serve
as function earth. It has no
function of protection!
5.3 Complete Luminaire
Plug the faston plugs of the
battery cables to the contact
plugs on the conductor board -
red wire to +(plus), blue wire to
- (minus) (Fig. 9).
SV Euro 1: Put up the top part
of enclosure and fix it with the 4
screws. Enter the lamp in the
sockets.
SV Euro 2: Put in the trapeze
shaped cover between the
adjusted trapeze shaped blocks
of enclosure and snap the 4
snap hooks. Enter the lamp in
the sockets.
Snap the legend cover(s) on the
enclosure of the luminaire.
switched
maintained
light
non main-
tained light
without jumper
L-L’,
maintained
light with jum-
per L-L’
Fig. 13
Optionally, every luminaire can
be operated with light switching
(switched maintained light), in
non maintained mode (without
jumper L-L’) or in maintained
mode (with jumper L-L’) (Fig.13).
Button/LED-foil-connection
Changing button/LED or printed
circuit please see marker 1 on
the printed circuit and on the
printed conductor (Fig. 9).
5.4 Monitoring device
The green LED (fig. 8) indicates
mains power and the charging
control for the batterie. With the
test button the emergency
switching can be tested.
5.5 Accessories
for SV Euro 1
The wire guard should be
firmly attached to the wall cen-
trally in front of the luminaire
using the four lugs and four
screws of the appropriate size
(Fig.11).
for SV Euro 2
Chain fasting
Part no.: 400 71 350 432
Ceiling mounting
Part no.: 400 71 350 432
Fig.: 14
Pendulum set
Part no.: 400 71 350 400,..402,
..404
Wall bracket
Part no.: 400 71 350 418
Fig.: 15
6. Inspection/
Maintenance/Repair
Observe the valid regulations
for the inspection, maintenance
and repair of electrical
equipment!
7. Disposal/Recycling
When disposing of faulty
equipment, observe the valid
regulations for recycling and
disposal.
Plastic parts are marked with the
appropriate symbols.
The NiCd batteries
installed in the
luminaire comply with
EU directive 91/157/
EEC - when changing, return to
the distributor or to an approved
disposer; do not dispose of it
yourself!
We reserve the right to make
technical alterations without
notice.


