26
6. 1 Preset
6. Function setting
1
Define
、
“
”
、
【
】
【
】
、
【
】
【
】
【
】
【
】
【
】
【
】
【
】
【
】
【
】
【
】
【
】
5
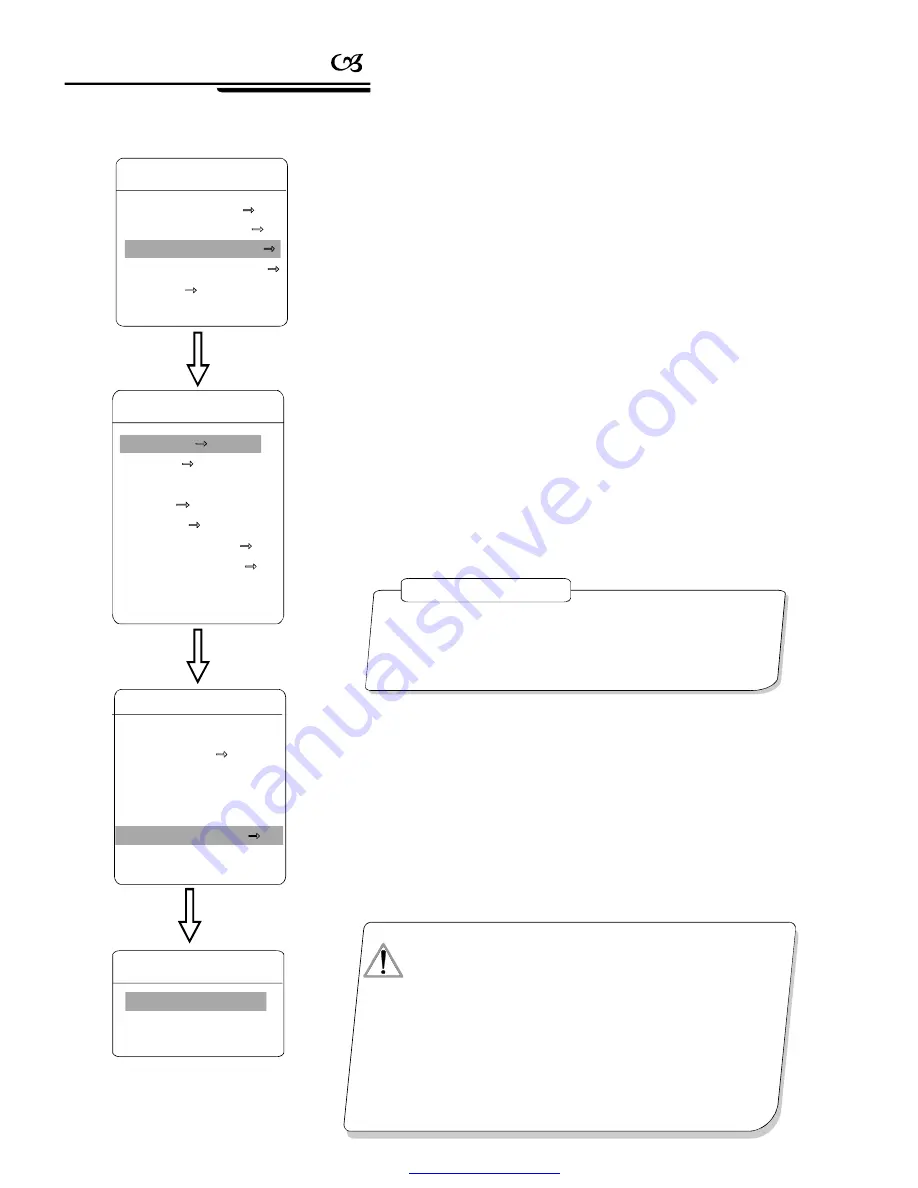
The system enters into the main menu by calling 95 preset or by calling
9 preset twice within 3 seco nds. Click each command to enter
preset m-
enu
according to the order of the left picture. As following:
preset and call preset function can be set by keyboard operat-
ion, input preset number at first, then click the key
save /call preset
to
carry out.
2
Define current preset number: move the cursor to
PRESET N UMB-
ER
,press
OPEN
to choose preset number, the range is 01-128as the
left picture show, here chooses number 5 as current preset, the following
operations aim at the current preset.
3
Define current preset: move the cursor to
SET PRESET
,press
OPEN
, by operating joystick to adjust magnification, to choose good
objective image, press
OPEN
to save. If the image is very near, the I-
mage is belong in digital zoom; when setting preset, the image will jump to
maximal optical zoom.
Display current preset: move the cursor to
SHOW PRESET
, press
OPEN
, the screen will display the current preset;
.Clear current preset: move the cursor to
CLEAR PRESET
, press
OPEN
, the current preset is cleared.
.
AUTO TRACKING
Call preset to Set auto-tracking ON/OFF; set
as ON, call the current preset to open auto-tracking function; set as OFF,
call the current preset to close auto-tracking function; Set as NONE, call
the current preset has no effect in auto-tracking function.
Edit current preset label: move the cursor to
EDIT PRESET LABEL
,
press
OPEN
to enter into editing preset submenu, system auto-sets la-
bel as PRESET-XX, press
OPEN
to revise label.
“
”
:
.
4
6
7.
MAIN MENU
SYSTEM SETTING
CAMERA SETTING
FUNCTION SETTING
WINDOW BLANKING
ALARMS
EXIT
Pre set function is that dome stores c urre nt pa n/til t ang le, z oom
and othe r pos ition parameters into the memory. W hen necessary dome
reca lls these paramete rs an d adj ust c ame ra to that position.
OPERATION KNACKS
1.W hen r unni ng to pro gram, display, clea r pre set and e dit la bel,
shou ld ch oose pre set n umbe r at first.
2. Th e lab el may s et up to 16 cha racters, and d oesn 't nee d ed iting
char acters. Pr ess
OP EN
con tinu ously to j ump over and use
spac ebar to re plac e the dele ted characters . Wh en y ou finish to
edit a cha ract er, pr ess
OP EN
to e nter into the n ext editi ng
char acter; wh en y ou fi nish to ed it th e las t cha racte r, pressin g
OP EN
to save. Pres s
CLOSE
to e xit.Chara cter of label
is su itable for choo sing as f ollow: 0- 9
A-Z
:<>-. , sp ace.
3. As the submenu
STATE
in
A UTO TRACKING
is
set as OF F, it is va lid to Cal l pre set to set auto- trac king
ON/OFF. (Pls reference the Para grap h 6.7 )
、
、
【
】
【
】
【
】
【
】
【
】
【
】
NOTI CE
●
●
●
●
●
●
PRESET NUMBER
SET PRESET
SHOW PRESET
CLEAR PRESET
AUTO TARCKING
EDIT PRESET LABEL
【
】
【
】
【
】
【
】
【
】
【
】
PRESET NUMBER
05
SET PRESET
SHOW PRESET
CLEAR PRESET
AUTO TARCKING NONE
EDIT PRESET LABEL
BACK
EXIT
PRESETS
EDIT PRESET LABEL
LABEL PRESET-05
BACK
EXIT
:
EDIT PRESET LABEL
FUNCTION SETTING
PRESETS
SCAN
PATTERNS
TOUR
ZONES
TIME RUNNING
AUTO TRACKING
BACK
EXIT
Function setting
PDF created with pdfFactory Pro trial version
www.pdffactory.com


