background image

1 9

GB

Assembly the Z-shelf

13

14

15

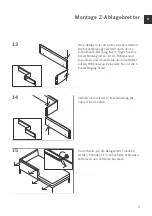
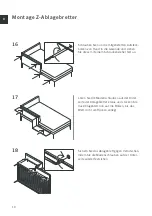
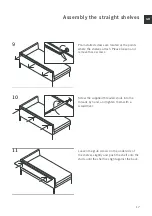
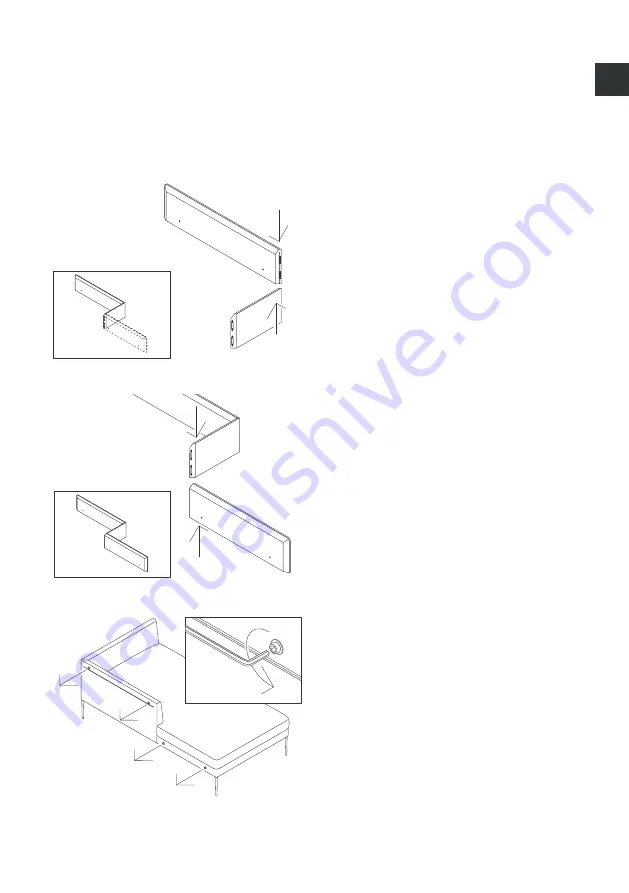
The Z-shelf must be assembled first of all. 
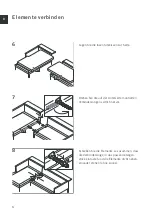
The corner joints are made using the Lamello 
Divario fitting. Insert a corner connector with 
approx. 10 cm offset, and then slide the boards 
together at the same level. The first corner 
connection has now been made.

Repeat step 1) to make the second corner 
connection.

Pre-installed screws are located at the points 
where the shelves attach. Please loosen and 
remove these screws.

Summary of Contents for Pilotis

Page 1: ...Montageanleitung Assembly instructions Pilotis...

Page 2: ...embly the traight shelves Assembly the Z shelf Adjustiong the shelves after installation 4 6 7 9 11 S I C H E R H E I T S H I N W E I S E Ablagebretter maximale Belastung 25 kg KEIN Sitzplatz NICHT au...

Page 3: ...rzeigersinn ab Schrauben Sie alle F e im Uhrzeigersinn von Hand auf das Gewinde Achten Sie darauf dass kein Gegenstand Bezugsstoff zwischen Fu und Anschraubplatte liegt Ziehen Sie mit Hilfe des passen...

Page 4: ...5 D Stecken Sie die Gleiterbasis in die untere ffnung der F e Klippsen Sie den Kunsstoff bzw Filzgleiter auf die Gleiterbasis Montage der F e 4 5...

Page 5: ...Verbinderzunge in das passende Gegen st ck einrastet und die Elemente dicht neben einander stehen ohne L cke Legen Sie die losen Sitzkissen zur Seite Drehen Sie die auf der Unterseite montierten Verbi...

Page 6: ...Bitte l sen und entfernen Sie diese Schrauben Sie nun die mitgelieferten Aufsteck bolzen von Hand in die Gewinde und ziehen Sie diese mit einem Schraubenzieher fest an L sen Sie die Madenschrauben auf...

Page 7: ...8 D Montage gerade Ablagebretter 12 Sichern Sie das Ablagebrett gegen Verrutschen indem Sie die Madenschrauben auf der Unter seite wieder festziehen...

Page 8: ...F gen Sie eine Eckverbindung mit ca 10 cm H henversatz zusammen und schieben Sie dann die Bretter auf ein H henniveau ineinander Nun ist die 1 Eckverbingung fixiert Verfahren Sie mit der 2 Eckverbind...

Page 9: ...hen Sie diese mit einem Schraubenzieher fest an L sen Sie die Madenschrauben auf der Unter seite der Ablagebretter etwas und stecken Sie das Ablagebrett nun auf die Bolzen bis das Brett dicht am R cke...

Page 10: ...er Bretter und die horizontale Positionierung vor Ort nachjustiert werden L sen Sie die Madenschrauben auf der Unter seite des Ablagebretts Ziehen Sie nun das Ablagebrett etwa 5 cm vom R cken ab es so...

Page 11: ...ie die horizontale Positio nierung des Bolzens vornehmen Ziehen Sie die beiden Schrauben wieder fest an Brett Neigung L sen Sie die beiden Zylinderkopfschrauben nur leicht Durch Verdrehen der Inbus Sc...

Page 12: ...htragliche korrektur Ablagebretter 25 26 Schieben Sie das Ablagebrett wieder dicht an den R cken heran Sichern Sie das Ablagebrett gegen Verrutschen indem Sie die Madenschrauben auf der Unter seite fe...

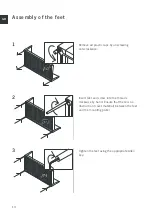
Page 13: ...ng anti clockwise Insert feet and screw into the threads clockwise by hand Ensure that there is no obstruction cover material between the feet and the mounting plate Tighten the feet using the appropr...

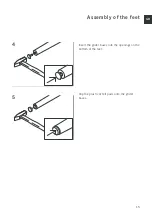
Page 14: ...1 5 GB Insert the glider bases into the openings on the bottom of the feet Clip the plastic or felt pads onto the glider bases Assembly of the feet 4 5...

Page 15: ...the connector tabs engage in their corresponding counterparts and the elements fit together closely without any gap Remove loose seat cushions Turn the connector tabs mounted on the underside to the s...

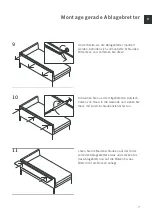
Page 16: ...e the shelves attach Please loosen and remove these screws Screw the supplied threaded studs into the threads by hand and tighten them with a screwdriver Loosen the grub screws on the underside of the...

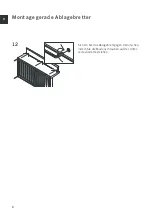
Page 17: ...1 8 GB Assembly the straight shelves 12 Secure the shelf by re tightening the grub screws on the underside...

Page 18: ...ivario fitting Insert a corner connector with approx 10 cm offset and then slide the boards together at the same level The first corner connection has now been made Repeat step 1 to make the second co...

Page 19: ...ds into the threads by hand and tighten them with a screwdriver Loosen the grub screws on the underside of the shelves slightly and push the shelf onto the studs until the shelf lies tight against the...

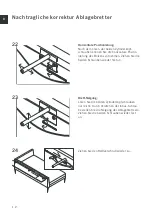
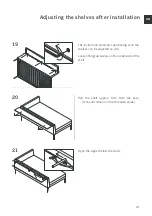
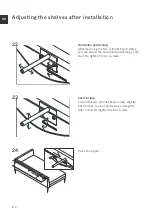
Page 20: ...20 21 The incline and horizontal positioning of all the shelves can be adjusted on site Loosen the grub screws on the underside of the shelf Pull the shelf approx 5cm from the back It should remain on...

Page 21: ...ter loosening the two cylinder head screws you can adjust the horizontal positioning of the stud Re tighten the two screws Shelf incline Loosen the two cylinder head screws slightly Shelf incline can...

Page 22: ...2 3 GB Adjusting the shelves after installation 25 26 Slide the shelf tight against the back Secure the shelf by re tightening the grub screws on the underside...

Page 23: ...COR Sitzm bel Nonenstra e 12 33378 Rheda Wiedenbr ck t 49 0 5242 4102 0 info cor de C O R D E...

Reviews: