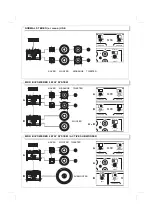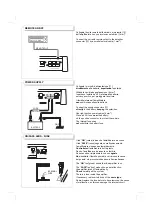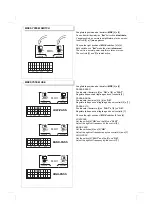
Scegliete la posizione dei deviatori
MRX
[6] e [8].
PASSA BASSO
Posizionate il deviatore [6] su “
ON
” e l’[8] su “
FLAT
”.
Regolate frequenza di taglio agendo sul controllo [5].
PASSA BANDA
Posizionate i deviatori [6] e [8] su “
ON
”.
Regolate le frequenze di taglio agendo sui controlli [5] e [7].
PASSA ALTO
Posizionate il deviatore [6] su “
FLAT
” e l’[8] su “
ON
”.
Regolate la frequenza di taglio agendo sul controllo [7].
Choose the right position of MRX switches [6] and [8].
LOW-PASS
Set the switch [6] “ON” and the [8] one "FLAT".
Adjust the right cut frequency by the control [5].
BAND-PASS
Set the switches [6] and [8] “ON” .
Adjust the right cut frequencies by the controls [5] and [7].
HIGH-PASS
Set the switch [6] “FLAT” and the [8] one “ON”.
Adjust the right cut frequency by the control [7].
MRX SYSTEM SWITCH
MRX SYSTEM USE
Scegliete la posizione dei deviatori
MRX
[6] e [8].
Con entrambi i deviatori su "
flat
" il circuito è
disattivato
.
L'apparecchio è un normale amplificatore, stereo o mono.
I controlli [5] e [7]
non
agiscono.
Choose the right position of MRX switches [6] e [8].
Both switches on "flat" make the circuit disarmed.
The unit is a normal power amplifier, stereo or mono.
The controls [5] and [7] are not active.
Hz
FLAT-ON
LOW-PASS
MRX
FLAT-ON
Hz
HIGH-PASS
Hz
FLAT-ON
LOW-PASS
MRX
FLAT-ON
Hz
HIGH-PASS
50
100
200
500
Hz
FLAT-ON
LOW-PASS
MRX
FLAT-ON
Hz
HIGH-PASS
50
100
200
500
50
100
200
500
LOW-PASS
BAND-PASS
HIGH-PASS
FLAT-ON
Hz
HIGH-PASS
Hz
FLAT-ON
LOW-PASS
MRX
50
100
200
500


