background image

7

QUICK START GUIDE

ON

OFF

1.5V - AA BA

TTER

Y

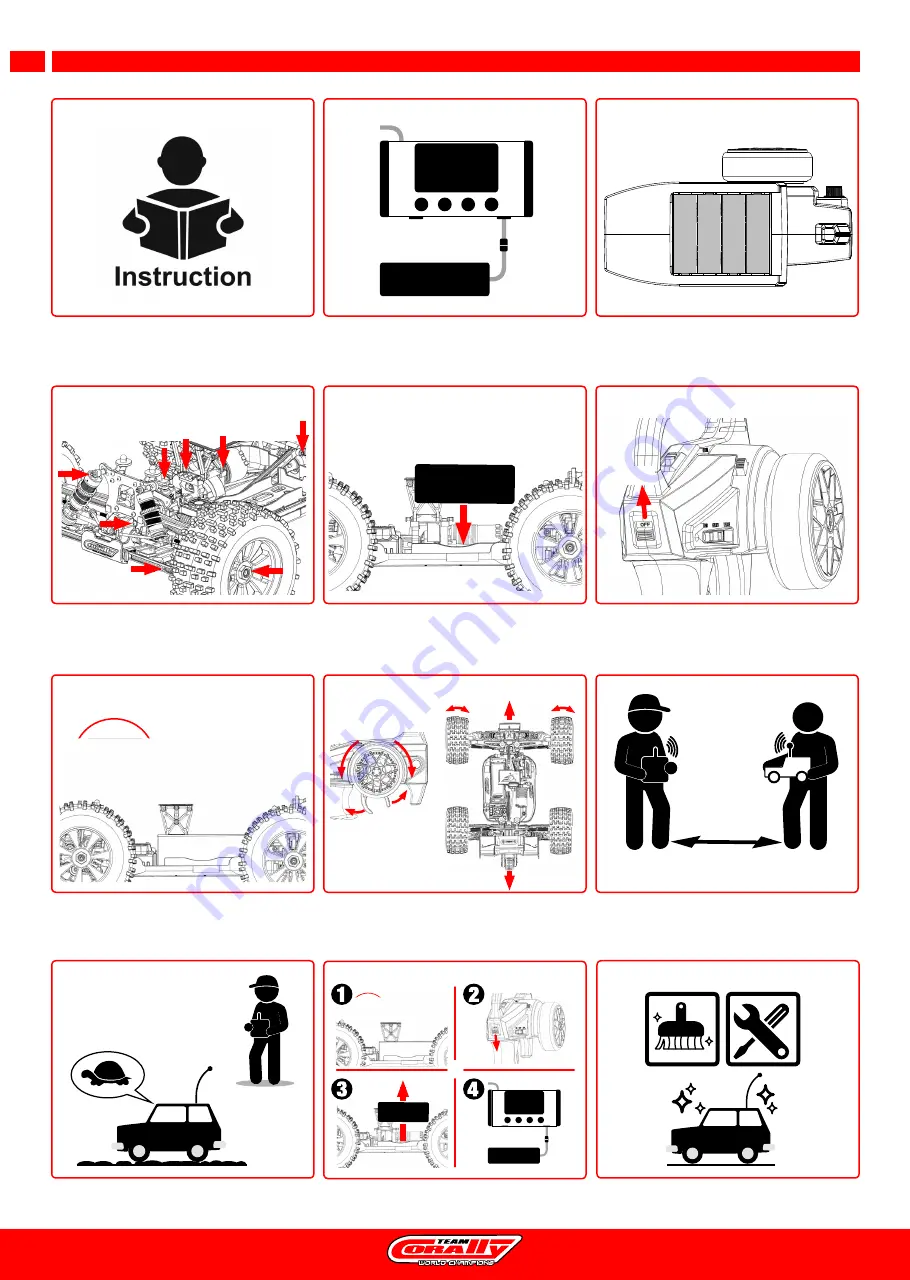
INSTALL 4x AA BATTERY

TURN ON THE TRANSMITTER (Always First)

READ THE INSTRUCTIONS

MAKE SURE THAT ALL SCREWS AND NUTS ARE  

TIGHTENED PROPERLY.

CHARGE THE BATTERY

INSTALL THE BATTERY

WHEN FINISHING

CHECK THE FUNCTIONS

CHECK THE RADIO SYSTEM RANGE

Move away from the max. distance you will drive the vehicle. 

Check that the vehicle responds properly to the controls.

If not, reduce the distance or change the driving location.

DRIVE SLOWLY TO BEGIN

1.5V - AA BA

TTER

Y

1.5V - AA BA

TTER

Y

1.5V - AA BA

TTER

Y

CHARGER

BATTERY

BATTERY

BATTERY

ON

OFF

1. CONNECT THE BATTERY TO THE ESC

2. SWITCH ON THE ESC

CLEAN AND MAINTAIN YOUR VEHICLE

CHARGER

BATTERY

CHARGE THE BATTERY

Summary of Contents for C-00167

Page 1: ...www corally com C 00167_manual REVISED 2020 12 17 ...

Page 2: ...lly JSP Group Intl bvba reserves the right to change any specification without notice All rights reserved This owner s manual is designed for use with your vehicle and contains the instructions you will need to operate and maintain your vehicle We know you want to start driving immediately after unpacking but it is very important that you take the time to read this manual carefully even if you are...

Page 3: ...il the problem has been solved Keep the wheels of the model off the ground when checking the operation of the radio equipment When learning to operate your model go to an area that has no obstacles that can damage your model Before and after each use check all the screws on the model To maintain the best performance check that all moving parts move freely Take all necessary precautions before duri...

Page 4: ...haser should state the material defect or manufacturing fault or symptoms of the fault as accurate as possible so that we can check if our warranty obligation is applicable The goods are transported from the consumer to us and from us to the consumer entirely at the risk and cost of the consumer Invalidation of the Warranty The consumer cannot make a claim under warranty when the fault is affectin...

Page 5: ...immediately and disconnect the battery from the charger Leave the battery outside for a few hours and observe Then recycle the battery according to the instructions of your country region Never dispose of a LIPO battery with domestic waste Before recycling your defective battery it must be neutralized Take a plastic container fill it with water and add a lot of salt until the water becomes opaque ...

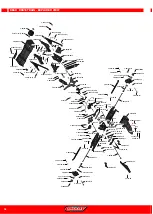
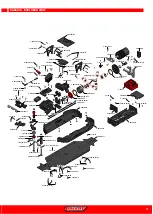
Page 6: ...Differential Front Differential Rear Differential Battery compartment Receiver Box Steering Link Steering Block Suspension Arm Anti Roll Bar Rear Suspension Arm Wheelie Bar Rear Upright Wheel Axle Rear Shock Absorber Power Switch Anti Roll Bar Front Shock Absorber Camber Links ...

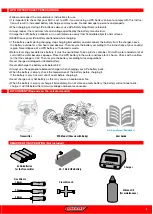
Page 7: ...HE FUNCTIONS CHECK THE RADIO SYSTEM RANGE Move away from the max distance you will drive the vehicle Check that the vehicle responds properly to the controls If not reduce the distance or change the driving location DRIVE SLOWLY TO BEGIN 1 5V AA BATTERY 1 5V AA BATTERY 1 5V AA BATTERY CHARGER BATTERY BATTERY BATTERY ON OFF 1 CONNECT THE BATTERY TO THE ESC 2 SWITCH ON THE ESC CLEAN AND MAINTAIN YOU...

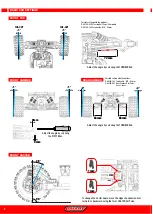
Page 8: ...1 Rear Camber Ball Cups Outer Inner Possible setting with the options C 00180 039 Steering Ball Cups Composite C 00180 144 Turnbuckle M4 92mm Adjust the angle by screwing the TURNBUCKLE To change the Caster Angle move the Upper Suspension Arm forward or backward using the 1mm CASTER CLIP size TOE OUT TOE OUT Adjust the angle by screwing the TURNBUCKLE Adjust the angle by screwing the PIVOT BALL ...

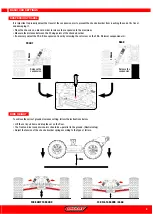
Page 9: ...r suspension arm Lift the car by 30cm and drop the car on the floor The front and rear suspension arms should be parallel to the ground Neutral setup Adjust the tension of the shock absorber spring according to the type of terrain To achieve the correct ground clearance setting follow the instructions below FRONT REAR 118mm 130mm It is important to properly adjust the travel of the suspension arm ...

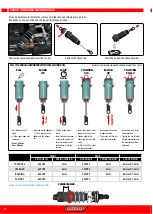
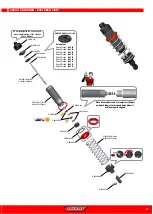
Page 10: ... 0mm 6 Holes Ø1 3mm OFF ROAD 600CPS 4mm 500CPS 0mm 6 Holes Ø1 3mm BASHING 650CPS 4mm 550CPS 0mm 6 Holes Ø1 3mm FACTORY 600CPS 500CPS 6 Holes Ø1 3mm SPRING TENSION Pull the Shock shaft down Fill the shock body with silicone oil Front 450cps Rear 400cps Move the piston up down 3 4x to release the air bubbles in the silicone oil Pull the Shock shaft down Install the shock absorb er vertically and let...

Page 11: ...ston Shock Piston 4x1 6 Shock Piston 4x1 8 Shock Piston 5x1 4 Shock Piston 5x1 5 Shock Piston 5x1 6 Shock Piston 6x1 4 Shock Piston 6x1 3 Shock Piston 8x1 2 Shock Piston 8x1 3 Set content C 00180 133 C 00180 189 C 00180 080 C 00180 190 C 00180 192 C 00180 136 C 00180 138 C 00180 029 C 00180 027 C 00180 149 C 00180 078 C 00180 188 C 00180 188 C 00180 191 C 00180 166 Front C 00180 137 Front C 00180 ...

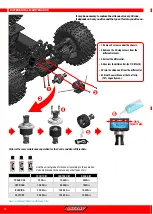
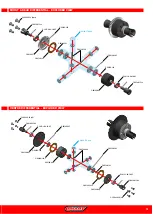
Page 12: ... Oil never use any other types of oil Perform the same maintenance operation for the Centre and Rear differentials 75 CAPACITY MAX SILICONE OIL 1 Remove 2 screws under the chassis 2 Remove the 2 fixing screws from the differential cover 3 Extract the differential 4 Unscrew the differential 4x F H M3x10 5 Drain the silicone oil from the differential 6 Fill with new silicone oil but not fully 75 cap...

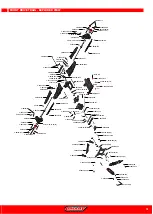
Page 13: ...0 183 1 C 00180 182 C 00180 686 C 00180 684 C 00180 154 3 C 00180 182 C 00180 205 C 00180 686 C 3002 30 10 x4 C 3002 30 10 x4 C 3611 3 08 16 05 C 00180 179 set C 00180 153 3 C 00180 153 3 C 00180 178 C 00180 182 C 00180 182 C 00180 205 C 00180 205 C 00180 179 set C 00180 183 C 00180 184 C 00180 098 C 3611 4 08 16 05 C 3611 4 08 16 05 C 3002 30 12 4pcs ...

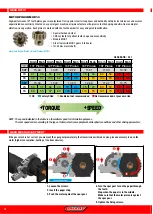
Page 14: ...urposes The real speed varies according to the type of terrain electronic equipment atmospheric conditions and other driving parameters PAPER STRIP 1x8cm 1 Loosen the screws 2 Insert the paper strip 3 Push the motor against the spur gear 4 Turn the spur gear to run the paper through the teeth Stop when the paper is in the middle Make sure that the motor pinion is against the spur gear 5 Tighten th...

Page 15: ... 117 x2 C 00180 122 C 3004 40 04 C 00180 030 C 00180 030 C 3101 30 x2 C 00180 149 C 00180 149 C 3003 30 16 C 3003 30 16 C 00180 148 x2 C 00180 048 x2 C 00180 168 C 3101 40 x2 C 3003 30 14 x2 C 3103 30 14 x2 C 3003 30 14 x4 C 3003 30 10 x2 C 00180 106 C 00180 106 C 00180 104 2 C 3003 30 10 C 00180 109 x4 C 00180 219 x2 C 00180 045 C 00180 033 C 00180 051 C 00180 240 C 3001 25 18 C 3003 25 10 2x C 3...

Page 16: ...114 C 00180 055 C 00180 127 C 00180 368 2 C 00180 367 C 00180 552 C 00180 089 C 00180 149 M4x8 C 3101 30 4 C 00180 033 C 00180 055 C 00180 155 3 C 00180 238 C 00180 052 C 3611 3 08 16 05 M4x8 M5x4 C 00180 089 C 00180 055 C 00180 099 2 C 00180 107 C 00180 107 C 00180 149 C 00180 194 C 00180 016 2 C 3003 30 10 x2 C 3003 30 20 x2 C 3003 30 25 C 3003 30 16 C 3003 30 20 C 3003 30 16 C 3003 30 16 C 3003...

Page 17: ...11 C 52022 C 72113 C 00180 604 C 00180 183 1 C 00180 154 3 C 00180 102 C 00180 529 C 00180 149 C 00180 044 x2 C 00180 305 C 00180 305 F H M4x14 C 3002 30 12 C 3001 40 10 x2 C 3001 40 12 C 3003 30 08 x2 C 3003 30 12 x3 C 3003 30 18 C 3003 30 10 x2 C 3002 30 08 x2 C 3002 30 14 x2 C 3003 30 12 x4 C 3003 30 12 x4 M3x8 C 3003 30 10 C 3003 30 35 M4x10 C 3002 30 10 x4 C 3003 30 06 x4 C 3003 30 08 x2 C 30...

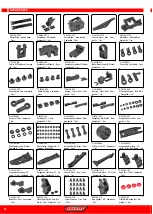
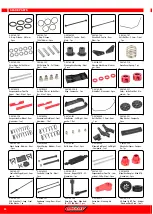
Page 18: ... pcs C 00180 051 Suspension Arm Mount Front Composite 1 Set C 00180 052 Suspension Arm Mount Rear Composite 1 Set C 00180 036 Steering Bellcrank Parts A B C Composite 1 set C 00180 089 Anti Roll Bar Ball Cups Com posite 4 pcs C 00180 098 Diff Case FR RE Composite 1 pc C 00180 099 2 Suspension Arm Long V2 Lower Rear Composite 1 pc C 00180 100 2 Suspension Arm Long V2 Lower Front Composite 1 pc C 00...

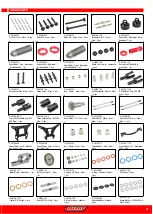
Page 19: ... EXH Steel 2 pcs C 00180 155 3 Pinion Outdrive Cup SP2 EXH Steel 2 pcs C 00180 153 3 Diff Outdrive Cup SP2 EXH Steel 2 pcs C 00180 156 Bevel Pinion 13T Steel 1 pc C 00180 164 Shock Shaft 66mm Rear Steel 2 pcs C 00180 166 Shock Shaft 61mm Front Steel 2 pcs C 00180 168 Shock Tower 4mm Alumini um Front 1 pc C 00180 169 Shock Tower 5mm Alumini um Rear 1 pc C 00180 170 Ball 6 8mm Steel 2 pcs C 00180 17...

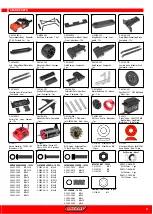
Page 20: ...ont Aluminium 1 Set C 00180 251 Wing Washer Composite 2 pcs C 00180 242 Side Guards Left Right Com posite 1 Set C 00180 246 Anti Roll Bar 2 6mm Rear 1 pc C 00180 287 Shock Spring Medium Rear 2 pcs C 00180 290 Shock Spring Medium Front 2 pcs C 00180 293 Ball 6 8mm Steel 4 pcs C 00180 296 Wheelie Bar Mount Left Right Composite 1 set C 00180 300 Wheelie Bar Spacer Compos ite 1 pc C 00180 301 Centre R...

Page 21: ...c Motor Kuron 825 4 Pole 2050 KV Brushless Sensorless C 72713 M1 0 Pinion Hardened Steel 13 Teeth Shaft Dia 5mm C 00180 616 Wheelie Bar Plate Composite 2 pcs C 3201 40 Steel Shim M4 C 3201 60 Steel Shim M6 10 pcs C 31205 Aluminium Washer for M3 Flat Head Screws Red 10 pcs Steel Nut Low Profile 10 pcs C 3104 40 M4 NYLSTOP NUT 10 PCS C 31001 25 M2 5 C 31001 30 M3 C 31001 40 M4 C 00180 684 Gear Diff ...

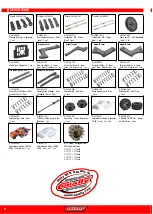
Page 22: ...s C 00180 288 Shock Spring Hard Rear 2 pcs C 00180 291 Shock Spring Hard Front 2 pcs C 00180 346 CVD Drive Shaft Long Rear Wide Hub 1 pc C 00180 382 Polycarbonate Body Dementor XP 6S Clear Cut 1 pc C 00180 316 Shock Cap Lower Aluminium 2 pcs C 00180 606 Spur Gear 50T CNC Machined Steel 1 Pc M1 0 Pinion Hardened Steel Shaft Diameter 5mm C 72711 11 Teeth C 72712 12 Teeth C 72713 13 Teeth C 72714 14 ...

Page 23: ...Direktive 2014 53 EU L objet de la déclaration décrit ci dessus est conforme à la législation pertinente en matière d harmonisation de l Union eu ropéenne en particulier les exigences des spécifications énumérées ci dessous conformément aux dispositions des directives européennes RED 2014 53 EU EN 300 440 V2 1 1 2017 EN 301 489 3 V1 6 1 2013 EN 301 489 1 V2 1 1 2017 EN 60950 1 2006 A11 2009 A1 201...

Page 24: ...WWW CORALLY COM Team Corally is a registered trademark licensed to JSP Group Intl bvba Geelseweg 80 B 2250 OLEN Belgium Tel 32 14 25 92 94 info corally com C 00167 M EN ...

Reviews: