background image

12

11

21

15


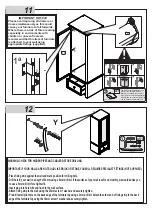
 IMPORTANT NOTICE

Please avoid opening all drawers or
doors simultaneously as this could 
cause your furniture to fall forwards.
Where there is a risk of this occurring,
especially in environments with
children or uneven floors we 
recommend that this item of furniture
is attached to your wall using 
appropriate fixings (supplied).

X

x01

RED = PAINT

The RED sachet contains touch up 
paint for your furniture. Please 
retain for use should you require it 
at any point in the future. Application 
is best with a small paint brush which 
can be cleaned in water after use.

R

R

R

R

R

R

!

ADJUSTING HINGE

R

R


WARNING: CHECK FOR HIDDEN PIPES AND CABLES BEFORE DRILLING.

IMPORTANT: IF YOUR WALLS ARE NOT SOLID LIKE BRICK OR STONE, YOU WILL REQUIRE SPECIALIST FITTINGS (NOT SUPPLIED).

- Place fixing strip against the wall and mark position for drilling hole.
- Drill hole in your wall to a depth of 30mm using a 6mm drill bit. If the surface of your wall is soft and crumbly, we would advise you 
  to use a 5mm drill bit for a tighter fit.
- Insert plug into hole with end flush to the wall surface.
- Attach fixing strip to the wall using the 25mm screw + washer and securely tighten.
- Pre-drill small pilot hole on the back edge of the furniture top using a 2mm drill bit. Attach the other end of fixing strip to the back
  edge of the furniture top using the 14mm screw + washer and securely tighten.
-

Y

Y

14mm

14mm

25mm

Y

x01

Summary of Contents for CRC525

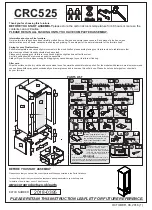
Page 1: ...to your furniture or flooring After care Wipe the surfaces with a dry cloth and an occasional use of a normal household furniture polish For the models with drawers we also recommend you use household spray polish occasionally on drawer grooves and runners as this will aid use Please do not use detergents or chemicals on your furniture PLEASE RETAIN THIS INSTRUCTION LEAFLET FOR FUTURE REFERENCE BE...

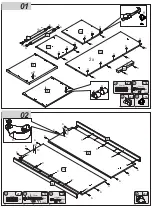
Page 2: ...07 06 12 11 H H H H H H H H H H H D D G D G D 2x 2x 2x 02 C C C C C C C C C C 02 04 03 02 A A A A A A A A A A A A D M M 01 D D D D D M Ø8 Ø8 25mm 25mm A A x24 x12 D D x04 x04 Ø3 5 Ø3 5 14mm 14mm P3 P3 G H x02 x16 28mm Ø4 5 C x10 P3 M x02 GOLD GOLD GREY H H ...

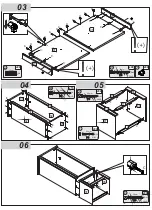
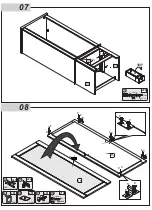
Page 3: ...C 04 05 B 06 B B B B B B B B B B B B B 01 02 02 04 03 12 09 08 06 07 11 11 F F C C F F 05 07 06 C C C C 03 Ø8 25mm A x06 28mm Ø4 5 C x06 H x06 P3 40mm Ø4 5 B x16 P3 28mm Ø4 5 C x02 P3 F x04 Ø3 5 25mm P3 28mm Ø4 5 C x06 P3 GOLD SILVER GOLD GOLD GOLD C ...

Page 4: ... 07 06 10 10 C C C C 08 28mm Ø4 5 C x06 P3 180º GOLD R N R R N R 15 15 R R R R R R K K K K K K R R K N R R L x01 3 16 x 5 8 P x01 GREY K x03 L 270 LEFT GREY O x01 BLACK Ø3 0 16mm R x10 P3 GREY N x02 L O P ...

Page 5: ...etail joints Tap gently up and down the drawer side until fully inserted into drawer front O Use a small drop of glue P x01 5g glue L x01 J x01 3 16 x 3 8 30mm Ø3 5 E x04 P3 GOLD GREY 09 O x01 GREY GREY L O 13 Z Z Z Z Z Z Z Z Z Z Z Z Z Z Z Z Z Z Z Z Z Z Z Z Z Z 14 8x8 Z x26 x22 x22 1 2 3 180º ...

Page 6: ...TING HINGE R R 1ª WARNING CHECK FOR HIDDEN PIPES AND CABLES BEFORE DRILLING IMPORTANT IF YOUR WALLS ARE NOT SOLID LIKE BRICK OR STONE YOU WILL REQUIRE SPECIALIST FITTINGS NOT SUPPLIED Place fixing strip against the wall and mark position for drilling hole Drill hole in your wall to a depth of 30mm using a 6mm drill bit If the surface of your wall is soft and crumbly we would advise you to use a 5m...

Reviews: