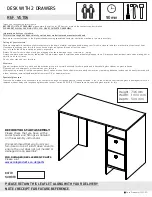
Height: 736 mm
Width: 1000 mm
Depth: 500 mm
90min
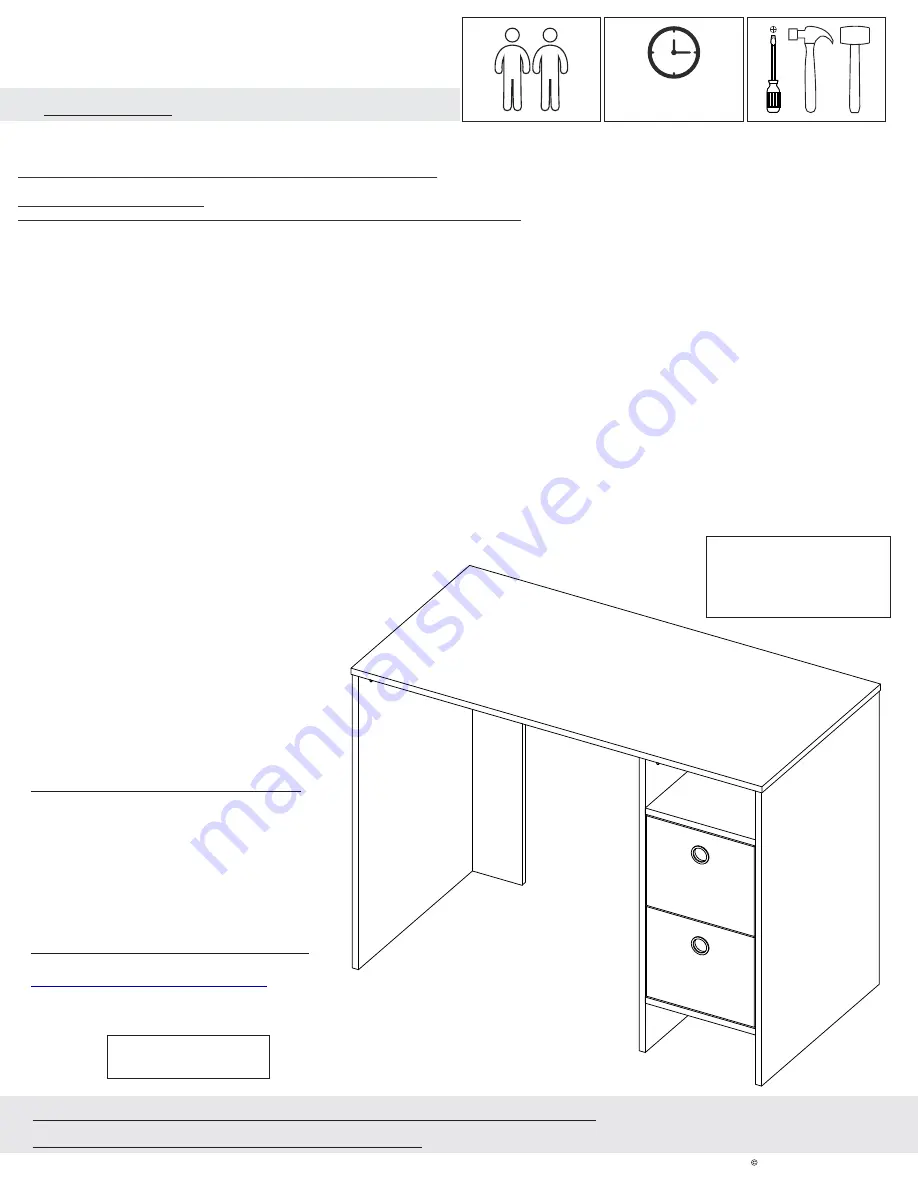
DESK WITH 2 DRAWERS
REF. VG106
Thank you for choosing this furniture.
BEFORE YOU START ASSEMBLY
please store the carton for 48 hours or more so the contents can acclimatise.
PLEASE RETAIN ALL PACKING UNTIL YOU HAVE COMPLETED ASSEMBLY.
Information about your furniture.
This furniture range has been carefully crafted from melamine faced manufactured board.
Each piece is manufactured to the highest standards using specialised computer controlled machinery to ensure accuracy.
Caring for your furniture.
Extreme temperature can cause slight movements in the board material so please avoid placing your furniture close to radiators or other direct sources of heat.
Please avoid exposing your furniture to continued bright sunlight as this can affect the colour.
Any fluid spills should be removed as quickly as possible.
Always lift your furniture when moving as dragging may cause damage to your furniture or flooring.
Always use place mats, coasters or tablecloths to help protect against scratches and accidentally dropped items. Always use heat resistant mats when placing hot or
cold items on to surfaces.
Do not sit or stand on your furniture.
After care.
Wipe all surfaces with a dry cloth and the occasional use of a normal household furniture polish and a household glass cleaner on glass surfaces.
Please do not use detergents or chemicals on your furniture.
After assembly remove all visible component identification stickers, these should remove easily however any remaining adhesive residue can be easily removed with
a label adhesive removal liquid available from most DIY or hardware stores.
Specialist glass care.
Glass can be marked with continual use by contact with rough surfaced objects or strong coloured fluids. In the unlikely event that the glass is damaged it must be
replaced without delay with toughened glass made to specification BS EN12150. Please consult a specialist glass retailer for this.
BATCH
NUMBER
BEFORE YOU START ASSEMBLY
Please check that you have all the
correct parts and fittings as detailed
on the assembly instructions.
We recommend that you build your
furniture on top of a soft clean cover to
ensure the unit does not get marked or
damaged during assembly.
FOR DAMAGED/REPLACEMENT PARTS
Please visit
www.coreproducts.co.uk/parts
PLEASE RETAIN THIS LEAFLET ALONG WITH YOUR DELIVERY
NOTE / RECEIPT FOR FUTURE REFERENCE.
Core Products 10/2020
Summary of Contents for VG106
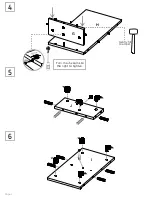
Page 4: ...Page 4 4 5 6 Turn mini x cams to the right to tighten 1 G H J I Gently hit to adjust...
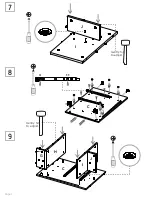
Page 5: ...7 8 9 Page 5 I C J C I J G H Gently hit to adjust Gently hit 4 11 to adjust...
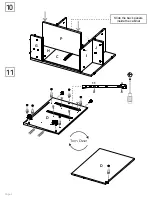
Page 6: ...10 11 Page 6 Slide the back panels inside the cabinet C I J G H P D D 4 11...
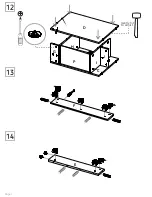
Page 7: ...12 Page 7 13 14 D I J G H C P Gently hit to adjust E F...
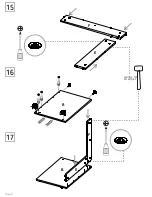
Page 8: ...16 17 Page 8 15 B E F B Gently hit to adjust F E...
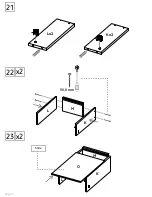
Page 10: ...21 Page 10 22 23 x2 x2 Lx2 Kx2 K L M 50 8 mm K O Slide M L...
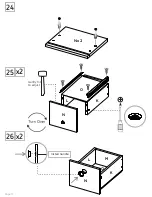
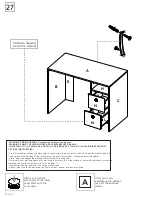
Page 11: ...24 Page 11 25 26 Nx2 K L N O K M L N O Install handle x2 x2 Gently hit to adjust...

