background image

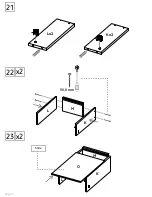
21

Page 10

22

23

x2

x2

Lx2

Kx2

K

L

M

50,8 mm

K

O

Slide 


M

L

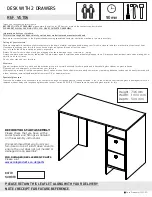
Summary of Contents for VG106

Page 1: ...lacing hot or cold items on to surfaces Do not sit or stand on your furniture After care Wipe all surfaces with a dry cloth and the occasional use of a normal household furniture polish and a househol...

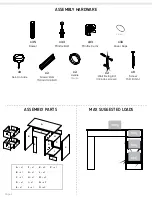
Page 2: ...x Cams x2 Wall Fixing Kit Includes screws Page 2 ASSEMBLY PARTS MAX SUGGESTED LOADS Screw 50 8 mm x8 x9 Nail On Glide x2 x2 Handle Manija A G F H C P J I E B N K M L O K N L M D O A x1 B x1 C x1 D x1...

Page 3: ...1 2 3 1 2 Gently hit to adjust Repeat this in the following steps Gently hit to adjust Repeat this in the following steps Page 3 H H G...

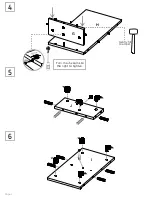
Page 4: ...Page 4 4 5 6 Turn mini x cams to the right to tighten 1 G H J I Gently hit to adjust...

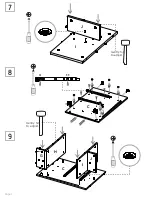
Page 5: ...7 8 9 Page 5 I C J C I J G H Gently hit to adjust Gently hit 4 11 to adjust...

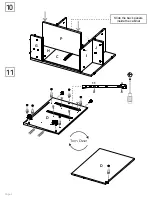
Page 6: ...10 11 Page 6 Slide the back panels inside the cabinet C I J G H P D D 4 11...

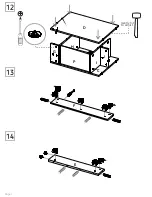
Page 7: ...12 Page 7 13 14 D I J G H C P Gently hit to adjust E F...

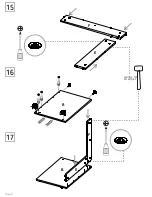
Page 8: ...16 17 Page 8 15 B E F B Gently hit to adjust F E...

Page 9: ...18 19 20 CAREFULLY FLIP THE FURNITURE Page 9 B F E P D C G H A C B E A H I D G Gently hit Gently hit to adjust to adjust...

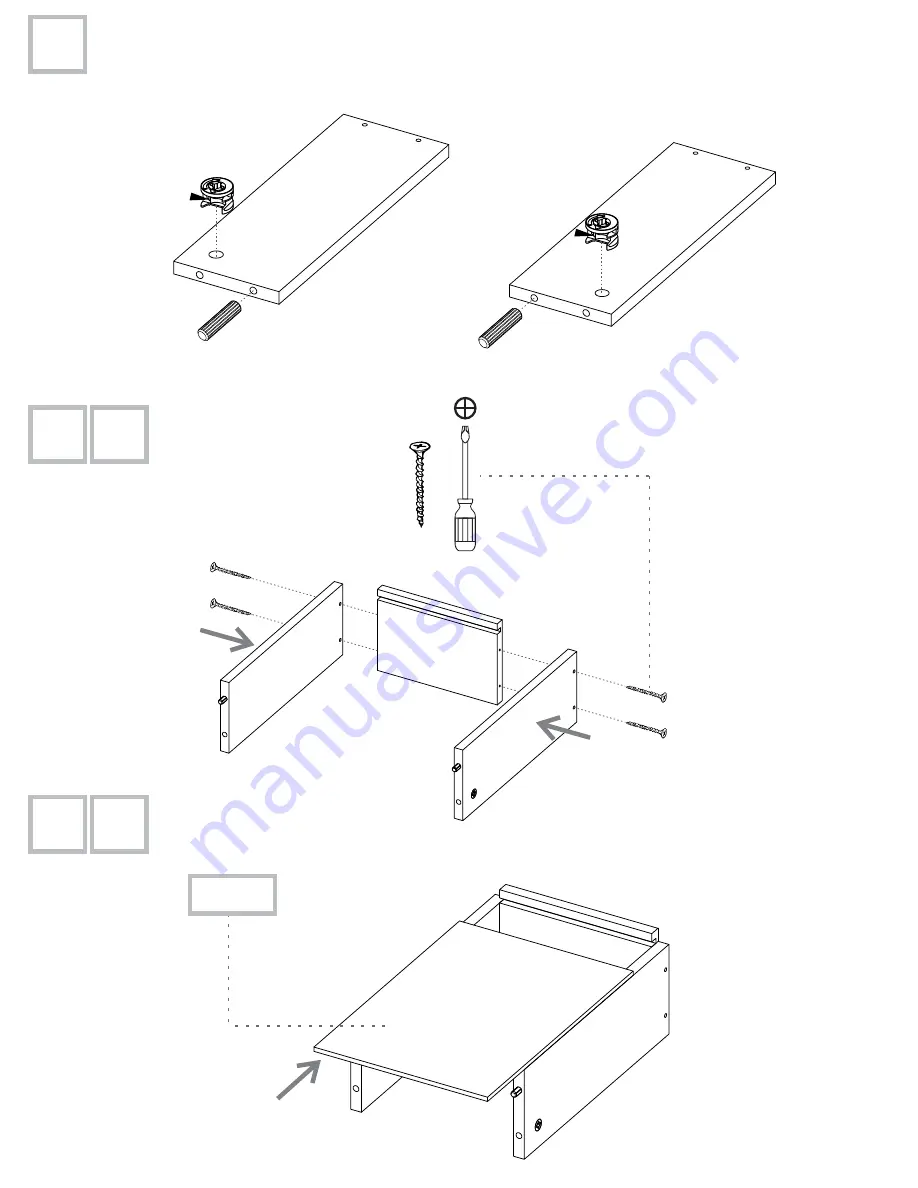
Page 10: ...21 Page 10 22 23 x2 x2 Lx2 Kx2 K L M 50 8 mm K O Slide M L...

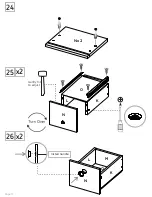
Page 11: ...24 Page 11 25 26 Nx2 K L N O K M L N O Install handle x2 x2 Gently hit to adjust...

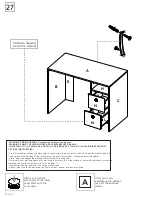
Page 12: ...ack edge of the furniture top using a 2mm drill bit Attach the other end of the xing strip to the back edge of the furniture top using the 15mm screw washer and securely tighten Place xing strip again...

Reviews: