4
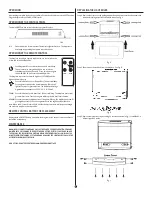
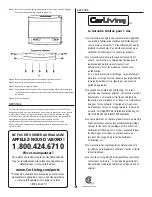
Step 4: Loosen and remove burnout bulb(s) and replace with new bulb(s).
Step 5: Replace the lower cover and re-attach the 11 screws.
Step 6: Replace the rock bed.
Step 7: Hold the front cover tightly and engage it with the 4 locking posts on both sides of
the fireplace. Make sure the front cover has been completely put into ALL 4 locking
posts before releasing your hands.
Step 8: Plug in the unit.
CLEANING
To clean the unit, first turn off the controls on the unit and unplug the unit from power
source. To clean the glass display panel, remove dust with clean dry cloth. Remove finger
prints and other marks clean glass with clean damp cloth. Do not use abrasive cleaners
or spray liquids on glass display panel surface. Metal and metal painted parts should
be cleaned with a damp cloth. Do not use abrasive cleaners or spray liquids on these
surfaces.
WARRANTY
Made in China
LIMITED 1-YEAR WARRANTY
1) The warranty is a consumer warranty and applies only
to products manufactured by CorBrands Distributing,
LLC under the name brand CorLiving™. Products
must have been purchased from an authorized
CorLiving™ Distributor or Dealer, recognized by
CorBrands Distributing, LLC.
2) The warranty period is from the verified purchased
date of the product. The warranty is expressly limited
to the replacement of components having
manufacturer defects only and on current available
models.
No assembly labor is included. Possible replacement
of components or parts does not extend this limited
warranty or begin a new warranty period.
3) CorBrands Distributing, LLC products are warranted to
the original purchaser and are not transferable.
The warranty is limited to defects in manufacturing,
materials, and workmanship. This warranty does not
apply to normal wear and tear. If the product has been
subject to abuse, misuse, improper care or use of the
product, the warranty is void.
4) The consumer has purchased this as a
Ready-To-Assemble product, which involves
“Do-It-Yourself”, assembly, including: handling,
transporting, assembling and erecting the product.
CorBrands Distributing, LLC shall not be liable for
incidental or consequential damages, which results
through the use of CorLiving™ products.
5) This warranty includes any statutory legislation in the
jurisdiction where the product is purchased and does
not exclude or limit your legal right.
6) Warranty service is available by contacting CorLiving™.
Warranty period to be verified by date of
manufacturing and original/receipt of sale.
DO NOT RETURN IT TO THE STORE!
CALL US FIRST!
1.800.424.6710
MISSING HARDWARE?
For fast and accurate parts requests for all
replacement missing or defective parts, please visit:
www.CorLiving.com/parts
*Proof of payment is necessary for all warranty
requests. If you have any questions please call
our toll free line 1.800.424.6710


