IDC Pro 255 Operator Manual
Publication Number: 621058649OPR
- 20 -
© 2016, Cornelius Inc.
R
EPLENISHING
THE
CO
2
S
UPPLY
!
DANGER:
CO
2
displaces oxygen. Strict attention
MUST
be observed in the prevention of CO
2
gas leaks in the entire CO
2
and
soft drink system. If a CO
2
gas leak is suspected, particularly in a small area,
IMMEDIATELY
ventilate the
contaminated area before attempting to repair the leak. Personnel exposed to high concentrations of CO
2
gas
experience tremors which are followed rapidly by loss of consciousness and
DEATH
.
When indicator on the 1800 psi gauge is in the shaded (“change CO
2
cylinder”) portion of the dial, CO
2
cylinder is
almost empty and should be changed.
To replenish the CO
2
supply, perform the procedure in Table 10.
S
ERVICE
M
ODE
The Service mode is used to perform all of the maintenance and troubleshooting for the unit. There are three menu
levels available depending on the classification of the operator. shows the service mode screen for operators, Figure
29 shows the service mode screen for supervisors and Figure 29 shows the service mode screen for service techni-
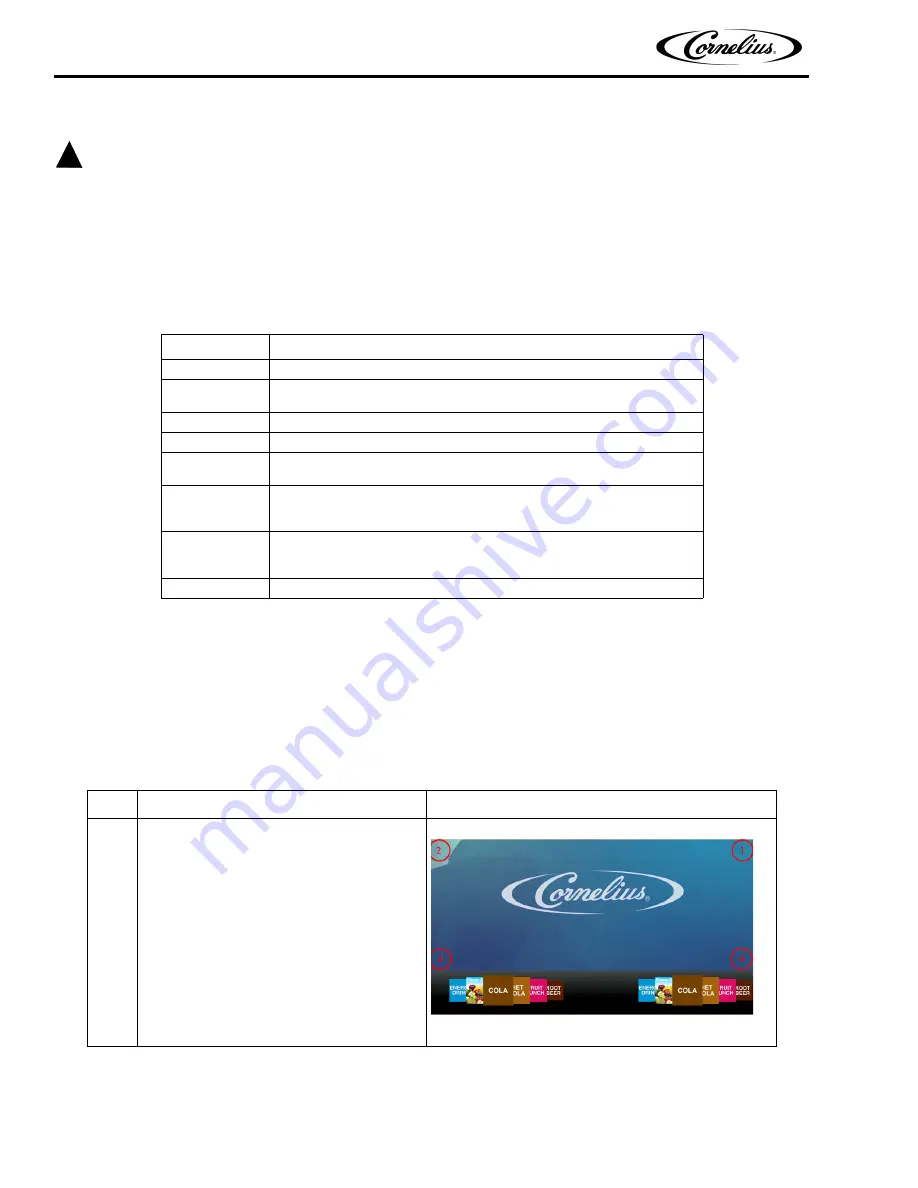
cians. To enter the service mode, perform the procedure in Table 11.
Table 10.
Step
Action
1
Fully close (clockwise) the CO
2
bulk cylinder valve.
2
Slowly loosen the CO
2
regulator assembly coupling nut, allowing CO
2
pressure to escape.
3
Then remove the regulator assembly from the empty CO
2
cylinder.
4
Unfasten the safety chain and remove the empty CO
2
cylinder.
5
Position the full CO
2
cylinder and secure the cylinder with the safety
chain.
6
Make sure the gasket is seated properly inside the CO
2
regulator
assembly coupling nut, then install the regulator assembly on the CO
2
cylinder.
7
Open (counterclockwise) the CO
2
cylinder valve slightly to allow the
lines to slowly fill with gas, then open the valve fully to back-seat the it
(back-seating the valve prevents gas leakage around the valve shaft).
8
Check CO
2
connections for leaks. Tighten any loose connections.
Table 11.
Step
Action
1
Display the keypad screen by tapping each
corner of the video screen starting in the upper
right corner (1) and continuing to tap each
corner in a counterclockwise direction, in a
sequence of 1,2,3 and 4 as shown in Figure
27.
NOTE: As each corner is touched, a
small confirmation rectangle
may momentarily appear to
confirm the touch.
Figure 27.


