STANDARD RECOMMENDED PROCEDURE 009-221 | ISSUE 8 | AUgUST 2015 | PAgE 3 OF 10
Step 1:
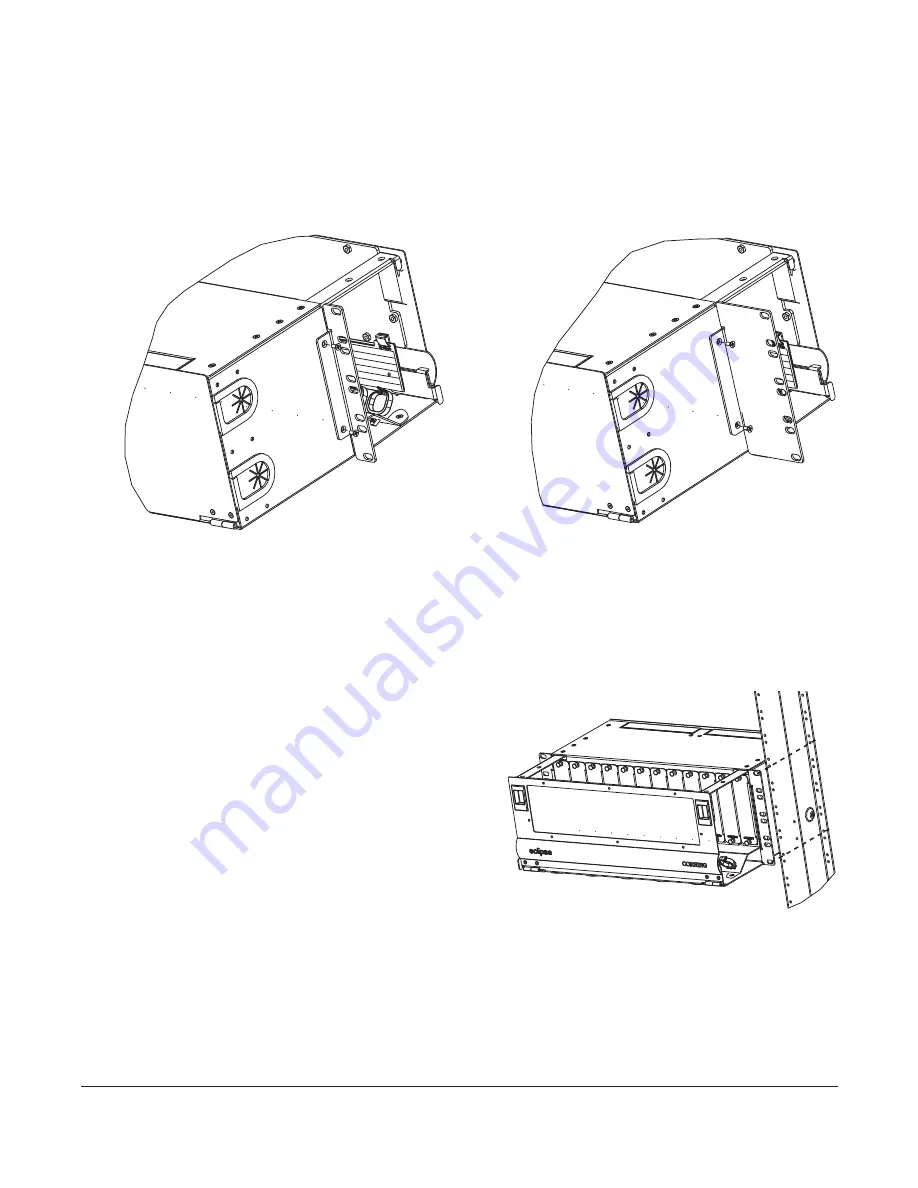
To install the housing from the front of the equipment rack, attach the appropriate
mounting brackets (Figure 3) to the supporting flange on the housing using the 6-32
screws provided.
Step 2:
Remove paint from the mounting bracket with sandpaper at one of the mounting hole
locations to provide metal-to-metal contact for grounding the housing.
Step 3:
Mount the housing to the equipment rack using thread-cutting screws.
NOTE:
The mounting bracket must have metal-to-metal contact providing an electrical path to properly
ground the housing.
19-inch
rack-mount
bracket
23-inch
rack-mount
bracket
Figure 3
5.2 Stubbed Housing
Factory-stubbed units are available with a specific length of preconnectorized cable installed
and strain-relieved in the unit. Install stubbed
housings from the rear of the equipment rack.
Step 1:
Slide the housing into the equipment
rack from the rear before attaching
the mounting brackets.
Step 2:
While supporting the unit, install the
appropriate mounting brackets using
the 6-32 screws provided as shown in
Figure 3.
Step 3:
Fasten the brackets to the equipment
rack using the screws provided. (If
mounting to an Eclipse frame, use the
12-24 screws provided.)
IMPORTANT:
Align the top mounting hole of the housing so that the next hole above is 1/2 inch higher
(Figure 4). Doing otherwise will result in the misalignment of the lower mounting holes.
KPA-2190
KPA-2191
KPA-2192
Figure 4


